
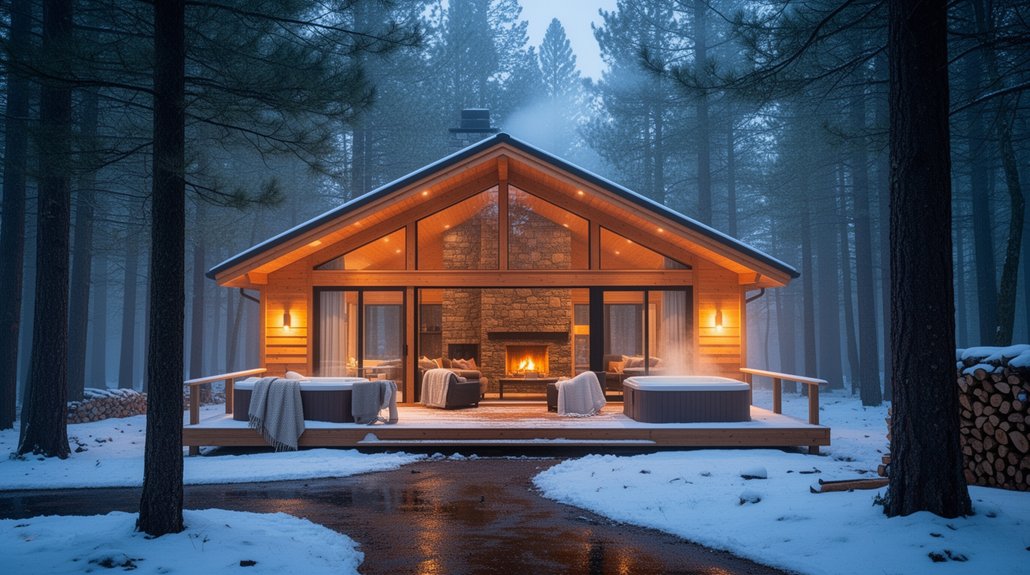
You want the lodge to feel like a backcountry cabin, yet perform like a tight, modern home. Start with a four-season audit: map drafts with a smoke pencil, log interior RH, and scan roof and rim joists with IR on a cold morning. Then you’ll air-seal without killing the timber look, prioritize roof/rim/floor insulation, and right-size heat for shoulder seasons—but one moisture pathway can undo all of it…
Key Takeaways
- Audit the lodge year-round using IR scans, humidity logging, and moisture tracing to pinpoint insulation voids, leaks, and bulk-water entry paths.
- Fix site drainage first: 5% grading away, extended downspouts, capillary breaks, and free-draining foundation materials to prevent dampness and rot.
- Air-seal hidden leak points—rim joists, log-to-frame joints, attic hatches, flues, and window casings—using caulk, gaskets, low-expansion foam, and fire-rated sealants.
- Upgrade insulation strategically: roof to R-49 with proper ventilation, then rim joists and floors/crawlspaces with moisture-safe assemblies that keep decks cold and dry.
- Right-size HVAC with Manual J and blower-door data, then add shading, fans, and HRV/ERV ventilation for summer comfort and winter indoor air quality.
Start With a Four-Season Lodge Audit
Before you buy materials or sketch a new floor plan, run a four-season lodge audit to pinpoint where comfort and energy performance break down in winter cold, spring moisture, summer heat, and fall wind. Map exposures, prevailing winds, and snow drifting, then log indoor RH, surface temps, and runtime data from your heating and cooling equipment. Use an IR camera during temperature swings to spot insulation voids and thermal bridges, and verify with selective borescope checks. In spring, trace bulk-water paths at roofs, decks, and foundation edges; document staining and moisture meter readings. In summer, measure attic delta‑T and solar gain by orientation. Protect Cultural heritage by photographing original assemblies before probing, and plan Wildlife preservation by noting bat, bird, or rodent entry points for humane scheduling.
Air-Seal Drafts Without Losing Rustic Character
After your audit, you’ll track hidden air leaks at rim joists, log‑to‑frame connections, window casings, and around flues using a smoke pencil or infrared scan on a windy day. You’ll seal with rustic-friendly materials—backer rod plus paintable sealant, low-expansion foam where it’s concealed, and compressible gaskets behind trim—to stop drafts without trapping moisture. You’ll then blend the seals with existing woodwork by tucking joints under casing, matching stain-grade covers, and keeping bead lines tight and consistent.
Locate Hidden Air Leaks
Although your lodge’s timber walls and stone hearth feel solid, the worst heat loss usually comes from small, hidden air paths you can’t see until you hunt them down. Start with a calm day and run the bath fan, range hood, or a window fan exhausting to depressurize the house. Walk the perimeter with a smoke pencil or incense and watch for steady pulls at baseboards, window casings, log-to-frame passages and electrical penetrations.
Check attic access hatches, pull-down stairs, and knee-wall doors; they’re frequent bypasses into cold roof cavities. Inspect Hidden vents behind furniture, in chases beside chimneys, and at soffit returns. Use an infrared camera after sunset to spot cold streaks, then confirm with smoke to separate insulation gaps from airflow.
Rustic-Friendly Sealing Materials
Once you’ve pinpointed the draft paths, choose sealing materials that stop airflow without introducing glossy plastics or stark, modern lines that fight your lodge’s wood-and-stone palette. For log-to-log checks and trim gaps, run paintable acrylic-latex caulk with siliconized additives; it bonds well, stays flexible, and won’t telegraph a slick sheen. For wider, irregular voids, use low-expansion, gun-grade foam labeled “window and door,” then trim flush after cure to prevent bowing jambs. At operable sashes and doors, install compressible EPDM or silicone bulb weatherstripping in a dark brown or black profile; it seals under light closure force and survives cold cycles. For electrical boxes, add foam gaskets and seal cable penetrations with fire-rated intumescent caulk. These sealing techniques preserve Rustic charm.
Blend Seals With Woodwork
Because bright sealant beads and bulky weatherstrip can read like new construction against hand-hewn timber, you’ll get the best air-seal by hiding the work in existing shadow lines and joinery. Backer rod deep in checks and log-to-trim seams lets you tool a thin, concave bead that disappears. Tint polyurethane or acrylic sealant to your stain, and mask to a crisp edge, then pull tape while it’s wet. To seal gaps at window casings, rout a shallow kerf on the back side and press in silicone bulb strip so it’s invisible when closed. At door thresholds, recess an adjustable sweep into the slab’s bottom rail. You’ll stop drafts yet preserve aesthetics and maintain serviceability during seasonal wood movement.
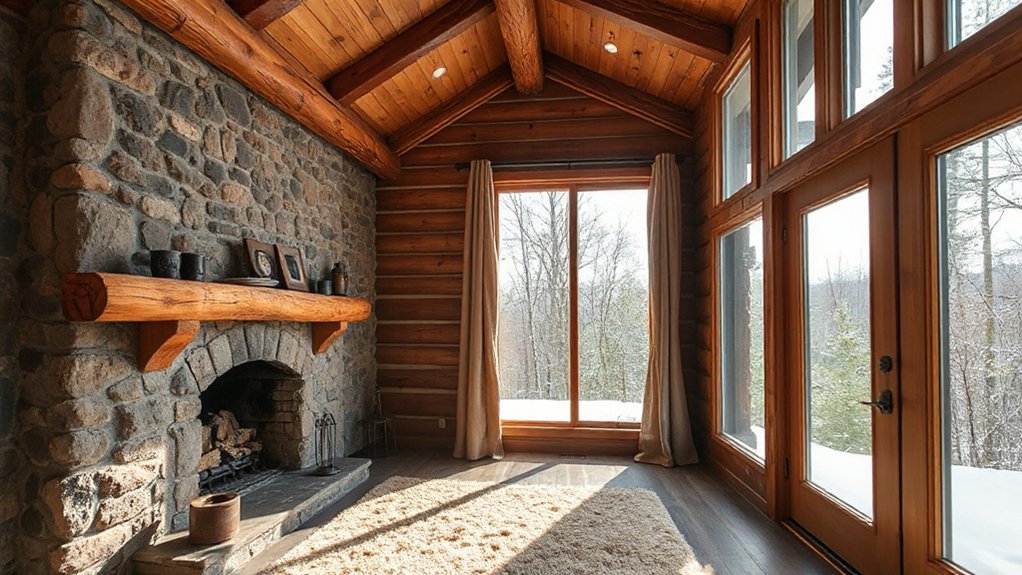
Insulate the High-Loss Areas First (Roof, Rim, Floor)
After you’ve air-sealed the obvious drafts, you’ll get the biggest comfort gains by insulating the highest heat-loss zones first: the roof, the rim joist, and the floor. You should prioritize roof insulation to hit your target R-value without compressing batts, then seal and insulate rim joist gaps with cut-and-cobble foam or closed-cell spray foam to stop wind-washing. Next, you’ll upgrade floor insulation and its air barrier so cold crawlspace air can’t bypass it and strip heat from the lodge.
Prioritize Roof Insulation
Where does most of your lodge’s heat escape first? Usually through the roof plane, so you’ll get the fastest comfort gains by upgrading Roof insulation before chasing smaller losses. Start by verifying air pathways: keep soffit and ridge vents clear, install baffles at the eaves, and maintain a continuous vent channel so attic ventilation stays effective after you add insulation. Target at least R-49 in cold climates; use blown-in cellulose for even coverage or fiberglass for quick installation, but don’t bury recessed lights unless they’re IC-rated. Seal the attic hatch with weatherstripping and add a rigid-foam lid. Finally, confirm moisture control: your roof deck should stay cold and dry, not warmed by indoor air leakage.
Seal Rim Joist Gaps
Roof insulation cuts the biggest heat leak, but your next fast win sits at the rim joist—the band of framing where floor joists meet the foundation wall. Here, cold air sneaks in through Joist gaps, sill seams, and utility penetrations, driving drafts and moisture.
Start by clearing debris and checking for rot. Vacuum the cavity, then Seal rim cracks with polyurethane caulk along the sill plate and subfloor edges. For larger Joist gaps, cut rigid foam to fit between joists, press it tight, and seal the perimeter with one-part spray foam. Around pipes and wires, use fire-rated sealant where required. Don’t block ventilation openings; air-seal only unintended leaks. Finish by confirming continuity with a smoke pencil or infrared scan.
Upgrade Floor Insulation
Why keep heating the crawlspace or basement when your floor assembly can stop that loss at the source? After you’ve sealed the rim, insulate the underside of the subfloor to cut conduction and drafts. In vented crawlspaces, install R-30 mineral wool or dense-pack cellulose between joists, supported with wire stays, then add an airtight, taped membrane to control air movement. In basements, consider 2–3 inches of closed-cell spray foam on the subfloor or rim-to-sill transitions for continuity, but verify fire protection requirements. Maintain clearance from masonry and protect insulation from bulk moisture with a ground vapor barrier. Choose batts or cellulose with Sustainable sourcing certifications. Finish with clean access panels and neat fastening for Aesthetic enhancements.
Right-Size Heating for a Woodland Lodge
Because a woodland lodge sits idle in shoulder seasons and fights deep cold in midwinter, you can’t pick a heating system by square footage alone—you need a load-driven target. Start with a room-by-room Manual J (or equivalent) using your upgraded floor insulation, window specs, air-sealing rate, and design temps. Then size equipment to the 99% heating load, not the “rule-of-thumb” peak, so it can modulate without short-cycling. Keep fireplace ambiance, but treat it as supplemental; your core system must carry the load while preserving rustic decor and safe clearances.
- Commission a blower-door test to validate infiltration inputs
- Choose a cold-climate heat pump with low-minimum output
- Add zoned controls to match intermittent occupancy
- Verify duct/pipe losses and insulate distribution runs
Add Summer Cooling: Ventilation, Fans, and Shading
A right-sized heating system keeps the lodge stable in winter, but summer comfort depends on how well you control heat gain and move air when the building sits closed up for days. Start with Summer shading: add exterior awnings, deep overhangs, or retractable screens on sun-facing walls, and prioritize shading before you add mechanical cooling.
Use Ventilation strategies that purge heat fast: crack low inlets on the shaded side and open high outlets to drive stack effect. Install an HRV/ERV on a timer for closed-up periods, but include a dedicated “boost” mode. Add ceiling fans sized for the room, set to pull air upward, then switch to downward flow when occupied. Place a whole-house fan with backdraft damper for evening cooldown cycles.
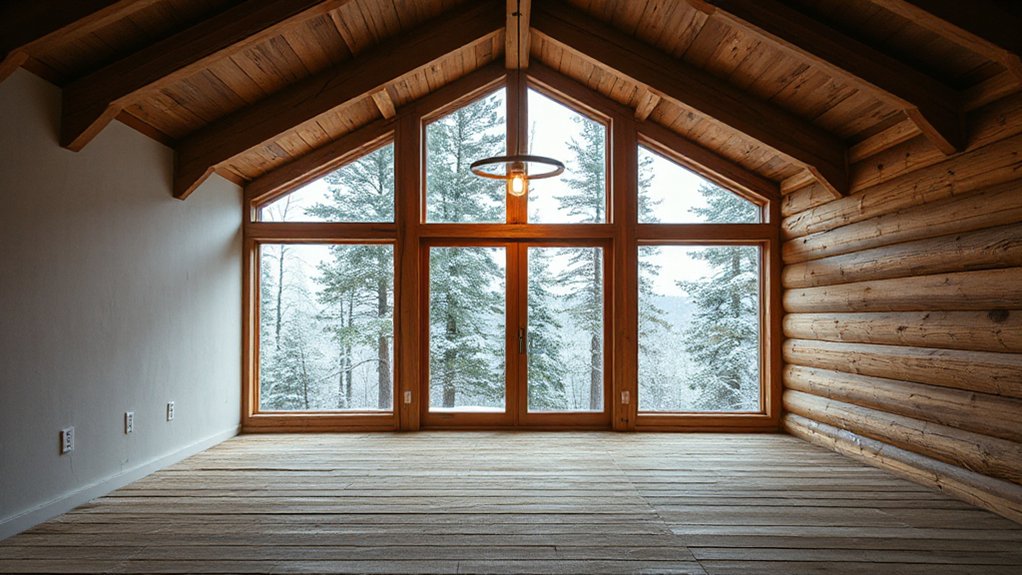
Upgrade Windows and Doors to Stop Heat Loss
Once you’ve tightened insulation and air sealing, windows and doors often become the dominant heat‑loss path, so upgrading them delivers an outsized winter payoff. Start by specifying low‑e, argon‑filled double or triple glazing with warm‑edge spacers; prioritize whole‑unit U‑factor over glass‑only claims. Match frame type to performance targets, then preserve Window aesthetics with divided‑lite patterns or interior grilles instead of leaky true muntins. For doors, choose insulated slabs and adjust the threshold for full gasket compression.
- Verify rough openings are square; shim to avoid frame twist and air gaps.
- Use backer rod and low‑expansion foam, then tape the interior air barrier.
- Install multipoint locks; upgraded Door hardware reduces rattle and leakage.
- Add storm panels where replacement isn’t feasible; seal perimeter with compressible bulb gaskets.
Choose Damp-Site Materials That Won’t Rot or Mold
Locking down windows and doors cuts drafts, but a woodland lodge still lives in a wet loading zone where splashback, snowmelt, and high indoor humidity can keep assemblies damp for days. Start with Damp site drainage: slope grade 5% away, extend downspouts, add a capillary break under slabs, and use free-draining stone at foundations.
Then choose materials that tolerate wetting. Specify borate-treated framing near crawlspaces, and use exterior-rated plywood or fiber-cement sheathing where bulk water risk is highest. Install closed-cell sill gaskets, PVC or composite trim at splash zones, and stainless or hot-dip galvanized fasteners to prevent bleed and staining. Inside, use paperless gypsum or cement board in mudrooms and baths, and finish with mold resistant paints over properly primed substrates.
Control Humidity: Ventilation + Dehumidification
Because a woodland lodge swings from cold-soaked framing to steamy showers and wet gear, you’ve got to manage indoor moisture with both controlled ventilation and dedicated dehumidification, not just “airing it out.” Start by setting mechanical ventilation to a known rate (balanced HRV/ERV is ideal for tight envelopes) and verify it with commissioning so you’re actually hitting your target CFM. Pair it with a ducted or standalone dehumidifier sized for latent load, and drain it reliably. Keep indoor RH around 35–50% to limit mold and condensation while maintaining comfort. Treat humidifiers as precision tools: Humidifier maintenance (cleaning, filters, and water quality) prevents biofilm and over-humidification. Plan Indoor plant integration with RH sensors so plants don’t push you above setpoints.
- Commission HRV/ERV flow balance
- Spot exhaust for baths and laundry
- Dehumidifier with condensate pump
- RH sensors tied to controls
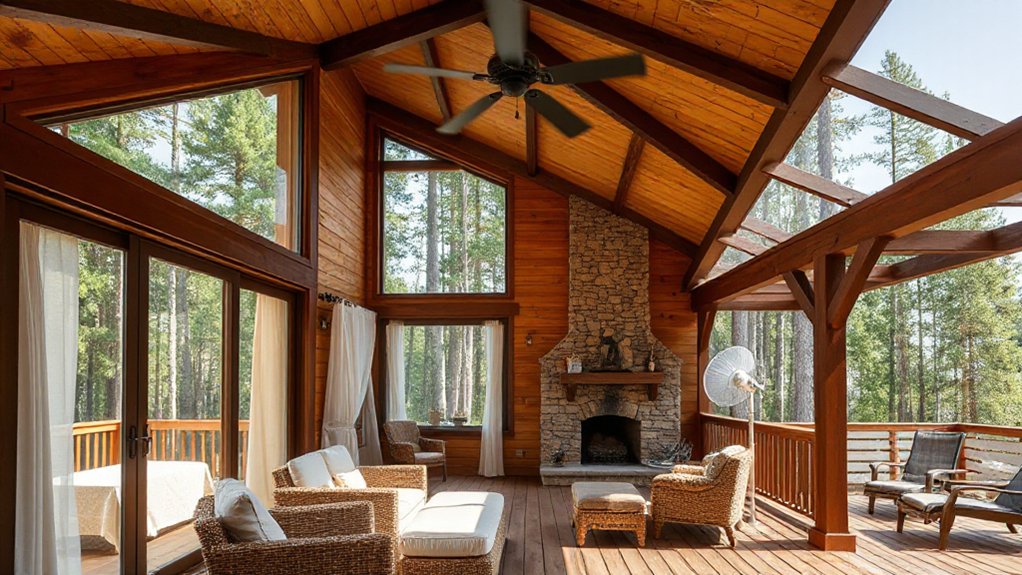
Update Interiors While Protecting Views and Daylight
While you modernize finishes and layouts, treat your glazing and daylight paths as fixed assets: preserve existing view corridors, keep head heights and sill heights consistent where possible, and avoid adding deep soffits, bulky built‑ins, or new partition walls that cut sightlines to the woods. Rework plans by pulling storage to interior cores and using low furniture and open shelving below sill height. Upgrade window performance with slim-profile interior storms, high-VT low-e coatings, and airtight trim returns so you don’t sacrifice daylight. Specify light-reflectance paints (LRV 70+), matte ceilings, and continuous flooring to reduce visual breaks and bounce diffuse light. For Wildlife conservation and Forest ecology, choose interior lighting with warm CCT (2200–2700K) and dimming to limit nighttime glow through glass.
Phase Upgrades by Budget, Season, and Disruption
You’ll phase upgrades by budget: start with air sealing, insulation, and HVAC controls, then move to window/door replacements and finally exterior cladding or deck rebuilds as funds allow. You’ll time work by season—roofing and drainage in dry months, envelope and mechanical work before freezing temps, and interior finishes when the lodge can stay closed up. You’ll minimize disruption by zoning the house, isolating dusty trades with temporary barriers and negative air, and sequencing utility shutoffs so you can keep key rooms operational.
Budget-Based Upgrade Phases
- $0–$500: weatherstrip doors, seal attic hatches, tune HRV/ERV, add smart thermostats.
- $500–$5k: air-seal top plates, dense-pack rim joists, insulate DHW lines, add vapor-smart membranes.
- $5k–$25k: high-performance windows, balanced ventilation, duct redesign, heat-pump water heater.
- $25k+: envelope retrofit, heat-pump HVAC, solar+storage, whole-house controls, panel upgrade.
Seasonal Timing Priorities
Budget tiers tell you *what* to tackle; the calendar tells you *when* you can do it with the least risk, mess, and downtime in a woodland lodge. In spring, prioritize drainage corrections, guttering, and foundation sealing before soils saturate; then schedule Seasonal plantings after heavy equipment exits. Summer gives the best curing window for exterior stains, roofing, and high-R air-sealing around rim joists and penetrations; you’ll also inspect insect activity and treat exposed timbers. In fall, tune HVAC, balance ventilation, and add attic insulation before humidity spikes and temperatures drop; prep heat-trace and freeze protection. Winter is ideal for interior electrical, lighting, and low-VOC finishes when outdoor access is limited. Time landscaping to preserve wildlife corridors.
Minimizing Disruption Planning
Although the scope may span multiple seasons and price points, you can keep a woodland lodge livable by phasing upgrades around three constraints: access windows, occupant downtime, and dust/noise risk. Start with envelope work when roads are firm, then schedule interior finishes after HVAC commissioning. Bundle noisy demolition into one blocked week, and isolate zones with zipper walls, negative-air fans, and sticky mats to protect air quality and Natural lighting by keeping glazing clean.
- Do “outside-first”: roof, flashing, drainage, and exterior air sealing.
- Reserve shoulder seasons for mechanical swaps and electrical rough-ins.
- Plan weekend “micro-shutdowns” for sanding, painting, and floor sealing.
- Protect Wildlife integration: limit night lighting, fence work areas, and avoid nesting windows.
Track spend by phase, not trade, so you can pause safely.
Frequently Asked Questions
How Do I Winterize Lodge Plumbing to Prevent Frozen Pipes?
Shut off water, drain lines, and open faucets; add Pipe insulation on supply runs, heat‑tape exposed sections, seal drafts, set thermostats above 55°F, and install Drainage solutions: low‑point drains, sloped piping, antifreeze in traps.
Do I Need Permits or Inspections for Insulation and HVAC Upgrades?
Yes—you’ll “save time” skipping them, until you don’t. You typically need permits and inspections for insulation and HVAC changes; verify local building codes and permit requirements, load calcs, duct sealing, combustion venting, and final signoff.
What Off-Grid Power Options Work Best for Year-Round Lodge Living?
You’ll get best year‑round results with solar panels plus battery storage sized for winter loads, backed by a propane/diesel generator. Add micro‑hydro or wind if viable, and use an inverter/charger with monitoring.
How Can I Deter Mice and Insects Without Harming Wildlife?
Seal entry gaps with steel wool and caulk, install door sweeps, and store food in airtight bins. Use wildlife friendly deterrents like snap traps in boxes and mint oils. Practice eco conscious pest control: reduce moisture, screens.
What Insurance Considerations Change After Major Energy Retrofits?
Like rewiring a plane midflight, you’ll update Insurance coverage and your insurer’s risk assessment: disclose retrofit scope, new HVAC/solar/batteries, permits, and contractors; adjust replacement cost, fire/liability riders, and secure equipment endorsements.
Conclusion
When you finish these upgrades, your lodge feels like a sealed thermos in winter and a shaded porch in summer. You’ve chased drafts with careful air‑sealing, wrapped the roof, rim, and floor in continuous insulation, and matched heating output to real loads. In July, you’ll move air with balanced ventilation, fans, and exterior shading. Damp‑site materials, drainage, and humidity control keep rot and mold out. You’ll phase work cleanly, room by room.


