
You probably don’t know that lime mortar can protect a barn wall by moving moisture outward, not by sealing it in. You start by surveying for racking, spread footings, and decayed sill ends, then brace weak bays before you touch joinery. You patch with local stone, sawn boards, or traditional infill, and you stop water fast with temporary sheeting. Get the roof covering right—and you’ll uncover the detail that decides whether the repair lasts.
Key Takeaways
- Survey structural risks (sag, racking, rot) and map defects to prioritize reversible shoring and safe load-path stabilization.
- Add temporary diagonal bracing, props, and breathable tarps or membranes to stop racking and prevent further water ingress.
- Rebuild stone footings with local fieldstone and lime mortar, using drained trenches, broad-bed stones, and a gravel leveling pad if needed.
- Repair timbers with like-for-like local wood, matching mortise-and-tenon joinery, drawbore pegs, ring orientation, and traditional detailing.
- Restore roof and wall coverings using regional materials (shingles, slate, thatch, board cladding, brick nogging), keeping assemblies vapor-open and well-drained.
Survey the Derelict Barn for Structural Risks
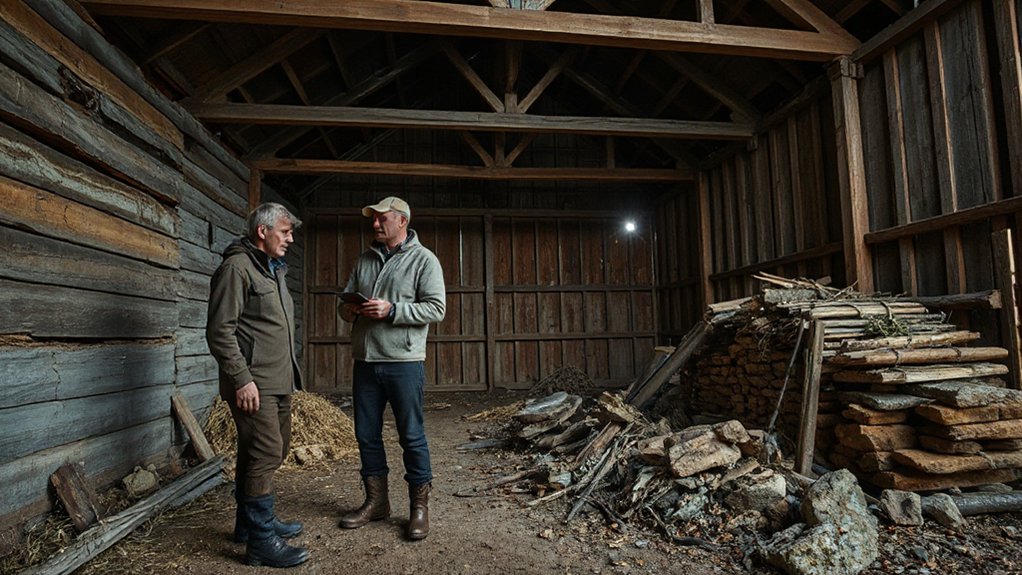
Before you bring in salvaged timber or lime mortar, you should survey the barn methodically for structural risks that could trigger sudden collapse. Start outside: check plumb of walls, roof sag, and racking at corners; note bulging masonry, washed-out footings, and standing water paths. Probe sills, posts, and plates with an awl for rot, insect galleries, and split checks at mortises. From a safe stance, inspect trusses, purlins, and pegged joints for shear cracks, slipped tenons, and failed tie restraints. Document every defect, then shore only where load paths are compromised. Use Innovative preservation by mapping decay and deformation to prioritize reversible supports, while meeting Modern safety with exclusion zones, overhead hazards control, and staged access.
Define Your Reclaimed Barn Goals and Use
Once you’ve identified the barn’s failure points, define exactly what you want the reclaimed structure to do—dry storage, livestock shelter, workshop, event space, or conditioned living area—because that single decision sets the performance target for every repair. Specify load demands, interior clearances, and moisture tolerance so you can choose appropriate framing, floor build-ups, and ventilation rates. If you’re housing animals, prioritize washable surfaces, draft control, and manure management; if you’re storing tools, prioritize security, power routing, and dust control. Set comfort targets (temperature, humidity, acoustics) only as needed, since they drive insulation, air-sealing, and glazing. Align Barn aesthetics with function by selecting rural materials—sawn timber, stone, lime mortar, and corrugated metal—matched for durability and compatible movement.
Check Permits, Listings, and Site Access Early
Before you commit to reclaimed timber, lime mortar, or stone repair, you’ll confirm what planning permissions apply to the barn’s change of use and structural works. You’ll also check whether the building is heritage-listed or within a protected setting, since that can mandate specific materials, detailing, and approvals. Finally, you’ll verify legal site access rights for surveys, deliveries, and ongoing works so you’re not blocked by easements, track limits, or neighbor constraints.
Verify Planning Permissions
Where do you start when the barn looks reclaimable but the paperwork might not be? You start at the planning desk. Confirm the site’s lawful use (agricultural, storage, mixed) and whether “repair” crosses into “development.” Ask the planning authority for the property’s decision history, conditions, and any enforcement notices, then map them to your scope: roof replacement, wall rebuilding, new openings, services, drainage, and access tracks.
Check Local regulations for setbacks, heights, flood constraints, protected species triggers, and construction traffic routes. If the barn’s Historical significance is cited in local plans, expect tighter controls on form, materials, and appearance even without formal designation. Finally, secure written confirmation on site access, rights-of-way, and utility easements so your contractor can mobilize without stoppages.
Check Heritage Listings
How do you know whether you’re allowed to touch the structure at all? Start by checking national, regional, and local registers for any statutory listing, conservation area status, or scheduled monument designation. Don’t rely on hearsay; pull the official entry, map boundary, and statement of Heritage significance, then compare them to what you see on site.
Next, review the listing criteria cited—age, rarity, intactness, group value, or historical associations—because they dictate what fabric you must retain and which interventions trigger consent. If the barn sits within a curtilage listing, ancillary walls, yards, or fixtures may also be protected. Photograph key elements, note construction phases, and submit queries to the heritage officer early so you can scope works without costly redesign later.
Confirm Site Access Rights
Heritage status tells you what you may change; access rights determine whether you can legally set foot on the site to survey, clear, or stabilise it. Confirm ownership boundaries, rights-of-way, and any shared access over farm tracks before you book contractors or bring machinery. Obtain written Access permissions from the owner, lender, or estate agent, and verify tenant rights, grazing licences, or sporting lets that could restrict entry.
Check planning conditions, environmental designations, and temporary traffic or crane permits if you’ll block lanes or cross watercourses. Coordinate Site security: agree lock changes, key control, signage, and incident reporting so you don’t inherit liability for theft, fire, or livestock escape. Record the access agreement scope, dates, working hours, and emergency contacts, then keep it on site.
Brace the Barn Frame and Shore Weak Bays
Before you touch any joints or replace members, you’ll lock the frame against racking by installing temporary diagonal bracing between posts, girts, and plates. You’ll shore weak bays with adjustable props, cribbing, and spreader blocks set on firm bearing so loads transfer cleanly to the ground. You’ll recheck plumb and level after each adjustment and keep bracing in place until permanent repairs restore full stiffness.
Install Temporary Diagonal Bracing
Once you’ve confirmed the frame’s plumb lines and identified the bays that rack under light pressure, install temporary diagonal bracing to lock the barn’s geometry in place while you work. Use straight, sound 2x stock or peeled poles, and run each brace from the lower post to the opposing upper girt, forming a stiff triangle. Fasten with structural screws or ring-shank nails into solid timber, not rot-softened sapwood. Where you must avoid scarring historic members, clamp blocks or use padded dogs so loads bear cleanly without crushing fibers. Keep braces clear of Traditional joinery—don’t drive fasteners through tenons, pegs, or mortise cheeks. Add opposing braces on both faces when possible, and recheck plumb after each installation before proceeding with further work.
Shore And Stabilize Bays
Because temporary diagonals only freeze the frame’s shape, you still need to shore any bay that shows post rot, loose tenons, or crushed bearings so it can’t settle or kick out under its own weight. Start Shore stabilization by unloading the suspect bent: set screw jacks on oak pads, then stack cribbing in tight, alternating courses to the underside of the tie or girts. Plumb each post with a level, then lock it with wedged shores and opposing rakers so thrust can’t shift the base. For Bay reinforcement, add a temporary sill beam or needle under failing bearings, and clamp split posts with batten plates and through-bolts. Recheck jack pressure daily, and keep loads low until you’ve repaired joints and footings.
Stop Water Fast With Temporary Weatherproofing
Even if your long-term plan involves re-roofing and re-pointing, you’ll need to arrest water ingress immediately with temporary weatherproofing that sheds rain away from timbers, masonry joints, and stored materials. Start by tracing flow paths during a hose test, then protect openings with lapped, tensioned tarps, fixed to sound members with battens and screws, not staples. Use sacrificial drip edges and tie-downs to keep sheets off sharp arrises and to prevent flapping. For roof voids, bridge holes with corrugated sheets or breathable membrane under counter-battens, maintaining fall and overlap. Material selection matters: choose UV-stable tarpaulins, non-staining straps, and breathable covers where condensation risks rot. Combine Weatherproofing techniques with simple gutters to divert runoff.
Repair Sills and Posts With Local Timber
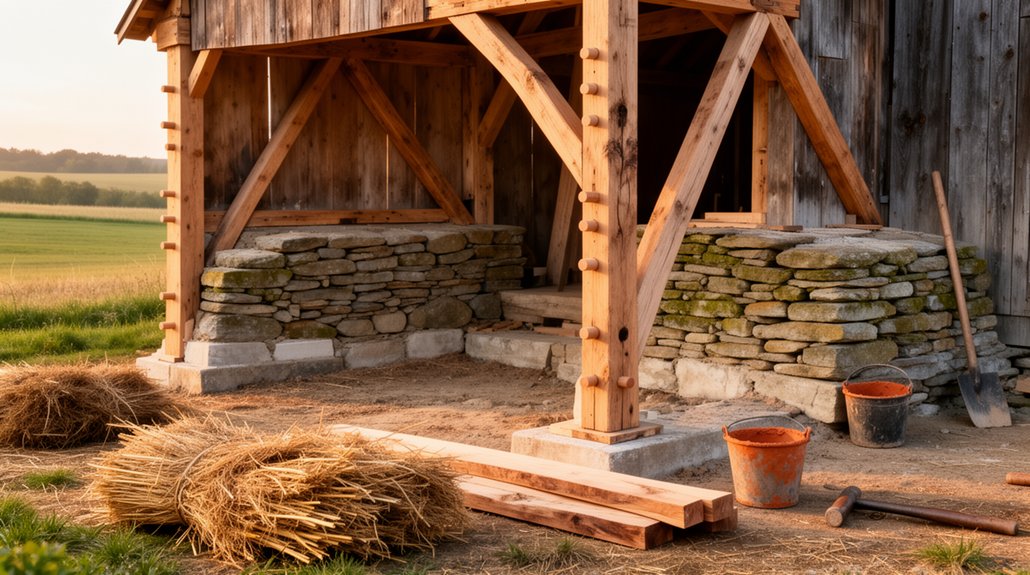
With rain temporarily shed away from the frame, you can tackle the structural rot that usually starts at ground level—failed sills and softened post feet. Shore the bay with adjustable props and spreader plates, then cut back to sound fibre with a saw and slick. Select dense local oak, larch, or chestnut sized slightly proud, and confirm moisture content; good Timber seasoning reduces shrinkage and future checking. Treat end grain with borate, keep faces breathable, and avoid film-forming coatings. Bed new sill sections on compacted stone and lime mortar, maintaining a capillary break and drainage fall. For post feet, splice in new timber using straight, square cuts and stainless pins. Local craftsmanship ensures matching grain direction and correct bearing points.
Match Original Joinery and Timber Detailing
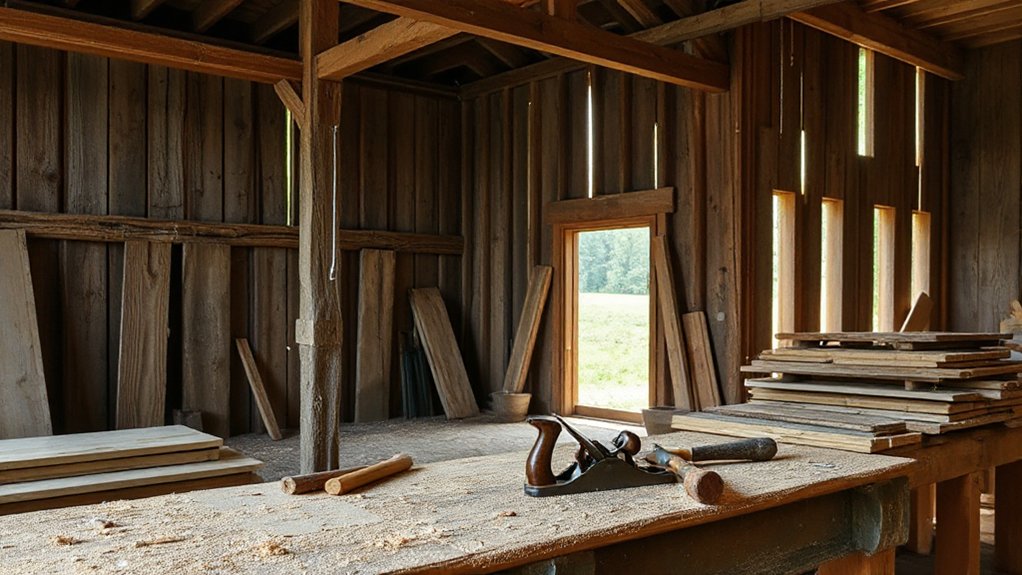
Once the frame stands plumb again, match the barn’s original joinery before you lock repairs in place. Map every mortise, tenon, and housing with story sticks, then transfer lines with a knife, not pencil, to keep shoulders crisp. Confirm peg diameters, offsets, and drawbore direction so replacement members pull tight without splitting.
For timber matching, copy species, ring orientation, and hewing or sawn texture so new work reads as continuous. Recut chamfers, lamb’s tongues, stop-splays, and any carpenters’ marks to maintain joinery detailing. Keep tolerances consistent: tight at bearing faces, eased at non-structural cheeks to prevent binding during seasonal movement. Use like-for-like fasteners—riven pegs where pegs existed—and test-fit dry, then tune with a slick and shoulder plane.
Rebuild Stone Footings With Fieldstone and Lime
Before you set the sill back down, rebuild the barn’s footings in the same language they were laid: fieldstone bedded and pointed in lime, not cement. Excavate to firm bearing, keep the trench drained, and lay a compacted gravel leveling pad where needed. For Fieldstone selection, choose dense, sound stones with broad beds; sort by thickness and reserve long “through” stones to tie width. Set each course on its natural bed, break joints, and keep faces plumb with tight hearting. For Lime mortar mixing, gauge consistent batches, pre-dampen stone, and work mortar into voids without smearing faces. Check elevations often, pack joints fully, and leave a flat, continuous bearing surface for the sill.
Use Breathable Lime Mortar and Lime Plaster
Because old timber frames and fieldstone walls manage moisture by drying to the air, you should stick to breathable lime mortar and lime plaster rather than dense cement or gypsum. Use Breathable lime putty or NHL matched to exposure: softer (NHL 2) for sheltered interior joints, stronger (NHL 3.5) for weathered elevations. Keep aggregates sharp and well graded; aim for a fat, workable mix that compacts without smearing the stone faces. Pre-wet masonry, then pack joints in lifts, leaving a slightly recessed finish to protect edges and promote evaporation. For Lime plaster, apply a coarse base coat with hair or fiber, scratch-key it, then build with thinner coats. Cure slowly: mist, shade, and avoid frost or forced heat.
Restore Barn Walls With Boards, Brick, or Infill
Although many derelict barns look “solid” from a distance, you’ll often find failed wall panels between the main posts and rails, so restore these bays with infill that matches the original system—board cladding, brick nogging, or light wattle-and-daub-type panels—while keeping the assembly vapor-open and mechanically independent of the frame. Start by documenting bay sizes, fixing lines, and historic nail patterns. For boards, use riven or sawn timber, back-primed, and hang with stainless ring-shanks or oak pegs, leaving a drained cavity and capillary breaks at sills. For brick infill, rebuild on a lime bed with soft, salvaged units, and stop short of posts to avoid jacking the frame. For lightweight panels, lash hazel laths and pack with clay-straw. These Traditional techniques favor Sustainable materials and repairability.
Re-Roof With Shingles, Slate, or Regional Thatch
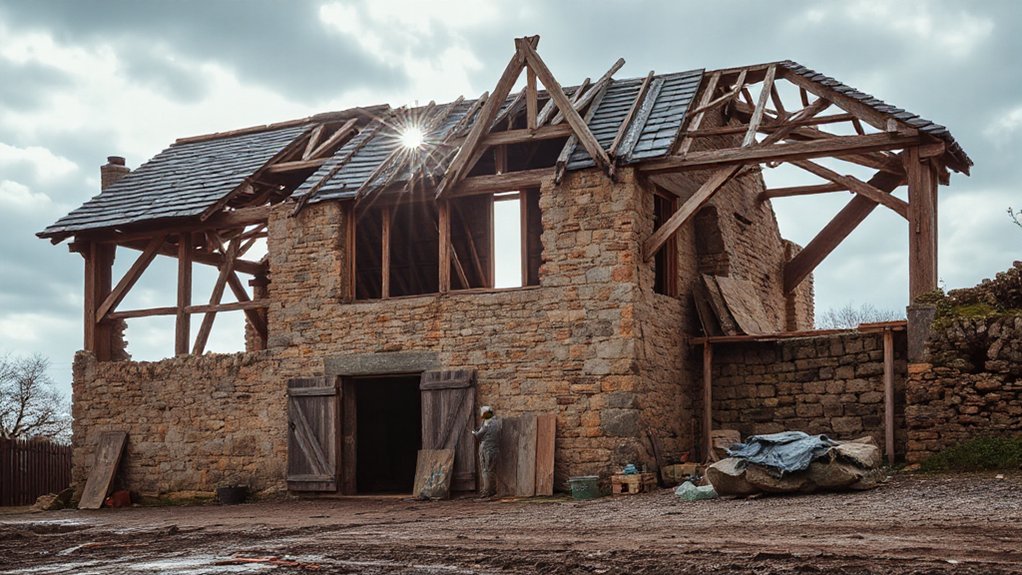
Once you’ve stabilized the wall bays and restored their infill, turn your attention upward, since the roof governs how long every timber and panel beneath it will last. Inspect rafters, purlins, and ridge for rot, spread, and failed pegs; you can splice like-for-like oak and add discreet collars where thrust shows. Re-lay underlay only where historically appropriate, and keep eaves ventilation clear to limit condensation.
Choose coverings by local precedent and pitch. A tight Shingle variety suits steeper slopes; fix to sound battens with stainless nails and leave adequate side-laps for wind-driven rain. Slate demands even battens, correct gauge, and copper nails, with lead soakers at abutments. Regional thatch needs riven spars, a sharp ridge, and planned Thatch maintenance cycles for firebreaks and moss control.
Hang Barn Doors and Fit Windows to Move
After you’ve made the roof watertight, hang the barn doors and fit any windows so they move freely, since binding joinery will rack frames and undo careful wall work. Set out your openings, then true the jambs with oak wedges and lime-pack where needed. Choose door hardware that suits weight and span: strap hinges, pintles, and a forged latch keep Barn aesthetics honest and robust. Plane door edges to a consistent reveal, and ease arrises so swelling doesn’t seize them. For windows, square the casement, align the hinge axis, and check the sweep before glazing.
- Strike plumb lines and measure diagonals.
- Dry-hang leaves, then pack and pin.
- Fit stops, weather boards, and thresholds.
- Lubricate pins, test swing, and recheck gaps.
Control Damp, Add Services, and Plan Upkeep
Before you run cables or paint a finish, get a firm grip on moisture, because damp will rot new oak, soften lime, and corrode fixings faster than any structural flaw. Start Moisture management by fixing gutters, adding discreet French drains, and keeping ground levels below sills. Use limecrete or ventilated slabs, not impermeable membranes, and maintain cross-ventilation through opposing openings. Monitor humidity with a simple data logger and respond early to spikes.
Then tackle service planning: route electrics in surface conduit or removable battens so you don’t chase historic masonry. Keep plumbing minimal, insulate pipe runs, and place shutoffs where you can reach them. Write an upkeep schedule for roof checks, pointing, and drain clearing, and record repairs annually.
Frequently Asked Questions
What Wildlife Protections Apply Before Clearing Out a Long-Abandoned Barn?
Before clearing a long-abandoned barn, you must survey for bats, nesting birds, and other Wildlife habitat, then follow seasonal work windows, obtain required permits, and document findings for legal compliance with protected-species and disturbance regulations.
How Can I Source Reclaimed Materials Ethically and Verify Their Provenance?
You source reclaimed materials ethically by sourcing local, demanding chain-of-custody paperwork, and auditing sellers’ salvage permits. You verify provenance by verifying authenticity via dated photos, original invoices, species/grade stamps, and third-party inspections.
Will Traditional Materials Reduce My Insurance Options or Increase Premiums?
Like threading a needle, you can still get coverage; traditional materials rarely shrink options. You’ll document fire performance, structural ratings, and maintenance. Insurance impact depends on risk controls; material premium rises if insurers flag nonstandard detailing.
How Do I Estimate Restoration Costs When Materials Are Locally Variable?
You’ll handle cost estimation under material variability by getting three local quotes per item, benchmarking unit rates, adding 15–25% contingency, pricing labor separately, and updating totals after site surveys confirm quantities, wastage, and lead times.
Can I Integrate Solar Panels Without Compromising the Barn’s Historic Character?
Yes—you can, like fitting a tailored suit to an heirloom frame. Prioritize low-profile, rear-slope Solar integration, hidden conduit runs, and reversible mounts. Coordinate with Historic preservation guidelines, maintain sightlines, and match panel color to roofing.
Conclusion
You’ll finish a reclaimed barn that’s stable, weather-tight, and true to its rural fabric. You’ve surveyed loads and decay, braced weak bays, and sealed water entry before permanent repairs. You’ll rebuild with lime mortar, local stone, and sound timber, then match the roof with slate, shingles, or thatch to suit the region. Fit doors and windows to move freely, manage damp, and schedule upkeep. Think of it as your medieval “maintenance app.”


