
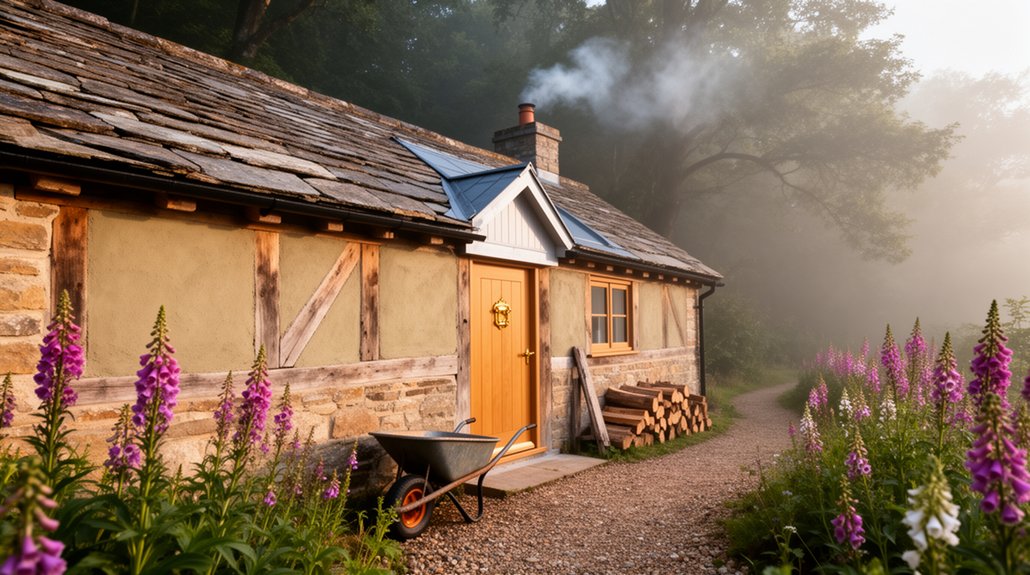
Like Theseus returning through familiar corridors, you start by surveying the lodge as it truly is, not as you hope it’ll be. You check for damp at skirtings, salt bloom on plaster, draughts at sash boxes, and soft timber at thresholds. You note roof lines, rainwater goods, and ground levels that push moisture in. Get this diagnosis wrong and every “improvement” compounds the damage—but one early decision changes everything…
Key Takeaways
- Survey every elevation for damp, heat loss, and movement; photograph defects and use moisture meters and smoke pencils to trace problems.
- Fix major causes first: improve ventilation, drainage, and active rot control to stop recurring damp and protect fabric.
- Rework the layout for daily use: add a boot room, ease circulation, separate bedrooms acoustically, and place WC and utility sensibly.
- Restore original features carefully: use lime mortar, repair sash windows and joinery like-for-like, and preserve patina and proportions.
- Add hidden comfort upgrades: breathable insulation, discreet draught-proofing, safe rewiring, efficient heating, and layered lighting compliant with Building Control.
Start With the Lodge Survey: Damp, Drafts, Structure
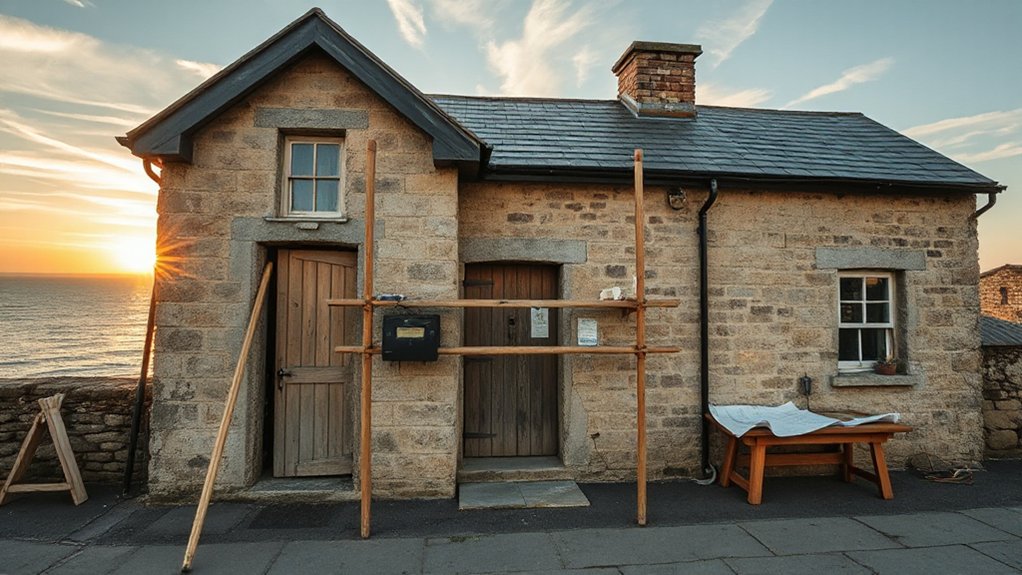
Before you pick up a tool, start with a proper lodge survey that pinpoints damp ingress, heat loss through drafts, and any structural movement. Walk every elevation, note defective pointing, spalled brick, slipped slates, and failed flashings, and map staining with photos and dates. Inside, use a moisture meter on skirtings, chimney breasts, and window reveals, then trace air leakage around sashes, loft hatches, and service penetrations with a smoke pencil. Check floors for bounce, measure cracks with tell-tales, and inspect lintels, joist ends, and roof spread from the loft. Record what must stay to protect Exterior charm and any adjacent wildlife habitat, and compile a prioritised schedule for approvals and costings.
Fix the Big Problems First (Ventilation, Drainage, Rot)
Once you’ve logged what’s wrong, tackle the failures that will keep undoing every decorative fix: poor ventilation, bad drainage, and active rot. Open up blocked air paths, fit discreet vents, and keep underfloor voids breathing so moisture can’t linger. Outside, re-grade ground, clear gullies, and extend downpipes into proper drains to stop splashback soaking stone and render.
- You’ll see trickle vents, air bricks, and a clear sub-floor void preventing condensation.
- You’ll spot French drains, clean soakaways, and falls leading water away from the plinth.
- You’ll expose soft timber, cut back to sound wood, treat, and splice like-for-like.
Control damp at source and you protect Outdoor aesthetics while supporting Wildlife integration by keeping habitats dry, not mouldy.
Rework the Gamekeeper’s Lodge Layout for Daily Life
Although the lodge’s original plan suited a lone keeper and a wood store, you’ll get far more out of it by reworking the layout around how you actually live day to day—where you drop muddy boots, how you move between kitchen and sitting room, and which spaces need heat, light, and privacy. Start with a proper lobby/boot room: hardwearing floor, bench, hooks, and a drain tray, so wet kit never reaches living areas. Widen or straighten pinch points between kitchen, dining, and sitting spaces to stop traffic jams and improve sightlines to the stove. Keep bedrooms behind a door for acoustic separation, and position the WC where guests don’t cross private zones. Add a utility cupboard for cleaning kit. Tie doors to garden landscaping routes and protect a wildlife habitat zone outside.
Restore Original Lodge Features You Can’t Replace
Reworking the layout for modern living goes hand in hand with safeguarding the lodge fabric that can’t be recreated once it’s stripped out. You’ll secure historical authenticity by surveying what’s original, then repairing rather than replacing. Start with gentle cleaning and careful consolidation, and document every element before you lift a tool.
- Rebed loose hearthstones and repoint the inglenook with lime mortar, matching aggregate and joint profile.
- Overhaul sash windows: splice rotten timber, keep crown glass where possible, and refit ironmongery.
- Conserve joinery and floors: lift boards selectively, treat for beetle, then refix with cut nails.
Use proven preservation techniques and insist on like-for-like materials. You’ll protect patina, maintain proportions, and keep the lodge’s character intact for decades.
Add Hidden Comfort: Insulation, Heating, Electrics, Lighting
While you preserve the visible fabric, you’ll make the lodge properly comfortable by threading insulation, heating and upgraded services through voids, floor zones and redundant chimneys so nothing jars with the period rooms. Specify breathable woodfibre or sheep’s wool between rafters and under suspended floors, and draught-proof sash boxes and doors with discreet brush seals to lift energy efficiency without trapping moisture.
Run new electrics in conduit behind skirtings, keeping chases out of historic masonry, and upgrade the consumer unit with RCD protection. Choose low-profile cast-iron-style radiators or wet underfloor heating in secondary rooms, fed by an air source heat pump where planning allows. Layer lighting: warm-white LED lamps, dimmers, and concealed uplighting in cupboards for Interior coziness. Test, certify, and record all works for Building Control compliance.
Frequently Asked Questions
What Planning Permissions Are Needed to Renovate a Historic Gamekeeper’s Lodge?
You’ll need planning permission for extensions or change of use, plus listed building consent if it’s listed, and conservation area consent if applicable. Historic preservation constraints apply; you’ll also comply with Building regulations and consult your LPA.
How Much Does a Full Lodge Renovation Typically Cost per Square Metre?
You might worry costs are unpredictable, but you’ll typically pay £2,500–£4,500 per m² for a full lodge renovation in the UK, reflecting Architectural preservation requirements and Sustainable materials, plus surveys, VAT, and contingencies.
Can I Get Grants or Tax Relief for Restoring Rural Heritage Buildings?
Yes—you can access grants and tax relief, but eligibility’s strict. You’ll need listed status or conservation justification for heritage preservation. Check Historic England, National Lottery Heritage Fund, and local authority rural funding; VAT relief may apply.
How Long Does a Typical Gamekeeper’s Lodge Renovation Take From Start to Finish?
You’ll typically take 6–18 months from surveys to sign-off, depending on scope. Historic preservation consents can add 8–16 weeks. Tight Budget planning, contractor availability, hidden defects, and utility upgrades often extend programmes.
What Insurance Coverage Do I Need During Renovation and Once the Lodge Is Occupied?
You’ll need renovation and public liability cover, plus contractor’s all‑risks; theory says Interior design and Landscaping plans raise risk—so specify them. Once occupied, switch to buildings, contents, and homeowners’ liability; add accidental damage.
Conclusion
You’ll find the lodge rewards method: survey first, then tackle damp, drafts and structure before anything decorative. When you sort ventilation and drainage, rot stops; when rot stops, your joinery and plaster last—again and again, the same cause and effect. Rework the layout to suit daily life, but keep what can’t be replaced: sash windows, fireplaces, original floors. Then hide modern comfort—breathable insulation, efficient heating, upgraded electrics and lighting—so heritage and performance coincide.


