
You start by surveying the coachman’s lodging like a forensic exercise: record profiles, hearth details, door furniture, and mortar joints before you touch anything. You’ll probe for damp paths, timber decay, and settlement, then set priorities around what you can save versus what must be stabilised. Plan services and insulation so they’re reversible and don’t trap moisture, and keep repairs lime-based and breathable. The first decision you make will dictate every finish that follows…
Key Takeaways
- Survey and document the entire lodging, mapping cracks, moisture routes, roof geometry, services capacity, and historic fabric before designing interventions.
- Confirm planning constraints, listed/curtilage status, and any change-of-use requirements early, using a pre-application and heritage statement to de-risk approvals.
- Budget for hidden defects with targeted investigations and a separate 10–20% contingency, converting allowances to fixed sums as conditions are confirmed.
- Repair masonry and structure with compatible lime-based, vapor-open materials, using like-for-like techniques and slow curing to avoid trapping moisture.
- Diagnose damp by cause—rising, penetrating, condensation, or leaks—then prioritize roof, gutters, downpipes, and ground drainage to keep walls dry.
Survey the Coachman’s Lodging and Set Priorities
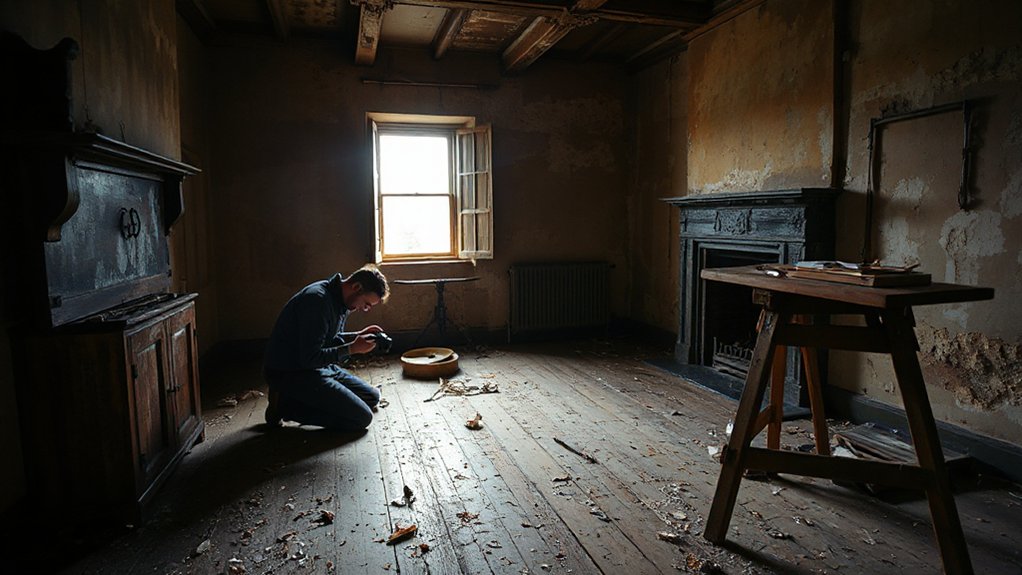
Before you touch a single finish or order materials, walk the coachman’s lodging end-to-end and document what’s actually there: structure, envelope, services, and historic fabric. Map cracks, deflection, and moisture paths; photograph junctions, floor build-ups, and roof geometry. Identify wall types, lime versus cement repairs, timber species, and any surviving joinery, ironmongery, or paint stratigraphy to establish Historical context. Test ventilation routes, flue integrity, drainage falls, and electrical capacity, then log hazards and access constraints. Translate findings into priorities: stabilize first, weatherproof next, then upgrade services with minimal intervention and reversible detailing. Align every decision with a room-by-room significance rating and a performance target. Use community engagement to confirm valued features, past uses, and acceptable change thresholds early.
Budget for Hidden Repairs and Contingencies
You can’t price a former coachman’s lodging accurately until you allow for unseen structural remediation—rot at embedded joist ends, compromised lintels, and moisture-softened masonry behind later finishes. Build a contingency fund sized to your risk profile (often 10–20%) and separate it from defined allowances for items you’ll select later, like bespoke joinery, reclaimed boards, and lime plaster finishes. When you document these as line items with trigger conditions, you keep the design intent intact while staying in control when the building reveals surprises.
Unseen Structural Remediation
Although the coachman’s lodging may look sound once plaster and paint go back on, the real budget risk sits in the structure you can’t see: softened joist ends where timber meets damp masonry, undersized lintels above altered openings, racked party walls, and failed chimney breasts that were “made safe” decades ago with hopeful props. You manage it by opening up selectively, mapping load paths, and specifying repairs that respect historical context and community significance while meeting today’s tolerances. Prioritise investigation and remediation in this order:
- Probe joist bearings, splice or sister with graded timber, and add DPC isolation.
- Replace/strengthen lintels with concealed steel, padstones, and stitch ties.
- Stabilise walls using helical bars, discreet ties, and lime grout injection.
- Rebuild chimney cores, add gallows brackets only where permitted, and certify.
Contingency Funds And Allowances
Once you’ve opened up enough to understand the load paths and moisture behaviour, set your budget up to absorb what the drawings can’t yet prove by separating fixed-price work from explicit allowances and a controlled contingency. Lock in scope where you can: scaffolding, roof coverings, leadwork details, and lime render specifications should price cleanly. Use allowances for investigatory joinery repairs, brick replacement quantities, timber splicing, and service reroutes where exposure will change counts. Define each allowance with unit rates, measurement rules, and approval triggers so allowance management stays design-led, not reactive. Hold contingency planning at project level, ring-fenced, and released only against documented site findings and engineer sign-off. Track spend weekly, update risk registers, and convert allowances to fixed sums as soon as opening-up resolves uncertainty.
Planning, Listed Status, and Change-of-Use Checks
Before any sketch becomes a proposal, confirm what the local authority will actually let you build by running three checks in parallel: planning constraints, listed status (and any curtilage implications), and whether the intended function triggers change-of-use. Map your design intent to policy early so you don’t waste time iterating options that can’t be consented, and so you protect Heritage significance while maintaining legal compliance.
- Pull the Local Plan, conservation area appraisal, and any Article 4 Direction; note limits on fenestration, dormers, materials, and parking.
- Verify listing grade, extent, and curtilage: boundary walls, outbuildings, and yard surfaces may be controlled.
- Test use class: holiday let, ancillary accommodation, or office may trigger change-of-use and conditions.
- Pre-application: submit a scope sketch, heritage statement outline, and decision-critical questions.
Record and Protect Original Features First
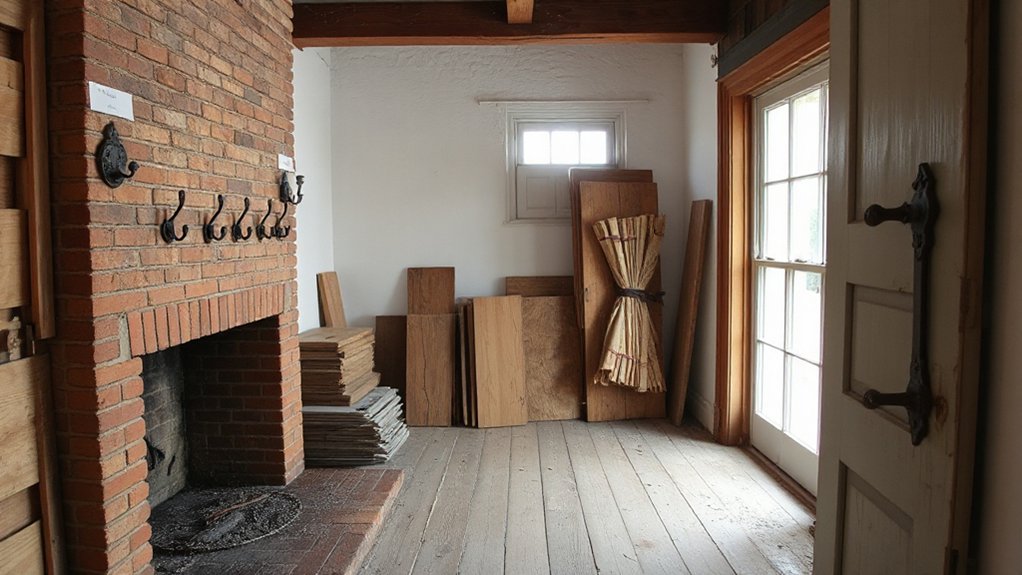
Because you’ll only get one clean chance to understand what’s original, start by recording and physically protecting the coachman’s lodging’s surviving fabric—joinery profiles, door and window openings, skirtings, architraves, stair parts, hearths, plaster runs, floorboards, roof timbers, ironmongery, and any yard setts—so your design decisions respond to evidence rather than assumptions. Photograph every elevation and room in consistent light, then add measured sketches, levels, and a keyed schedule. Take profile gauges of mouldings, note saw marks and nail types, and map deflection or settlement. Tag components, bag loose fittings, and store them dry. Use Correx and breathable wraps to shield edges, treads, and plaster arrises during works. These preservation techniques safeguard historical significance while you test layouts, services routes, and thermal upgrades without erasing clues.
Patch Stone and Brick the Lime-Mortar Way
Start by mapping cracks, spalls, salt blooms, and open joints so you can distinguish cosmetic wear from structural movement in the historic stone and brick. Mix a traditional lime mortar to suit the substrate—match binder type, aggregate grading, and moisture content, and keep it softer and more vapor-open than the surrounding masonry. When you patch brick, you’ll rake back failed joints, pre-wet, pack in tight lifts, and tool the finish to match the original joint profile and edge arrises.
Assessing Historic Masonry Damage
Even if the wall looks sound at a glance, historic masonry often hides failure in the mortar bed or the face of the units, so you’ll get better results by diagnosing the substrate before you touch a trowel. For Historic preservation, you’ll map defects, then confirm causes before any masonry cleaning or patching shifts the evidence.
- Probe joints with a thin pick; note powdering, hollow sounds, and depth of loss.
- Read the face: spalls, sugaring, and salt bloom indicate moisture paths and incompatible past repairs.
- Check movement: stepped cracks, rotated quoins, and bowed reveals point to settlement or failed lintels.
- Test moisture: use a meter and tape squares; trace wetting from gutters, rising damp, or trapped vapor.
You’ll photograph, tag locations, and prioritize structural risks first.
Mixing Traditional Lime Mortar
Before you repoint a single joint, you’ll mix a lime mortar that matches the wall’s original movement, permeability, and color so the repair sacrificially takes stress instead of the brick or stone. In Traditional construction, that means choosing the right lime: non-hydraulic for soft, sheltered work; feebly hydraulic (NHL2) where exposure demands earlier set. You’ll select sharp, well-graded sand to control shrinkage and tone, then dry-blend binder and aggregate for even distribution. Add clean water slowly, aiming for a cohesive, plastic mix that holds on a trowel without slumping. Let it fatten (rest) 10–20 minutes, then re-mix to improve workability. Keep batch sizes small, protect from sun and wind, and record ratios for consistency.
Patchwork Techniques For Brick
Once you’ve dialed in a lime mortar that matches the wall’s strength and vapor flow, use it to stitch patch repairs so the masonry reads as one surface and the patch remains the sacrificial element. Treat each loss like Decorative quilting: small, deliberate units that visually settle into the field without faking age. Prep matters—sound edges, clean pores, dampened substrate—so the lime keys mechanically and carbonates evenly, avoiding hard rims and future spalls. Work like Textile restoration: conserve, infill, and reweave structure, not perfection.
- Undercut friable joints, then brush and mist to SSD condition.
- Butter bricks and pack voids in lifts; compress with a jointer.
- Tool joints to match profile, then stipple faces for grain continuity.
- Cure slow: shade, mist, and protect from wind and salts for 7–14 days.
Fix Damp for Good (Diagnose the Cause)
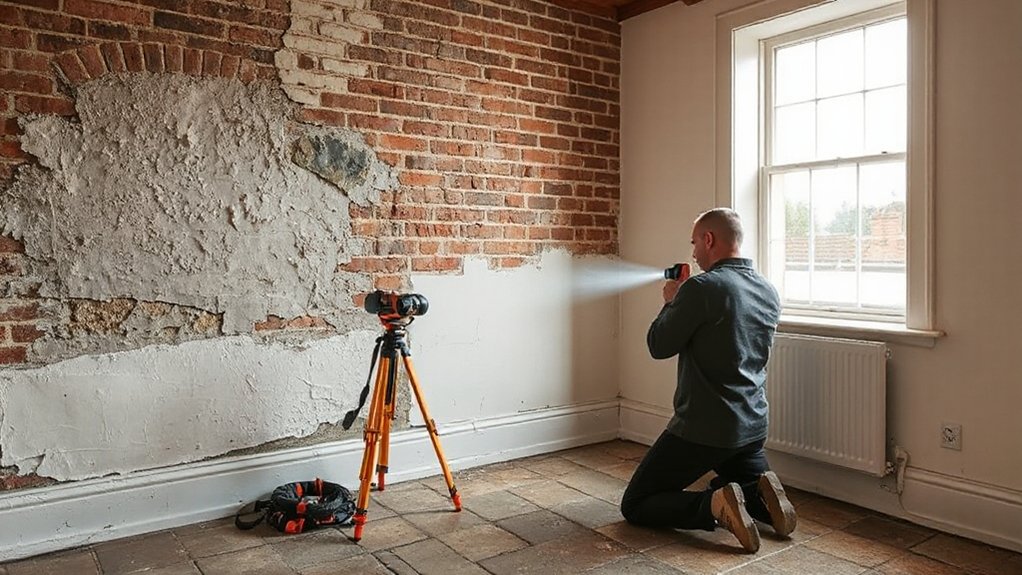
Although damp can look like a simple cosmetic nuisance, you’ll only fix it for good by diagnosing the exact moisture pathway—rising, penetrating, condensation, or plumbing leaks—because each demands a different intervention. Start with mapping: photograph tide marks, blistered paint, salts, and mould, then log weather, heating, and occupancy patterns to narrow Damp causes and routes of moisture intrusion. Use a moisture meter for relative readings, but confirm with carbide testing before specifying repairs. Rising damp usually shows hygroscopic salts and a clear “tide line”; check floor levels, suspended void ventilation, and capillary bridges at plaster. Condensation clusters on cold corners; measure RH and surface temperature, then improve airflow and insulation continuity. Plumbing leaks read as localized hotspots; pressure-test lines and inspect waste runs.
Sort the Roof, Gutters, and Site Drainage
Because rainwater causes more historic fabric decay than most internal defects, you should treat the roof, gutters, and ground drainage as one continuous system and make it watertight from ridge to outfall. Start with a methodical Roof inspection: check slipped slates/tiles, ridge bedding, lead flashings, valley linings, and nail sickness, then repair like-for-like to keep the roof plane true. Keep falls consistent and interfaces crisp.
- Clear, realign, and test outlets; gutter maintenance means no standing water after a hose test.
- Re-bed or replace brackets, fit leaf guards only where access is limited, and seal joints appropriately.
- Verify downpipe sizes, fixings, and shoes; discharge into gullies, not against walls.
- Regrade paving, add French drains where feasible, and rod/jet runs to confirm free flow.
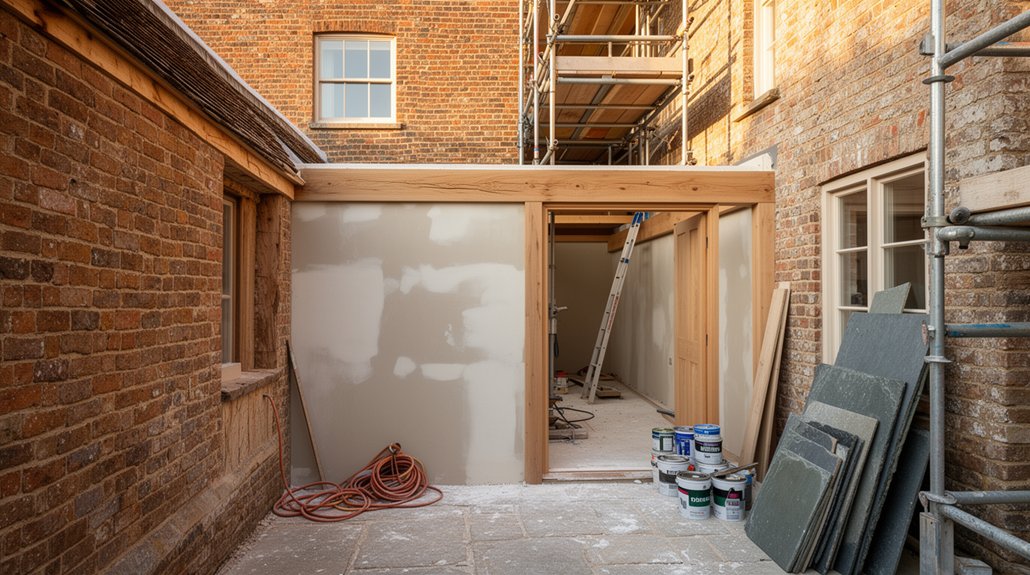
Insulate Without Trapping Moisture (Add Ventilation)
With the roof, gutters, and drainage shedding water reliably, you can turn to insulation—but you must keep the building’s moisture pathways working as designed. Prioritise vapor-open, capillary-active builds so the lodging can dry both ways. Use wood-fibre or mineral-wool between joists, and add a smart vapour retarder on the warm side, taped to masonry returns and around timbers.
Don’t block existing air routes: keep a ventilated void above ceiling insulation, maintain eaves gaps, and fit discreet ridge or tile vents where appropriate. For suspended floors, insulate between joists while preserving crossflow through airbricks; clear blocked vents and add new ones only where layouts demand. Combine ventilation strategies with targeted moisture control: airtightness to limit warm air leakage, plus controlled extract in wet rooms.
Update Electrics and Plumbing to Today’s Code
Once you’ve confirmed the fabric can stay dry, bring the services up to code in a way that respects the building’s irregular masonry and timber. Treat electrics and water as reversible layers: surface routes, accessible junctions, and minimal chasing preserve historic faces while meeting inspection.
- Specify an RCD/RCBO consumer unit, tested bonding, and metal-clad accessories where knocks are likely for Electrical safety.
- Use fire-rated cabling and grommeted penetrations; sleeve through timber to prevent abrasion and heat buildup.
- For plumbing upgrades, replace mixed metals with barrier pipe or copper, add isolation valves, and pressure-test before boxing.
- Fit leak detection, tundish-visible discharge for safety valves, and acoustic wraps to stop pipe rattle.
Document as-built runs, labels, and test certificates for future maintenance.
Plan the Layout Around Structure and Services
Although you might want to start by sketching the “ideal” rooms, you’ll get a better plan by letting the existing load paths and service routes set the rules: map bearing walls, chimney breasts, floor-joist directions, and any truss or purlin lines first, then overlay your electrical risers, soil stack positions, and wet-room zones so you can keep penetrations few and predictable. You then size circulation to suit structural bays, not vice versa, and you’ll align kitchens and bathrooms back-to-back to shorten pipe runs and venting. Keep new partitions lightweight and reversible where possible to respect the Historical context. Validate spans, notches, and drilling limits before fixing layouts. With community involvement, share drawings early to flag access needs, acoustic expectations, and any retained features.
Choose Heritage-Style Windows and Doors That Perform
You’ll get the restoration right when you specify heritage-style windows and doors with authentic profiles—slim glazing bars, correct meeting rails, and period-accurate mouldings—so the elevations keep their original rhythm. Pair that with modern performance upgrades like double or slimline glazing, robust weather seals, and thermally improved frames to lift airtightness and cut heat loss. Done well, you’ll boost energy efficiency without sacrificing the period charm that makes a former coachman’s lodging feel authentic.
Authentic Profiles, Modern Performance
When you’re restoring a former coachman’s lodging, window and door profiles can’t be an afterthought, because the proportions of the glazing bars, meeting rails, and stiles set the entire elevation’s rhythm. You’ll get authenticity by measuring existing sightlines, horn lengths, and sash thickness, then matching them to the new joinery’s section sizes.
- Specify true putty-line detailing, not bulky applied beads.
- Keep rail junctions crisp: square shoulders, tight mitres, no over-rounding.
- Choose ironmongery with correct throw and backset so reveals stay slim.
- Coordinate head heights and threshold steps with Historic landscaping paths.
You must also document profiles for Preservation regulations, including sample corners and finish schedules. If you can’t replicate decay-damaged originals, prototype one bay to confirm scale, shadow gaps, and paint build.
Energy Efficiency, Period Charm
How do you raise thermal performance without flattening the fine muntin lines and delicate reveals that make a former coachman’s lodging read “right”? You specify heritage-style timber or slimline steel sections that keep sightlines tight, then pair them with slim double glazing, warm-edge spacers, and low‑e coatings to cut U-values without chunky beads. You’ll detail concealed brush seals, compression gaskets, and multi-point locks so air leakage drops while the sash still closes with period weight and sound.
Choose doors with insulated cores and traditional bolection moulds, and set frames on airtight tapes with capillary breaks at the sill. If you’re planning solar integration, route wiring in the jamb voids now. Match glazing gains to shading, then size renewable heating to the reduced heat load.
Restore Floors, Fireplaces, and Old Joinery
Although the walls set the tone, the building’s authenticity returns through its hard surfaces—floors underfoot, fireboxes at eye level, and the original joinery that frames every opening. Start by mapping deflection, moisture staining, and prior repairs so you don’t sand away history or introduce new movement. Your aim is a crisp, legible palimpsest that supports interior decor and keeps sightlines aligned to the Historic garden.
- Lift loose boards, re-fix with cut nails, and add discreet noggins where bounce reads.
- Clean hearths, re-bed slipped tiles, and rebuild firebrick throats so the draw stays stable.
- Rake joints, replace spalled brick, and reset mantels plumb to adjacent architraves.
- Strip hardware, ease sashes and doors, and splice matching timber into worn stops and rails.
Use Breathable, Period-Suitable Paints and Finishes
Because the lodge’s masonry and timber still regulate moisture the way they always have, you’ll get the best long-term result by specifying finishes that stay vapour-open and flexible rather than sealing the fabric. Choose Breathable finishes like limewash, distemper, claypaint, or silicate mineral paint on plaster and brick, and avoid modern vinyl emulsions that trap salts and drive blistering. Where earlier joinery survives, use linseed-oil paint or a thin shellac sealer followed by oil-based topcoats; they move with seasonal swell without cracking hard edges. Match sheen to use: flat in service rooms, eggshell on circulation. Specify period appropriate paints in muted, historically grounded pigments, and test panels under daylight. Keep prep minimal: clean, key, and consolidate friable substrates instead of over-filling.
Frequently Asked Questions
What Insurance Covers Restoration Works on a Listed Coachman’s Lodging?
You’ll need specialist listed-building insurance with restoration coverage for heritage fabric, plus contractor’s all-risks during works. You’ll manage insurance claims for storm, fire, escape-of-water, and theft, excluding defects and unauthorized alterations.
Do I Need Archaeologist Oversight During Excavation or Groundwork?
You’ll likely need archaeological oversight if conditions require Historical accuracy or if planning/listed consents trigger Excavation permits. You can skip it only with written approval, a low-risk WSI, and monitored groundworks.
How Do I Source Matching Reclaimed Materials Legally and Sustainably?
It’s unbelievably easy if you document profiles, species, and dimensions, then use Reclaimed sourcing through certified salvage yards, heritage brokers, and audited marketplaces. You’ll verify provenance, request chain-of-custody, check local permits, and prioritize Sustainable materials.
Can I Claim VAT Relief or Grants for Heritage Restoration Projects?
You can sometimes claim VAT relief on eligible listed-building alterations, and you can apply for heritage grants through bodies like the NLHF or local councils. You’ll need consents, itemised invoices, compliant scopes, and timeline-aligned budgets.
How Long Should I Expect the Full Restoration to Take End-To-End?
You should expect 12–24 months end-to-end, depending on Historical accuracy targets, surveys, consents, and Material sourcing lead-times. You’ll accelerate by locking specifications early, sequencing structural works, and pre-ordering bespoke joinery, lime, stone.
Conclusion
You finish the coachman’s lodging like you’d tune a carriage lamp: brightening function without scorching patina. Your surveys, contingencies, and consent checks become the harness; they keep every upgrade from bolting. You’ve logged mouldings, stitched brick and stone with lime, and routed services through the structure’s safest seams. Heritage windows, repaired joinery, and breathable paints let the walls exhale. In the end, the building stands—original, legible, and quietly modern.


