
Like Theseus in the labyrinth, you won’t get far in a historic water mill without a clear thread of decisions. You start by confirming conversion viability: listing status, water rights, access, and flood levels. Then you commission a measured survey, map load paths, and stabilise floors, walls, and bearings before any strip-out. You plan discreet service routes, pair ventilation with breathable insulation, and protect character while adding light. Next you’ll face the constraint that changes everything…
Key Takeaways
- Confirm planning feasibility early, aligning room layouts to existing volumes and documenting community feedback to support approvals.
- Verify listing constraints, curtilage, protected machinery, water rights, and flood-risk requirements, since these can override design choices.
- Commission measured surveys and structural load-path assessments, then install temporary shoring, no-cut zones, and safe access sequencing before strip-out.
- Repair masonry and manage moisture with breathable lime materials, drainage relief, ventilation, and service routes that stay dry, inspectable, and minimally invasive.
- Phase repairs from structure and moisture validation to envelope and finishes, using reversible interventions and contingency budgets for regulatory and site surprises.
Confirm the Mill Can Be Converted
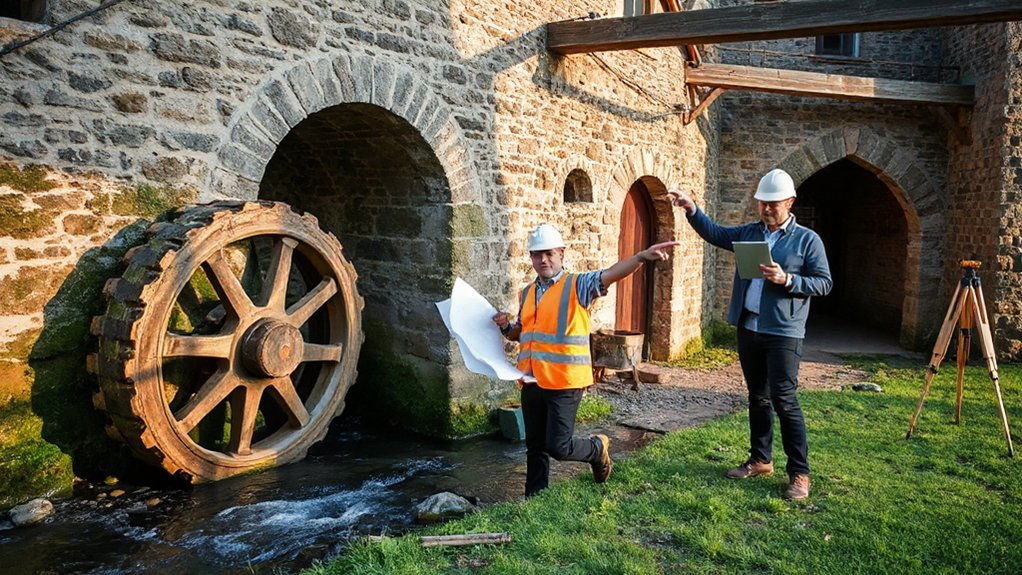
A historic water mill can’t be treated like a standard barn conversion, so you need to confirm—early and in writing—that the structure, rights, and regulations actually allow a change of use. Start by commissioning measured surveys and a conservation-focused condition report, then map proposed rooms to existing volumes to minimize intrusive cutting. Ask the planning authority for pre-application guidance and define the decision route, required drawings, and consultation timetable. Establish your design intent around the mill’s Historical significance: retain the wheel pit, stonework, and voids as legible features, not obstacles. Build community engagement into the process with a brief public presentation and feedback log; it strengthens your justification and keeps objections manageable. Don’t proceed until you’ve got a written pathway to consent.
Check Listings, Water Rights, and Flood Risk
Before you sketch a new staircase or specify glazing, you need to lock down three constraints that can override every design choice: heritage listing, legal water rights, and flood risk. First, confirm whether the mill is nationally or locally listed and obtain the listing description, curtilage boundary, and any protected machinery; those details dictate what you can alter, repair methods, and visible services routes. Next, verify Water licensing and riparian entitlements: abstraction limits, discharge consents, and responsibilities for weirs, sluices, and bypass channels. Don’t assume historic use equals lawful use; secure the right legal permits early. Finally, map flood zones, historic flood levels, and freeboard requirements; these will steer floor levels, escape routes, waterproof materials, and where you can place plant rooms and electrics.
Survey the Mill Before Designing Layouts
With listing constraints, water law, and flood exposure pinned down, you can now measure what you’re actually working with. Start with a full dimensional survey: wall thicknesses, openings, floor-to-ceiling heights, headroom under beams, and the exact position of the wheel pit, tailrace, and sluice routes. Laser-scan if you can; it captures wonky geometry you’ll otherwise “square up” on paper and regret.
Map moisture and services next. Record damp lines, salt bloom, timber decay, ventilation paths, and existing drainage falls. Locate incoming water, power, and foul runs, plus any historic machinery stubs worth retaining. Photograph every junction, label materials, and note repairs. This evidence anchors Historical significance and guides appropriate preservation techniques before you draft new room layouts.
Work Out How the Mill Carries Loads
Once you’ve captured the mill’s true geometry, trace the load path from roof coverings down to foundations so you don’t ask a centuries-old frame to behave like a new build. Identify primary members—principal rafters, purlins, tie beams, posts, and wall plates—and note where loads change direction at joints, bearings, and masonry pockets.
Map Load distribution across floors: joist spans, girder lines, and any point loads from retained machinery or new stairs. Check how lateral loads travel: roof diaphragms (often absent), gable walls, and any timber bracing. Where settlement has altered bearing, record gaps, crushing, or racking so your design can re-balance forces. Specify Structural reinforcement only where it completes the load path—adding discreet steel flitch plates, sistered timbers, or new posts aligned to existing supports.
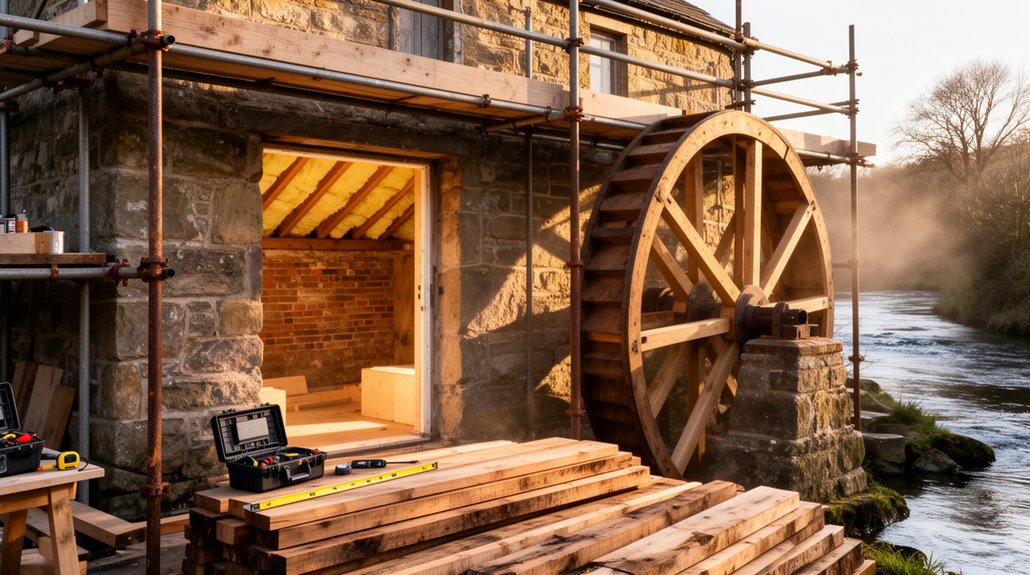
Make the Structure Safe Before Any Strip-Out
Even if your survey shows a tidy load path, you must stabilise the mill as it stands so strip-out doesn’t remove the very elements that currently keep it upright. Install temporary shoring to floors, joists, and wall heads, and brace any out-of-plumb masonry with rakers set on spreader pads. Prop lintels and arch barrels before you lift boards or remove partitions; tie scaffold to independent standards, not historic fabric. Mark “no-cut” zones around trusses, tie beams, and bearing ends, and tag every member you intend to retain for Historic preservation. Control access with exclusion zones, edge protection, and a sequenced method statement. Invite Community engagement early so you can explain why temporary works may alter circulation and sightlines during enabling works.`
Stop Damp by Fixing Water Entry Points
Start by inspecting the millrace and tailrace for overtopping, seepage lines, and scour that can drive moisture into the building fabric. Then seal stonework joints and cracks with compatible lime-based mortar and discreet crack stitching where needed, so you stop capillary pathways without trapping moisture. Finish by upgrading drainage falls and perimeter gullies, and refit gutters and downpipes with proper discharge points, because controlled water shedding is the backbone of a dry, durable conversion.
Inspect Millrace And Tailrace
Because the millrace and tailrace control how water approaches and leaves the building, you’ll inspect them first when tracking damp and chronic seepage. Walk the full length in dry weather and after heavy rain, noting Water flow speed, pooling, and any backwatering near the walls; these patterns often explain wet floors and tide marks.
Check for silted sections, collapsed edging, undermined banks, or vegetation that pinches the channel and raises levels. Probe for voids at the toe of foundations where fast currents can scour and threaten structural integrity. Confirm headwalls, screens, and sluice gear operate cleanly, and that debris can’t dam the race. Look for outfalls that discharge too close to the building, and verify the tailrace falls away without eddies.
Seal Stonework Joints And Cracks
Once you’ve mapped how water moves around the mill, seal the stonework where it actually gets in—open mortar joints, hairline cracks, and failed pointing that act like capillary wicks. Rake out loose material to sound mortar, vacuum dust, and pre-wet the wall so new work cures slowly and bonds properly. Match the original: use a breathable lime mortar, not hard cement, so you don’t trap moisture and spall historic stone.
To Seal joints, tool the mortar flush or slightly recessed to suit the façade’s character and shed water. To fill cracks, stitch wider splits with stainless helical bars set in lime grout, then repoint over. Finish with a soft-bristle clean and allow full carbonation before decorating or lining inside.
Upgrade Drainage And Gutters
Where does the water go after it hits your roof and walls—and does it get there fast enough? In a historic mill, you can’t rely on undersized gutters, sagging brackets, or buried outlets. Specify deep-profile gutters with corrosion-resistant fixings, set correct falls, and add leaf guards to protect downpipes from debris. Overshoot capacity for intense storms, then route discharge away from foundations via visible channels, trapped gullies, or French drains you can inspect. Keep splash zones off stone plinths with drip edges and kick-out flashings at abutments. If you’re planning Rainwater harvesting, separate clean roof runs, add first-flush diversion, and size tanks for seasonal drawdown. Integrate Water recycling by directing overflow to planted swales, not back to the mill base.
Repair Mill Masonry Without Trapping Damp
When you repair mill masonry, you can’t lock moisture into thick stonework with hard cement or impermeable sealers. You’ll repoint with breathable lime mortar that matches the original strength and porosity, then detail joints and edges to shed water cleanly. You’ll back that up with drainage and ventilation—clear weep paths, relieve ground levels where possible, and maintain airflow at floors and voids—so the wall can dry to both sides.
Breathable Lime Mortar Repointing
Although hard cement pointing can look tidy, it often seals a historic mill’s masonry like a waterproof jacket, forcing moisture to migrate through stone and brick instead of evaporating through the joints. You’ll get better performance and a truer finish by repointing with breathable lime mortar matched to the original in color, aggregate size, and joint profile—key Historic techniques that respect movement and porosity. Rake out defective joints by hand to avoid spalling arrises, then dampen the masonry so the mortar cures slowly. For Lime application, press mortar in thin layers, fully compacting to the back of the joint, and finish slightly recessed or flush to shed water without smearing faces. Protect from rapid drying and frost until carbonated.
Drainage And Ventilation Strategies
How do you keep a mill’s walls dry without “sealing” them? You manage moisture at its source and give it a safe exit path. First, read Water flow: confirm culvert levels, relieve hydrostatic pressure with a French drain at the wall toe, and pitch finished grades away. Use clean, free-draining aggregate and a geotextile wrap; don’t backfill with clay. Where you can’t excavate, add internal perimeter channels to a sump, but isolate them from historic floors.
Then ventilate, not varnish: keep lime-based finishes, open up redundant cement renders, and create controlled cross-drafts. Route Ventilation ducts through service voids, not masonry cores, and specify humidity-triggered fans. Detail air gaps behind linings so salt and vapor can migrate.
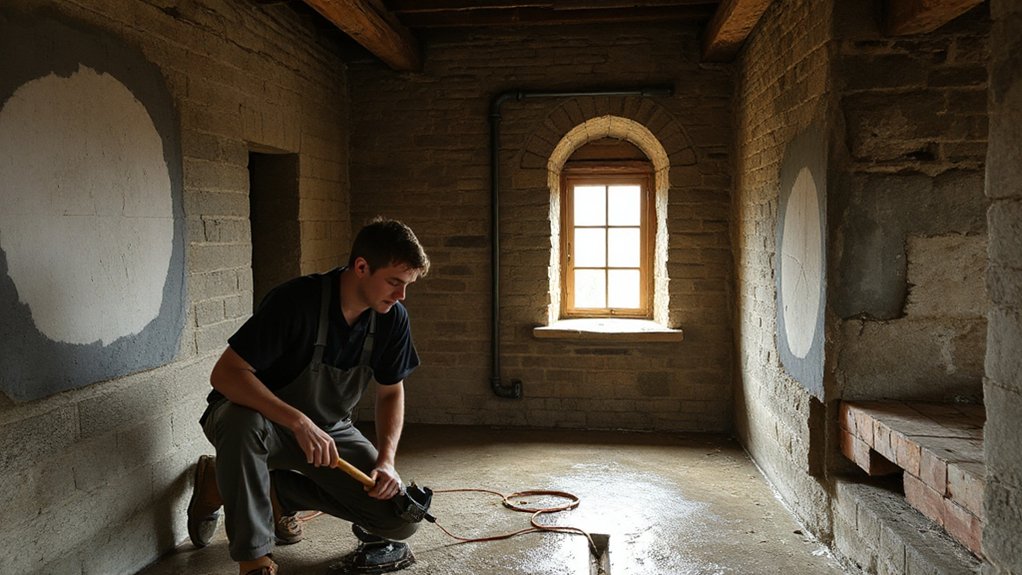
Repair Timbers and Treat Rot Properly
Where do you start once you’ve exposed a suspect sill or joist in an old mill? Probe with an awl, map soft zones, and check moisture content; don’t guess. If decay is localized, you’ll cut back to sound fibers and splice in matching species, grain orientation, and section size, using scarf joints and stainless fixings. Keep interventions legible so the structure reads honestly.
For timber treatment, you’ll dry the assembly, then apply a borate-based preservative to vulnerable end grain and bearing pockets; it penetrates without sealing in moisture. Follow with rot prevention by rebuilding capillary breaks: insert damp-proof membranes between masonry and timber, ventilate pockets, and keep water paths visible. Finish with breathable coatings, not film-forming paint, and schedule inspections.
Route Electrics, Plumbing, and Drainage in a Mill
Before you pull a single cable or set a pipe clip, map your service routes around the mill’s structure and moisture logic, not against it. Keep electrics high, dry, and inspectable: run in surface trunking or discreet voids above flood lines, bond metalwork, and separate power from data for Electrical safety. Drop plumbing on the warm side of rooms, sleeve every timber penetration, and add isolation valves where you can reach them fast. For drainage, use gravity falls, rodding access, and trapped gullies; direct clean roof water to storage for water conservation, never into the historic race.
- You’ll sleep when cables stay out of splash zones.
- You’ll breathe easier when leaks can’t hide.
- You’ll feel pride when every run looks intentional.
Add Ventilation and Breathable Insulation Together
Because a water mill wants to move moisture as faithfully as it once moved water, you’ll get the best results when you design ventilation and breathable insulation as one continuous system rather than two separate upgrades. Start by mapping wet zones: wheel pit, stone walls, basement slabs, and roof junctions. Choose vapor-open insulation—wood fiber, hemp, or mineral wool—with capillary-active plasters, then pair it with controlled air paths. Install low-energy extract in kitchens and baths, and supply air through filtered inlets sized to balance pressure. Keep ducts short, serviceable, and insulated where they cross cold voids. Detail airtight layers at floors and ceilings, but avoid trapping masonry. Your target is steady Air quality and reliable moisture control, season after season.
Bring in Light Without Harming Character
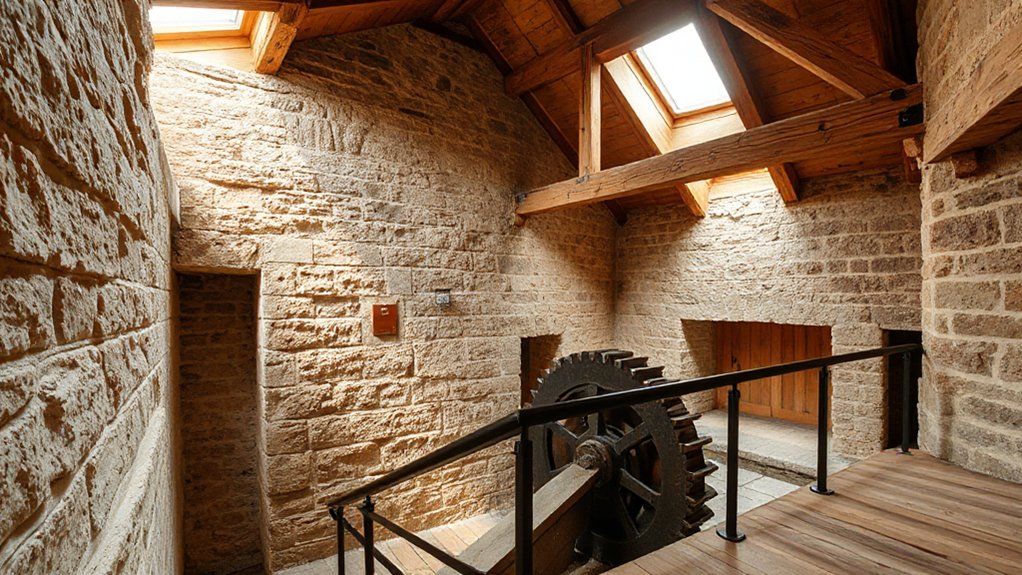
Although you may crave bigger openings and brighter rooms, you’ll protect a mill’s authority—and get better light—by treating daylight as a design intervention rather than a demolition cue. Map sun paths, wall thickness, and sightlines before you touch masonry; then upgrade Natural lighting with reversible moves that respect historical integrity. Favor repairing existing sash, easing paint lines, and using slim-profile glazing where permitted. Add interior light-shelves, pale limewash, and reflective reveals to push daylight deeper without shouting “new.” Keep openings legible: align any secondary glazing with original muntins, and hide modern seals in shadow gaps.
- You preserve the sober rhythm of stone and timber.
- You feel rooms brighten without losing their hush.
- You let every beam read as honest, not forced.
Budget, Phase, and Manage Conversion Risk
You can’t treat a historic water mill conversion like a fixed-price interior refresh, so you’ll build a contingency budget that covers hidden rot, buried services, and conservation-grade materials without compromising the design intent. You’ll phase the work to reduce risk: validate structure and moisture first, then lock in the envelope, and only then commit to finishes and bespoke joinery. You’ll tie each phase to clear hold points, updated cost forecasts, and go/no-go decisions so surprises don’t rewrite your scope.
Contingency Budget Planning
Three contingency layers should anchor your water mill conversion budget: known unknowns, regulatory/design drift, and true surprises hidden in historic fabric. Price each layer separately, and protect them with clear allowances tied to scope notes, drawings, and finish schedules. Your goal is to defend historical significance while funding preservation techniques that keep original masonry, timber, and ironwork legible.
- Known unknowns: set 5–10% for repairable decay—joist ends, lime mortar loss, silted culverts—so you don’t panic when surveys turn physical.
- Regulatory/design drift: hold 3–7% for consent conditions, fire upgrades, accessibility detailing, and quieter MEP routes that respect sightlines.
- True surprises: reserve 5–15% for concealed rot, voids, contaminated sludge, or undocumented sluice alterations, and you’ll sleep.
Phased Risk Management
Contingency allowances keep the numbers honest, but they won’t stop risk from landing in the worst week of the build unless you phase it. Start with an investigative phase: measured surveys, moisture mapping, and timber probes so you price reality, not assumptions. Gate the next phase on findings, and lock scope before you touch fabric of high Historical significance.
Sequence enabling works ahead of finishes: temporary weathering, shoring, and services routes that avoid historic masonry. Package specialist tasks—wheelpit repairs, lime work, sash restoration—so preservation techniques sit inside clear method statements and inspection hold points. You’ll schedule approvals as deliverables, not delays. Re-baseline cost and programme at each gate, and you’ll absorb surprises early, when design can still pivot without rework.
Frequently Asked Questions
What Insurance Is Needed for a Historic Mill Conversion During Construction?
You’ll need builder’s risk Insurance policies with Restoration coverage, general liability, workers’ comp, and professional liability. Add inland marine for materials, equipment coverage, and flood/water ingress endorsements. Confirm historic-structure valuation, ordinance-or-law, and debris removal.
Can I Install a Modern Heating System Without Damaging Historic Fabric?
Yes—you can, if the theory holds that reversibility prevents loss; it usually does. You’ll route compact ductless or radiant zones through existing chases, prioritize Historic preservation, and document Modern integration, avoiding masonry cuts and original timbers.
How Do I Comply With Fire Safety and Escape Regulations in a Mill?
You’ll comply by commissioning a fire strategy, designing protected escape routes, and meeting travel-distance limits. You’ll integrate compliant fire alarm systems and emergency lighting discreetly, upgrade doors, add compartmentation, and secure approvals via building control.
Are There Grants or Tax Reliefs Available for Mill Restoration Projects?
Yes—you’ll “love” how money hides in paperwork. You can pursue Heritage grants via heritage bodies and local councils, and claim Tax incentives like rehabilitation credits; align drawings, conservation plans, and costed specs to qualify.
What Ongoing Maintenance Costs Should I Expect After Conversion?
You should budget annual inspections, gutter and roof repairs, and moisture control; plan periodic Water pump upgrades and regular Exterior paint maintenance. You’ll also pay for HVAC servicing, pest treatments, insurance, and reserve funds for masonry and timber.
Conclusion
You’ve seen that a successful mill conversion starts with proof: permissions, water rights, flood modelling, and a full structural survey before you draw a single wall. You’ll protect historic fabric by stabilising floors and frames first, then routing services discreetly and reversibly, pairing ventilation with breathable insulation, and adding light with restraint. Remember: floods are the costliest natural disaster globally, causing about $95 billion in annual losses—plan for water, and you’ll safeguard the mill’s future.


