
You’ll transform a dark basement by tackling moisture first: trace leaks via gutters, downpipes, tide marks and salts, then fix the source and choose a BS 8102 system (tanking or cavity drain membrane with sump). Next, check Building Regulations early for headroom, stairs (Approved Doc K) and escape routes (Doc B), then plan the layout around services and flow. Brighten it with layered, warm high-CRI LEDs, pale reflective finishes, and add MEV/MVHR plus dehumidification—keep going to see how.
Key Takeaways
- Fix moisture and leaks first: trace water paths, repair sources, and use BS 8102 tanking or cavity membranes with sump drainage.
- Check Building Regulations early: confirm headroom, stairs, and egress routes; secure Building Control approval before structural or electrical work.
- Plan a layout around constraints: stairs, drainage, party walls, and low beams; design clear circulation and storage for the intended room use.
- Brighten with layered lighting and light finishes: dimmable ambient LEDs, task lights, and high-LRV wall/ceiling colours to reflect light.
- Control air quality: install MEV/MVHR and correctly sized dehumidification to maintain 50–60% RH and prevent mould recurrence.
Fix Basement Moisture, Mold, and Leaks First

Before you think about plasterboard, electrics, or flooring, you’ve got to get moisture under control, because a damp basement will ruin finishes and create a health risk fast. Start by tracing the water path: check gutters, downpipes, and ground levels outside, then inspect internal walls for tide marks, salt deposits, and active drips. Fix leaks at the source, and pressure-test any incoming services. For Basement waterproofing, use a BS 8102 approach: either cementitious tanking on sound masonry or a cavity drain membrane with perimeter channels and a sump pump where hydrostatic pressure is likely. Then tackle mould: scrub, dry, and run proper mold remediation with HEPA extraction, biocide treatment, and dehumidification until moisture readings stabilise below safe levels.
Check Basement Code Early (Egress, Height, Permits)
Once you’ve got the basement dry, check the regulatory basics early, because Building Control can force expensive redesigns if you miss them. Confirm minimum headroom and stair geometry against Approved Document K, and check whether you’ll need to lower the floor or alter joists. If you’re creating a habitable room, make sure egress works: an escape window or protected stair route to a final exit, in line with Approved Document B. Get clarity on planning versus Building Regulations; most conversions need Building Control approval, and Party Wall notices may apply. Arrange a Foundation inspection to identify movement, sulphates, or inadequate footings before you load the space. If you’re underpinning or cutting new openings, specify Structural reinforcement and calculations from a structural engineer.
Plan Your Basement Layout for Your End Use
You’ll get a better basement conversion if you first define the primary functions of each area—lounge, guest room, home office or utility—so your layout supports the way you’ll use it. Mark fixed constraints (stairs, party walls, existing drainage runs and any required egress) and then set out zones on a simple plan with accurate UK dimensions. Map traffic flow between doors, stairs and storage so routes stay clear, furniture fits, and you don’t waste headroom or floor area on dead corridors.
Define Primary Room Functions
How will the basement actually work day to day? Decide your primary use first: guest suite, home office, gym, cinema, utility-plus-storage, or a self-contained annex (check planning and Building Regulations where required). Then list performance requirements: heat, ventilation, daylight, acoustic control, and moisture tolerance. Plan furnace placement early so you keep service clearances, access to the flue route, and space for condensate drainage, without sacrificing usable area. Match materials to function: use moisture-resistant plasterboard and floor finishes for laundry or plant rooms; specify durable, cleanable surfaces for gyms. If you’re adding a bedroom, prioritise fire safety and egress. Apply soundproofing techniques around media rooms or home offices to limit airborne and impact noise.
Map Traffic Flow Zones
Although it’s tempting to start placing furniture straight away, map your traffic flow zones first so the basement functions safely and efficiently. Sketch your plan to scale and trace the main routes: stair to seating, WC, storage, and any external door. Keep circulation clear of low beams, services, and radiators, and allow sensible widths (about 800–900mm for primary walkways). Check door swings and ensure access to the consumer unit, stopcock, and boiler remains unobstructed. Use lighting to reinforce Traffic patterns: brighter on routes, softer in resting areas. Apply Zone separation by grouping noisy uses (gym, workshop) away from quiet uses (cinema, study), and place buffers like cupboards. Finish by testing the route with taped floor lines.
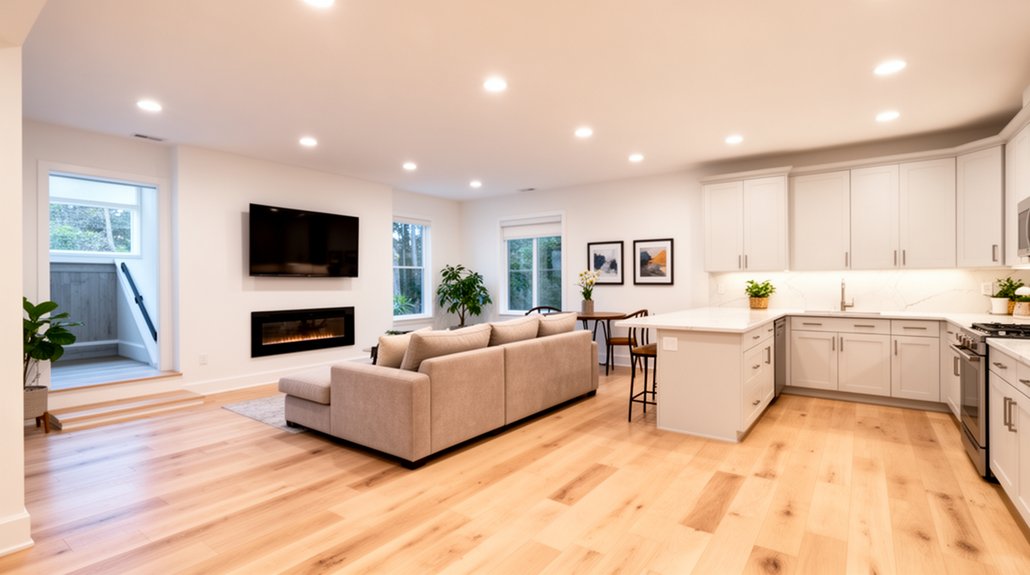
Layer Lighting to Brighten a Dark Basement
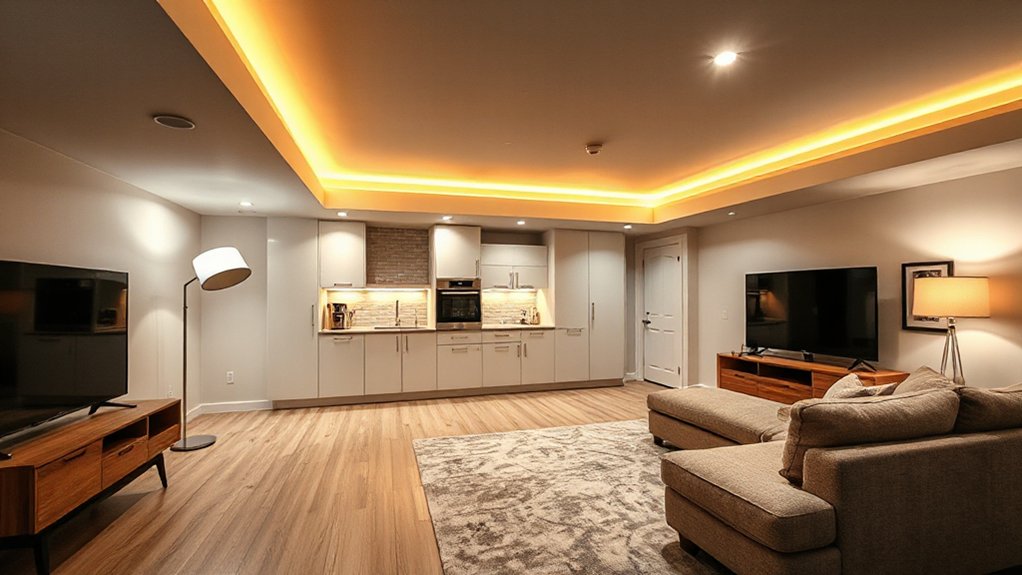
Because most UK basements sit below ground level and rely on limited daylight, layered lighting gives you the quickest, most controllable way to lift the space from gloomy to liveable. Start with ambient lighting: dimmable recessed downlights or slim LED panels give even coverage under low ceilings and reduce harsh shadows. Put them on separate circuits and two-way switching if you’ve got stairs.
Add task lighting where you work: under-shelf LEDs at a bar, adjustable spots over a desk, and IP-rated fittings in utility or shower areas. Then introduce decorative fixtures to create focus—pendants over a dining table or wall sconces along a media zone—kept on their own dimmer. Use warm-white (2700–3000K) LEDs and high CRI for comfortable skin tones. Include emergency lighting where required.
Use Light-Reflective Basement Finishes and Colors
When daylight’s limited, you can make every lumen work harder by choosing finishes and colours that bounce light around the room. Start with a high-LRV palette: off-whites, pale greys, and soft stone tones on walls and ceilings, with a flat ceiling to hide defects and a durable eggshell on walls for wipeability.
Specify Reflective paints where you need maximum return, especially on stairwells and light wells. Use satin or semi-gloss on timberwork and skirting to add controlled sheen without glare. On floors, Light colored tiles in porcelain or ceramic lift the whole space and pair well with underfloor heating if you’re upgrading. Choose pale grout and larger formats to reduce visual breaks. Finish with mirrored or metallic accents to redirect light.
Improve Basement Ventilation, Dehumidification, and Air Quality
Light finishes will brighten a basement, but you’ll only get a comfortable living space if the air stays dry and fresh. Start by checking for damp sources: leaking gutters, failed tanking, or bridged DPC. Then size a dehumidifier to the room volume and aim for 50–60% RH; ducted units suit larger conversions. Fit continuous Ventilation systems, ideally a MEV or MVHR where you’ve insulated and airtightened, to control moisture and odours year-round. Use trickle vents or air bricks only as supplementary paths, not the main strategy. Add Air filtration via MVHR filters (G4/F7) or a standalone purifier to reduce dust and spores. Commission airflow rates to UK Building Regulations and service filters quarterly.
Frequently Asked Questions
What Does a Typical Basement Transformation Cost per Square Foot?
You’ll typically pay £120–£250 per sq ft in the UK, depending on spec. You’ll spend more if Basement lighting upgrades and Moisture control measures are extensive; structural work, electrics, heating, and finishes drive totals.
How Long Does a Basement Conversion Project Usually Take?
You’re probably right: most basement conversions take 8–16 weeks. You’ll shorten it if you finalise drawings early and lock in trades. Lighting design and Ventilation solutions add time for approvals, installs, testing, commissioning.
Can I Soundproof the Basement for Music, Gaming, or a Home Theater?
Yes, you can soundproof your basement using soundproofing techniques like resilient bars, mineral wool, and double plasterboard; add acoustic treatments such as panels and bass traps. You’ll also need sealed doors, decoupled ceilings, and floor underlay.
What Flooring Options Work Best Over Concrete for Warmth and Comfort?
Want warm, comfy flooring over concrete? You’ll get best results with engineered wood or LVT on an insulated floating subfloor, plus proper Basement insulation and Moisture barriers; you’ll reduce cold-bridging, damp, and footfall noise.
How Can I Add Built-In Storage Without Making the Basement Feel Smaller?
You’ll minimise bulk by using shallow cabinetry between studs, plus floating shelves and decorative wall panels to hide doors. Keep units 300–400mm deep, match wall colours, add LED strip lighting, and choose sliding fronts.
Conclusion
Once you’ve stopped moisture and mould, confirmed Building Regulations (egress, ceiling height) and secured any permissions, you’re ready to make your basement work hard. Plan the layout around how you’ll use it, then layer ambient, task and accent lighting to banish gloom. Choose pale, reflective finishes to bounce light like a torch in a cave. Finally, fit robust ventilation and a dehumidifier to keep air quality stable and comfortable year-round.


