
To open up a 1930s semi for open-plan living, you’ll first confirm which walls are load-bearing, chimney-related, or party walls by checking joist directions and wall stacking, then bring in a structural engineer for calculations. You’ll likely need an RSJ with proper bearings and padstones, installed with safe temporary propping and Building Control sign-off. You’ll also plan ventilation, electrics, plumbing, insulation, and daylight upgrades, then zone the space to keep 1930s character. Next, you’ll see how to map layouts and manage chimney breasts.
Key Takeaways
- Start with a measured survey and structural engineer; confirm which walls and chimney breasts are load-bearing before designing an open-plan layout.
- Check planning status and Building Regulations early, especially for structural steels, ventilation, insulation upgrades, and any new doors, windows, or rooflights.
- Plan the layout around clear circulation and kitchen work zones, keeping routes from hall to garden unobstructed and avoiding walkways through cooking areas.
- Use engineered steel beams with correct padstones, bearings, and temporary propping, following an agreed installation sequence approved by Building Control.
- Retain 1930s character by zoning with flooring and joinery, and either feature or safely remove chimney breasts with capped, ventilated flues.
Can You Open Up a 1930s Semi Safely?
Although many 1930s semi‑detached houses lend themselves well to open‑plan layouts, you can’t assume any internal wall is safe to remove without checks. Start by commissioning a measured survey so you understand room sizes, chimney breasts, and existing openings. Then book a structural engineer to review your proposed changes and specify beams, padstones, and connection details; you’ll need this for Building Control.
You also need to plan fire safety, sound control, and ventilation, especially if you’re combining kitchen and living space. Upgrade insulation where you expose floors or ceilings, and choose efficient glazing and draught‑proofing to protect energy efficiency. Finally, coordinate external works—like new patio doors—with garden landscaping, so levels, drainage, and access align with your layout and timeline.
Identify Load-Bearing Walls in a 1930s Semi
In a typical 1930s semi, you’ll usually find solid load-bearing spine walls running front-to-back, with joists and rafters bearing onto them and onto the external walls. You can spot a load-bearing wall by checking what sits above it (another wall, chimney breast, or landing), which way the floor/ceiling joists run, and whether the wall is masonry rather than a lightweight partition. Before you remove anything, you’ll confirm these clues against the loft and underfloor structure so you don’t undermine the house’s primary supports.
Typical 1930s Structural Layout
Because most 1930s semis were built to a fairly repeatable plan, you can usually predict the load paths before you lift a floorboard or chase plaster. Expect solid brick external walls, plus a central spine wall running front-to-back that supports first-floor joists and often the roof. Party walls between neighbours are typically structural masonry and shouldn’t be altered without robust engineering. At ground level, you’ll often find two front rooms split by that spine, with a rear kitchen or scullery tucked behind. Upstairs, the same wall usually divides bedrooms and carries joists bearing in from both sides. Chimney breasts commonly sit on the party wall or the spine wall. Plan changes around Historic preservation and interior decor constraints too.
Signs A Wall Bears Load
Even if the house has been modernised over the years, you can usually spot a load‑bearing wall in a 1930s semi by tracing what it lines up with above and below. Check whether it sits directly under upstairs walls, joists, or purlins; these homes often stack structure neatly, even where Vintage charm features hide it.
- Look for joists running perpendicular into the wall; if they pocket into it, it’s likely carrying floor loads.
- Follow the wall through floors: if it continues in the same position upstairs or into the loft, treat it as structural.
- Inspect thickness and supports: masonry, chimney breasts, or steel/RSJ ends often indicate load paths.
Before wall restoration, lift a floorboard or use a borescope and confirm with a structural engineer.
Sketch the Best Open-Plan Layout (Kitchen/Diner/Living)
Start your sketch by locking in clear kitchen work zones—prep, cook, and wash—so the triangle stays tight and circulation doesn’t cut through it. Then lay out the dining-to-living flow with a straight, unobstructed route from the kitchen and enough clearance around the table and seating to prevent bottlenecks. Finally, position windows to pull light through the whole space and assign continuous storage walls (tall units, pantries, media/storage) to keep the open plan tidy and functional.
Define Kitchen Work Zones
Where do you actually cook, wash, and store in an open-plan kitchen/diner/living space? Start by mapping your primary work zones so you don’t waste steps or clash with others passing through. Anchor the “wet” zone on existing plumbing, then position the “hot” zone with strong extraction, and keep the “cold” zone adjacent for efficient prep. Group kitchen appliances by function, not by symmetry, and specify storage solutions that support each task, not generic cupboards.
- Prep zone: 900–1200mm clear worktop, knives, bins, and frequently used bowls within arm’s reach.
- Cook zone: hob/oven with landing space both sides; pans and spices in deep drawers.
- Wash zone: sink/dishwasher together, with glassware and plates stored directly above or beside.
Plan Dining-Living Flow
Once you’ve fixed the kitchen work zones, you can sketch the dining–living flow so people move around the cook without cutting through it. Draw a clear route from hall to garden that skirts the hob and sink, then set the dining table on that edge, not in the middle of circulation. Keep 900–1,000mm around the table for chairs and serving. Position the sofa group beyond dining, oriented to a focal point, with a 1,000–1,200mm “spine” path behind it for easy passing. Use a rug and ceiling drop line to mark the living zone without walls. Align furniture with existing chimney breast or bay to keep Vintage charm and respect period details. Maintain sightlines for supervision, conversation, and light.
Place Windows And Storage
Although you’ll feel tempted to lock the kitchen units in first, place your windows and tall storage next, because they dictate daylight, sightlines, and the “dead” wall lengths you can actually use. In a 1930s semi, aim for window placement that pulls light deep into the new combined room without blasting glare onto the hob or TV.
- Set large glazing on the garden elevation; keep opening lines clear of dining chairs and sofa backs.
- Cluster tall storage on one internal wall (fridge, pantry, broom) so you don’t pepper the plan with bulky blocks.
- Use low storage solutions under windows—banquettes, radiators covers with drawers, or shallow cabinets—to protect headroom and views.
Then sketch circulation: you should walk past storage, not through it.
Chimney Breasts: Remove, Reduce, or Work Around Them
Before you start knocking through walls in a 1930s semi, you need to decide what to do with the chimney breasts, because they often dictate the structure, the room layout, and even how services run. First, map what serves the stack: live flues, old gas pipes, redundant vents, and any neighbouring breast you share. If you want Chimney removal, plan for making good: cap and ventilate redundant flues to prevent damp, reroute cables and heating pipes, and match floor joists, boards, and skirting where the breast sat. If you prefer Fireplace preservation, consider reducing the breast to a shallow pier, or keeping it as a feature and building storage either side. Also check hearth heights, clearances, and how you’ll hide the old chimney line in ceilings and floors.
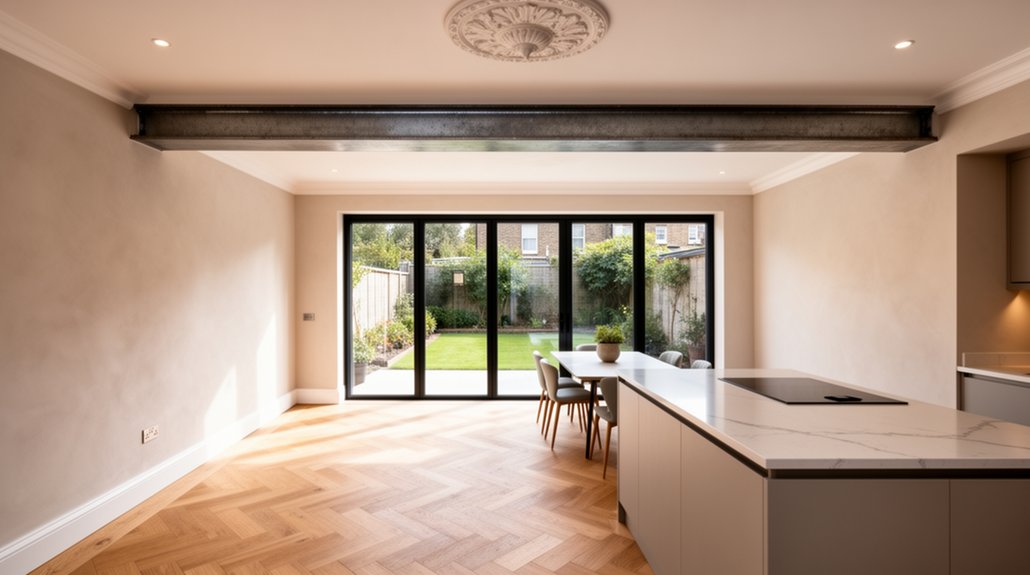
Structural Engineer + Steel Beams (RSJs) for Open Plan
You’ll start by booking a structural engineer site survey so they can confirm load paths, wall build-ups, and foundation clues typical of 1930s semis. From that, they’ll size and specify the RSJ (section, bearing length, padstones, connections, and any fire protection) to suit the new open-plan span. During the work, you’ll rely on correctly positioned temporary propping and a controlled installation sequence to keep the structure stable until the steel is fully seated and made good.
Structural Engineer Site Survey
Once you’ve decided which walls in your 1930s semi you want to remove for open-plan living, book a structural engineer’s site survey to confirm what’s loadbearing and to specify the steelwork (typically RSJs) that will replace it. They’ll inspect floor and ceiling joist directions, wall thicknesses, lintels, and any signs of past movement, so you don’t lose vintage charm or compromise garden integration with poorly placed openings.
During the visit, you’ll typically get:
- Confirmation of load paths and which supports must remain.
- Notes on temporary propping needs and safe sequencing for knock-throughs.
- Guidance on padstones, bearing points, and any hidden services to reroute.
Provide plans and photos beforehand, and verify loft access is clear. Ask for a written report suitable for Building Control.
RSJ Sizing And Specification
Although the knock-through might look straightforward, RSJ sizing and specification needs your structural engineer to calculate the exact beam section, grade, span, and bearing so the new opening carries floor and roof loads without bounce, cracking, or long-term sag. You’ll supply accurate wall thicknesses, joist directions, storey heights, and any chimney or padstone constraints, because these govern point loads and deflection limits. Your engineer will confirm whether you need a universal beam or column, what steel grade (typically S275 or S355), and the minimum end bearing onto suitable masonry with padstones. They’ll also check lateral restraint, load paths from above, and whether a flitch or multiple beams suit tight headroom. Good rsj specification includes corrosion protection, fire protection requirements, and clear fabrication notes.
Temporary Propping And Installation
With your engineer’s beam size, bearings, and padstone details fixed, the next risk sits in the build sequence: keeping the house properly supported while the loadbearing wall comes out and the RSJ goes in. Set out lines, check joist directions, and mark services before you touch masonry.
- Install Acrow props with strongboys (or needles) onto sound bearings, spread loads with timber soles, and keep props plumb and tightened evenly.
- Cut pockets for padstones, allow mortar to cure, then lift the RSJ in with enough labour and clear access, keeping the beam level and centred on bearings.
- Only then remove wall sections progressively, pack and grout the beam, and stitch masonry for lateral restraint.
Protect finishes: dust-screen for interior decor, and plan skips/access so garden landscaping isn’t trashed.
Do You Need Planning Permission for Open Plan?
Before you knock through a 1930s semi to create an open-plan layout, you need to confirm whether the work falls under permitted development or triggers formal consent. Internal alterations usually don’t need planning permission, but you must check if your home is listed, in a conservation area, or subject to an Article 4 Direction that removes permitted development rights.
Planning becomes likely if you’ll change the building’s external appearance: new rear extensions, altered windows/doors, new rooflights, or moving/flipping a side entrance. If your open-plan scheme relies on big glazing or wider openings to the garden, align proposals with garden landscaping and privacy impacts (overlooking, light spill, boundary treatments). When you adjust facades for better interior decor, confirm materials and sightlines match local design guidance. Ask your council for written confirmation early.
Building Regs Checklist for a 1930s Semi Knock-Through
As soon as you plan a knock-through in a 1930s semi, you need to treat Building Regulations as the non-negotiable checklist that governs structure, fire safety, ventilation, and insulation. Start by confirming whether the wall is loadbearing, then get structural calculations for the beam, padstones, and any temporary propping sequence your builder will follow.
Check the essentials:
- Structure (Part A): specify steel size, bearings, lateral restraint, and how you’ll make good floors and ceilings.
- Ventilation (Part F): upgrade extract rates in kitchen areas and ensure background vents still meet minimums.
- Energy (Part L): detail insulation to exposed walls, floors, and thermal bridging at the opening.
Keep vintage charm by matching trims and plaster profiles, and coordinate facade restoration so external alterations don’t compromise compliance.
Fire Safety in Open-Plan Spaces: Escape and Protection
Building Regs don’t stop at the beam and insulation details—once you open up a 1930s semi, you also alter how a fire would spread and how you’d get out. Treat the new open-plan as a single fire compartment and protect the stair as your primary escape path.
Install interlinked fire alarm systems: smoke alarms on the circulation route and landing, plus a heat alarm in the kitchen zone, all mains-powered with battery back-up. Keep emergency escape routes clear and direct: avoid pinch points, maintain door openings, and don’t let furniture block the hall or stair. Upgrade internal doors on escape routes if required, fit self-closers where Building Control asks, and ensure windows used for escape meet opening and sill-height guidance. Add mains-powered, testable emergency lighting if the route is long or complex.
Moving Electrics and Plumbing for an Open-Plan Kitchen
When you shift a kitchen into an open-plan layout, you’ll nearly always need to reroute power, lighting, water, waste, and ventilation to suit the new run of units and appliances. Start with a services survey: old 1930s wiring, shallow joists, and thin internal walls create renovation challenges, so plan routes before you chase plaster or lift floors. Keep vintage charm by hiding trunking, reusing period switches where safe, and aligning outlets with cabinetry.
- Electrics: put the hob, oven, and sockets on dedicated circuits, upgrade earthing, and allow for under-cabinet lighting and extractor feeds.
- Plumbing: move hot/cold supplies with isolators, and check pressure before relocating the sink or dishwasher.
- Waste: maintain falls, add rodding access, and vent correctly to stop gurgling.
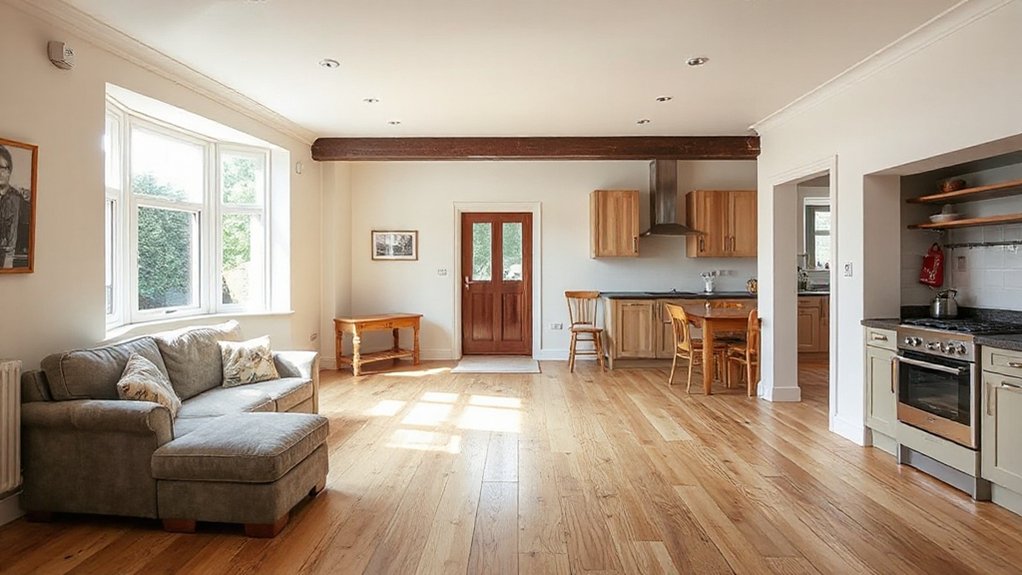
Add Daylight to an Open-Plan 1930s Semi
Although an open-plan knock-through can make a 1930s semi feel bigger, it won’t automatically make it brighter, so you need to plan daylight routes as carefully as you plan the layout. Start by checking where the original bay and rear windows throw light, then keep new openings aligned to those sightlines. If you’re adding rear doors, choose slimmer frames and a higher head to pull light deeper into the plan. A rooflight over the new kitchen run works best when it sits just inside the external wall line, not buried centrally. Use pale, wipeable finishes on ceilings and wall returns to bounce light, and swap bulky pelmets for simple blinds. Keep Vintage charm with reeded glass or timber-framed internal screens as aesthetic upgrades.
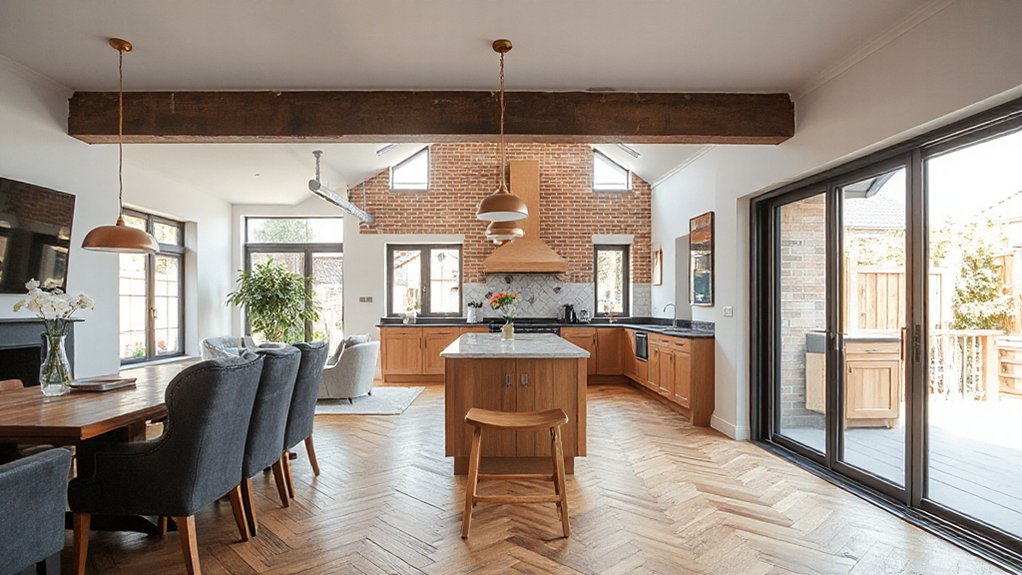
Zone the Space: and Keep 1930s Character
Once you’ve opened up a 1930s semi, you need to put structure back in with deliberate zoning, or the whole ground floor can read as a single bland room. Use floor changes, ceiling cues, and furniture to define function while keeping sightlines.
- Flooring breaks: keep original boards in the front room, then switch to tile or herringbone in the kitchen; align thresholds with former walls.
- Ceiling and lighting: add a shallow beam, picture rail, or stepped plasterwork; hang pendants over the island and a lower shade over the table.
- Joinery anchors: build a banquette, bookcase, or glazed screen that nods to Crittall lines.
Preserve period details—architraves, doors, fireplaces—then repeat their profiles in new trim for Vintage charm.
Frequently Asked Questions
How Much Does a 1930S Semi Open-Plan Renovation Typically Cost?
You’ll typically spend £35,000–£90,000 for a 1930s semi open-plan renovation, depending on Structural challenges and Historical authenticity. You’ll pay more if you add steelwork, relocate services, upgrade electrics, or reconfigure kitchens/bathrooms.
How Long Does a Knock-Through and Open-Plan Conversion Usually Take?
Measure twice, cut once: you’ll usually need 6–12 weeks for a knock-through and open-plan conversion. You’ll speed things up if you finalise structural approvals, flooring options, and lighting design early, and coordinate trades tightly.
Can We Live in the House During the Open-Plan Building Work?
Yes, you can, but you’ll need temporary living arrangements. You’ll face dust, noise, and restricted kitchens/bathrooms. Secure renovation permits, isolate work zones, and plan safe access, utilities shutdowns, and inspections throughout.
How Do We Manage Dust, Noise, and Neighbour Disruption During Works?
Like you’ve got a Spotify playlist for builders, you’ll manage disruption by sealing doors, running extractors, and scheduling loud tasks. Use dust control strategies, add soundproofing measures, notify neighbours early, and keep tidy daily.
Will Opening up Reduce Resale Value or Put off Period-Home Buyers?
You won’t usually hurt resale if you balance Historical preservation with Modern aesthetics. Keep key features, document changes, and guarantee structural approvals. Offer flexibility with partitions. Period buyers won’t balk if you respect original character.
Conclusion
Opening up your 1930s semi can feel like defusing a bomb: one wrong cut and the whole plan goes bang. You’ll stay safe by confirming load-bearing walls, chimney supports, and beam sizes with a structural engineer, then designing a layout that protects escape routes and meets fire regs. Budget for rewiring, plumbing runs, and ventilation early. Pull in daylight with doors, rooflights, or widened openings, and zone the space so period details still belong.


