
Future-proof your 1970s detached home by booking a professional energy survey with blower-door and thermographic checks, then tackle the biggest heat-loss points first. Top up loft insulation to 270–300mm, fix cavity-wall voids safely, and insulate suspended floors while keeping subfloor vents clear. Seal skirting, service penetrations, and loft hatches, but add humidity-sensing extract ventilation. Upgrade controls with zoning, TRVs, and weather compensation, then prep for a heat pump and add solar PV. Next, you’ll see how to phase it all by cost and payback.
Key Takeaways
- Book a professional energy survey (blower-door, thermography, heat-loss calculations) to pinpoint air leaks, insulation gaps, and thermal bridges.
- Prioritise biggest heat-loss upgrades first: loft to 270–300mm, fix cavity-wall voids, and insulate suspended timber floors while keeping subfloor vents clear.
- Draught-proof systematically—seal skirtings, service penetrations, doors, and loft hatches—then re-test with smoke pencil or blower-door for missed leaks.
- Improve windows without changing appearance using repairs, upgraded seals, low‑E secondary glazing, or slim double/vacuum glazing where frames allow.
- Control moisture and ventilation with humidity-sensing extractors, sealed insulated ducts, and consider MEV/MVHR once airtightness improves.
Book a 1970s Detached Home Energy Survey
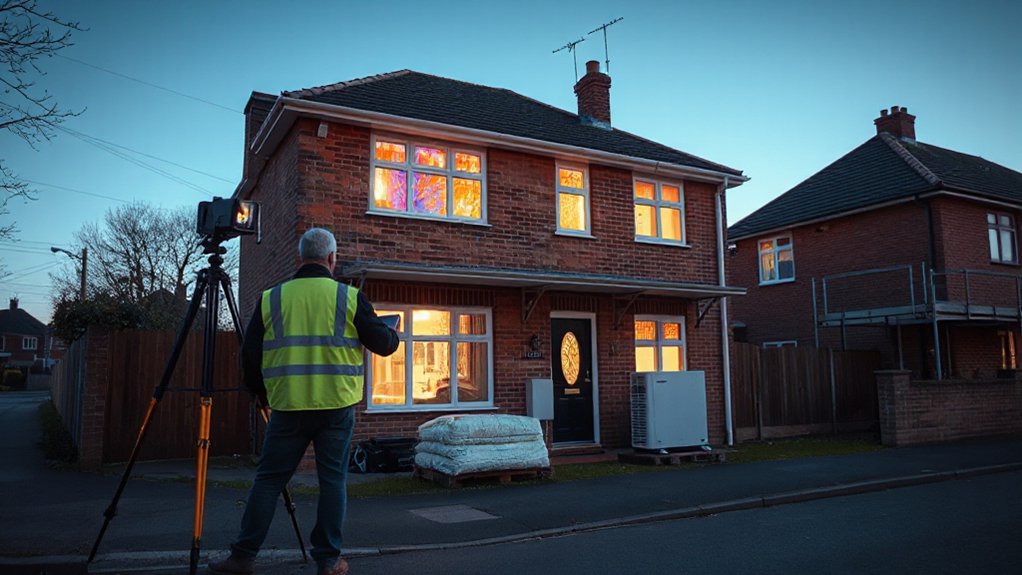
Before you spend money on upgrades, book a professional energy survey tailored to a 1970s detached home so you can target the biggest heat-loss and efficiency gaps first. Ask for blower-door testing, thermographic imaging, and a room-by-room heat-loss calculation that reflects cavity-wall construction, suspended floors, and original glazing details. You’ll get measured air-leakage rates, insulation depth checks, and notes on thermal bridges at lintels, eaves, and attached garages. Request boiler and hot-water efficiency readings, radiator balancing observations, and ventilation assessments so you don’t trap moisture. Have the surveyor map circuits and controls to support Home automation later, including zoning opportunities and smart-trv compatibility. Insist on recommendations that respect your Vintage decor, detailing non-invasive access routes and discreet sensor placement.
Prioritise Upgrades by Cost and Heat Loss
You’ll get the best payback by tackling the biggest heat-loss hotspots first—typically loft insulation gaps, uninsulated cavity walls, leaky windows/doors, and poorly sealed floors. Use your survey results to rank each fix by heat saved per pound and disruption, then schedule the high-impact, low-cost measures before larger retrofits. Build a budget-phased plan that locks in quick wins now and sets clear trigger points for pricier upgrades like new glazing, heating controls, or a heat pump.
Heat Loss Hotspots First
Even if you’re keen to start with shiny tech like heat pumps or solar, you’ll get far better results by tackling the biggest heat-loss hotspots in your 1970s detached home first. Start at the top: an under-insulated loft and unsealed hatch can dump heat fast, so add insulation materials to current standards and fit airtight draught seals. Next, check cavity walls or, if they’re unfilled or poorly filled, assess suitability and top up to improve heat retention. Then target suspended timber floors and skirting gaps with insulation between joists and perimeter sealing. Don’t ignore glazing: secondary glazing or upgraded seals cut conductive and convective losses. Finally, deal with uncontrolled ventilation—seal obvious leaks, then ensure planned extract ventilation keeps air quality safe.
Budget-Phased Upgrade Plan
Once you’ve tackled the main heat-loss hotspots, map out a budget-phased upgrade plan that puts the biggest savings per pound first and leaves higher-cost tech until your fabric can support it. Start with low-cost sealing: loft hatch, letterbox, service penetrations, and draught-proof doors. Next, add loft insulation to target depth, then upgrade glazing seals or fit secondary glazing where comfort complaints persist. Phase two: insulate cavity walls if suitable, then address suspended floors and thermal bridging at bay windows. Only then size heating upgrades: smart controls, weather compensation, and a right-sized heat pump or boiler. Schedule work alongside Home decor refreshes to avoid redoing plaster and paint. Use gardening tips to plan trenching for external insulation, drainage, and future cable runs without repeated excavation.
Top Up Loft Insulation (Targets for 1970s Homes)
Because many 1970s detached homes were originally insulated to much lower standards, topping up your loft insulation delivers one of the fastest, most reliable efficiency gains. Aim for 270–300mm total depth (about 10–12 inches) across the main loft area; if you’ve only got 100mm, you’re leaving heat and money behind. Choose compatible insulation materials: mineral wool rolls suit most joist layouts, while loose-fill can top up uneven areas—keep it away from downlights and flues. Protect loft ventilation by maintaining clear eaves paths and fitting rafter trays so insulation doesn’t block soffit vents. Insulate and draught-seal the loft hatch, and raise boarding on stilts if you need storage. Check for damp or staining before you start work.
Fix Cavity-Wall Insulation Gaps (Safely)
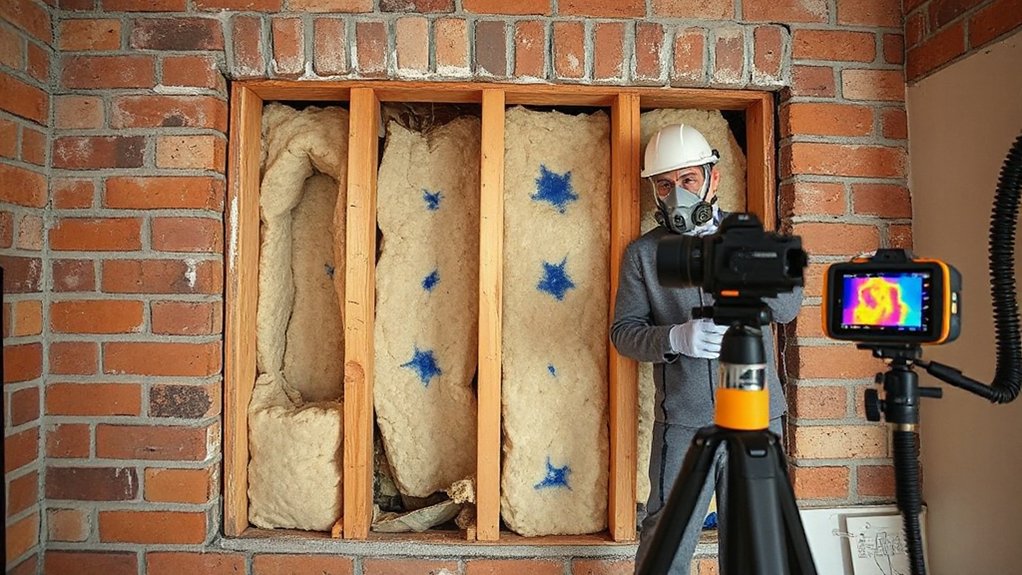
You’ll often find cavity-wall insulation voids in 1970s detached homes around window reveals, meter boxes, and at the top of gable walls, where cold bridging shows up as localised chill or mould. You can confirm gaps safely by checking existing drill holes, using a borescope or thermal imaging, and inspecting vents and weep holes—without removing bricks or blocking airflow paths. When you spot missing, slumped, or damp insulation, book an installer to extract and re-fill or inject the correct material, and get any moisture cause fixed first.
Identify Insulation Voids
Where do 1970s detached homes most often leak heat despite having cavity-wall insulation? You’ll usually find problems where the original fill was patchy, slumped, or never installed: around window and door reveals, at eaves, behind meter boxes, and where extensions meet the main wall. These insulation gaps create cold strips that feel like draughts but are actually thermal bridging through masonry, lintels, and wall ties.
To identify voids, map rooms that stay colder, show faster condensation, or develop mould at corners and reveal edges. Track patterns: vertical cold bands often indicate missing fill between studs or blocked injection paths; horizontal lines can point to settled insulation. Compare north-facing versus sheltered elevations to prioritise likely trouble spots and plan targeted remedial work.
Safe Inspection Methods
Before you start drilling or pulling off trims to “check the cavity,” inspect safely and non-invasively: use an infrared camera on a cold, still morning to spot consistent cold bands, confirm them with a moisture meter around reveals and skirtings, and then verify wall build-up with a borescope through an existing mortar joint (not brick faces) in an inconspicuous location. Then follow disciplined, low-risk steps that align with safety regulations and your inspection checklists:
- Isolate electrics: locate cables/pipes with a scanner and avoid sockets, vents, and flues.
- Control dust: wear FFP3 mask, goggles, gloves; bag debris immediately.
- Protect finishes: tape edges, use shallow stops, and avoid widening joints.
- Record findings: photos, readings, locations, and dates for consistent comparisons.
Professional Remediation Options
Although small voids in 1970s cavity-wall insulation can look like a quick DIY top-up, professional remediation gives you controlled access, correct material choice, and documented moisture-safe detailing—especially around corners, lintels, meter boxes, and party-wall junctions. You’ll get a survey using borescopes and moisture meters, then targeted drill-and-fill or extraction-and-replacement where insulation has slumped or bridged. Your installer should match the fill to cavity width and exposure (EPS beads, mineral wool, or foam only when suitable), clear debris, and reinstate cavity trays and weep paths. You’ll also receive ventilation and damp-risk checks so you don’t trap moisture behind render or cladding. For Historic preservation and aesthetic considerations, they patch mortar neatly, avoid visible brick damage, and document locations for future work.
Insulate Suspended Floors and Seal Skirting Draughts
If your 1970s detached home has a suspended timber floor, you’ll lose a surprising amount of heat through the void and the draughty gap line along the skirting. Tackle Suspended floors and Skirting draughts together to cut bills and stop cold spots.
- Check airflow: keep subfloor vents clear so you don’t trap moisture while insulating.
- Insulate from below where possible: friction-fit mineral wool or PIR between joists, then add a breathable membrane to prevent wind-wash.
- Seal edges: run acrylic caulk or perimeter foam between skirting and floorboards; use flexible filler at corners to prevent cracking.
- Close board gaps: lift a few boards and add draught strips, or apply sealant to narrow joints for immediate comfort.
Test with a smoke pencil and re-seal misses.
Upgrade 1970s Windows Without Changing the Look
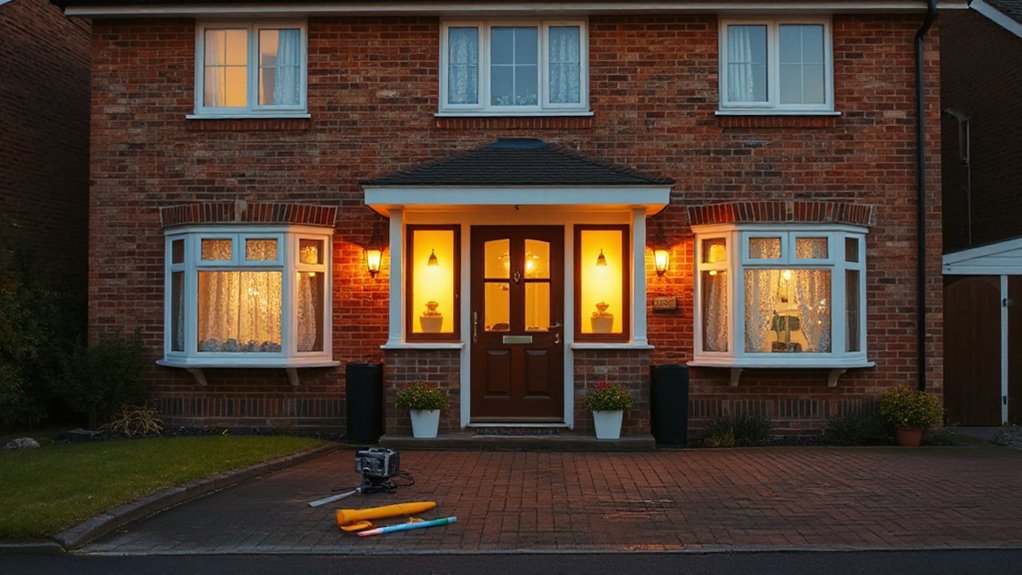
When you want warmer rooms and lower heat loss without altering your 1970s façade, you’ll get the best results by upgrading the window performance rather than replacing the frames. Start with a full condition check: rotten sashes, failed seals, and warped casements need repair before any upgrades. If frames are sound, fit slim-profile double glazing or vacuum glazing where rebates allow, and use heritage-style spacers to keep sightlines crisp. Add magnetic secondary glazing on the room side for big U-value gains while preserving Vintage charm. Specify low‑E glass and warm-edge spacers, and insist on correct glazing packers and perimeter seals to prevent rattle and cold bridging. Reserve full window replacement only for irreparable frames or safety upgrades.
Draught-Proof Doors, Letterboxes, and Loft Hatches
You’ll cut heat loss fast by upgrading door seals with continuous compression strips and a correctly adjusted threshold so the door shuts tight without binding. Fit a letterbox draught excluder (internal brush or external cowl) and make sure the flap closes fully to stop cold air jets through the hallway. Seal and insulate the loft hatch with an airtight perimeter gasket and a bonded insulation board on top, then add secure latches so it compresses every time you close it.
Door Seal Upgrades
- Fit new compression weatherstrips to the frame: clean, dry, then apply continuous runs with tight mitred corners to stop corner leaks.
- Add a quality threshold seal: choose a low-profile, adjustable strip that meets the door sweep without scraping, and fix into solid timber, not carpet.
- Replace the door sweep: pick a bristle or rubber fin matched to your floor type; set it to lightly contact for a full-width seal.
- Seal the loft hatch: install adhesive foam around the perimeter and add toggle catches to compress it evenly.
Letterbox Draught Excluders
Although letterboxes look insignificant, they can leak a surprising amount of cold air straight through the door skin. To tackle Letterbox draughts, fit purpose-made draught excluders: an internal brush or sprung flap and an external cowl that covers the slot. Measure your aperture and screw-hole centres first, then choose a model that matches your door thickness and finish. Remove the old plate, clean paint ridges, and bed the new plates on a thin bead of silicone or compressible gasket to stop air sneaking around the edges. Keep the flap tension firm so it snaps shut, but not so stiff it jams post. Finally, test with a smoke pencil or tissue to confirm you’ve sealed it properly.
Loft Hatch Insulation Seals
Because warm air naturally rises, a poorly sealed loft hatch can act like a permanent open window at ceiling level, dumping heat into the roof void and dragging cold air back into the landing. In a 1970s detached home, you’ll often find a thin, warped hatch and no compressive gasket, so draughts bypass your ceiling insulation. Fix it with purpose: choose closed-cell foam insulation seals, guarantee full contact, and add insulation on top of the hatch without blocking the frame. Follow this sequence:
- Check the Loft hatch sits flush and square; plane or pack the frame if needed.
- Fit continuous insulation seals around the frame, corners tightly butted.
- Add a rigid insulation board to the hatch top, taped and mechanically fixed.
- Install toggle latches to compress the seal evenly.
Improve Airtightness in a 1970s Detached Home
If you want your insulation and heating upgrades to actually deliver, you’ve got to tackle airtightness first, since many 1970s detached homes leak warm air through countless small gaps. Start with a draught audit on a windy day: feel around skirting boards, window reveals, pipe penetrations, and the letterbox. Seal gaps at floors and service entries with acrylic caulk; use expanding foam only where it won’t distort frames. Fit brush strips to external doors and a gasketed letterplate. Add airtight grommets behind radiators and around cables in ceilings. When upgrading windows, specify continuous perimeter tapes and properly packed frames. You’ll protect interior aesthetics by sealing neatly and painting after. Outside, keep seals clear of exterior landscaping and ground splashback.
Add the Right Ventilation to Prevent Damp
Once you tighten up a 1970s detached home, you also need controlled ventilation or you’ll trap moisture and trigger condensation, mould, and timber decay. Prioritise extract where moisture is made, and supply where fresh air is needed, so airflow is predictable and continuous. Keep trickle vents open, especially if you’ve added insulation and new seals. Don’t rely on cracking windows: it’s inconsistent and wastes heat, even with good natural lighting.
- Fit humidity-sensing extractor fans in kitchen and bathrooms, ducted to outside.
- Add a continuous MEV or MVHR system if you’ve upgraded airtightness significantly.
- Seal and insulate ducts, and use backdraught shutters to stop cold air ingress.
- Maintain 10–20mm clearance behind wardrobes, and don’t overwater Indoor plants.
Add Zoning, TRVs, and Smart Heating Controls
You’ll cut wasted heat fast when you zone your system room by room, so bedrooms, living areas, and seldom-used spaces run on their own schedules. Fit TRVs on each radiator to set precise temperatures per room and prevent overheating when the boiler’s running. Then integrate a smart thermostat to coordinate zones, learn your routines, and let you adjust setpoints and timings remotely for tighter control and lower bills.
Room-By-Room Heat Zoning
Although a 1970s detached home often relies on a single thermostat to heat the whole house as one “blob,” room-by-room heat zoning lets you direct warmth where it’s actually needed and stop overheating empty spaces. You’ll cut wastage, reduce boiler cycling, and make comfort predictable even with draughty halls and mixed insulation levels.
- Split the system into zones (upstairs/downstairs, living/sleeping) with motorised valves and a wiring centre, then match each zone to its own sensor.
- Add smart schedules and geofencing so bedrooms warm before sleep, while unused rooms coast.
- Use room sensors away from radiators, direct sun, decorative accents, and interior lighting heat sources to prevent false readings.
- Set sensible setpoints and setbacks (e.g., 20°C occupied, 16–17°C idle) and review weekly runtimes.
TRVs For Radiator Control
Room-by-room zoning sets the schedule and the broad “where,” but thermostatic radiator valves (TRVs) handle the fine control at each radiator so one warm room doesn’t force the rest of the house to overheat. Fit TRVs on most radiators, then set lower numbers in bedrooms and spare rooms, higher in living areas, and “*” for frost protection when you’re away. Don’t install a TRV on the radiator in the room with the main wall thermostat, or you’ll confuse control and reduce comfort. For best radiator efficiency, balance your system first so flow matches heat demand, then let TRVs trim peaks. Plan simple valve maintenance: free stuck pins each autumn, check for weeping glands, and keep heads clear of curtains and covers.
Smart Thermostat Integration
Once you’ve set up zoning and TRVs, a smart thermostat ties the whole heating system together so the boiler only runs when there’s a real demand for heat. Smart thermostats let you match heat output to occupancy, weather, and room-by-room targets, cutting waste common in 1970s detached homes.
- Configure schedules per zone, then let TRVs fine-tune individual radiators to prevent overheating.
- Enable load compensation or weather compensation so flow temperature drops when outdoor temps rise.
- Use geofencing and optimum start/stop so the house warms efficiently without long preheats.
- Turn on energy monitoring to track run times, cycling, and setpoint changes, then adjust zones and TRVs accordingly.
Choose a thermostat that supports your boiler type (on/off, OpenTherm) and offers reliable app control and data exports.
Choose Low-Carbon Heating for a 1970s System
If you want to future-proof a 1970s detached home, start by replacing fossil-fuel heating with a low-carbon system that works with your existing pipework and heat demands. Begin with a room-by-room heat-loss check and a radiator output review, then size equipment to match. Your low carbon heating options include an air-to-water heat pump, a hybrid heat pump with a retained boiler, or a biomass boiler where fuel storage and maintenance are realistic. If your radiators are oversized, you can run lower flow temperatures and cut running costs. Upgrade controls to weather compensation and fit smart TRVs so each zone tracks demand. Finally, verify electrical capacity, flue requirements, and local fuel availability before you commit to an installer and warranty plan.
Make Your 1970s Home Heat-Pump Ready
Low‑carbon heating works best in a 1970s detached house when the fabric and heat emitters let a heat pump run at low flow temperatures. Get the basics right and you’ll cut bills, improve comfort, and avoid oversizing.
- Boost insulation: top up loft insulation, seal draughts, and insulate suspended floors; prioritise airtightness before new kit.
- Upgrade emitters: fit larger radiators or add underfloor loops so rooms heat well at 35–45°C flow.
- Balance and control: flush, balance, and set weather compensation; use smart zoning that suits your Home decor layout.
- Plan outdoor space: choose a quiet location with clear airflow; integrate the unit into landscaping design with screens that don’t block vents.
Cut Hot-Water Losses: Cylinder, Pipes, and Showers
Although a 1970s detached home often hides its worst inefficiencies in the hot‑water system, you can make meaningful gains quickly by stopping heat from leaking out of the cylinder, the distribution pipes, and the shower itself. Start at the cylinder: fit an 80 mm jacket (or upgrade thin factory foam), insulate the top, and lag exposed primary connections. Set the thermostat to 60 °C for hygiene, then use a timer so Hot water isn’t stored all day. Next, add Pipe insulation to every accessible run—especially in the airing cupboard, under floors, and in the garage—and keep gaps tight at elbows and valves. Finally, cut shower losses: fit a 6–8 L/min efficient head, shorten warm‑up time, and fix dripping mixers to stop constant reheating.
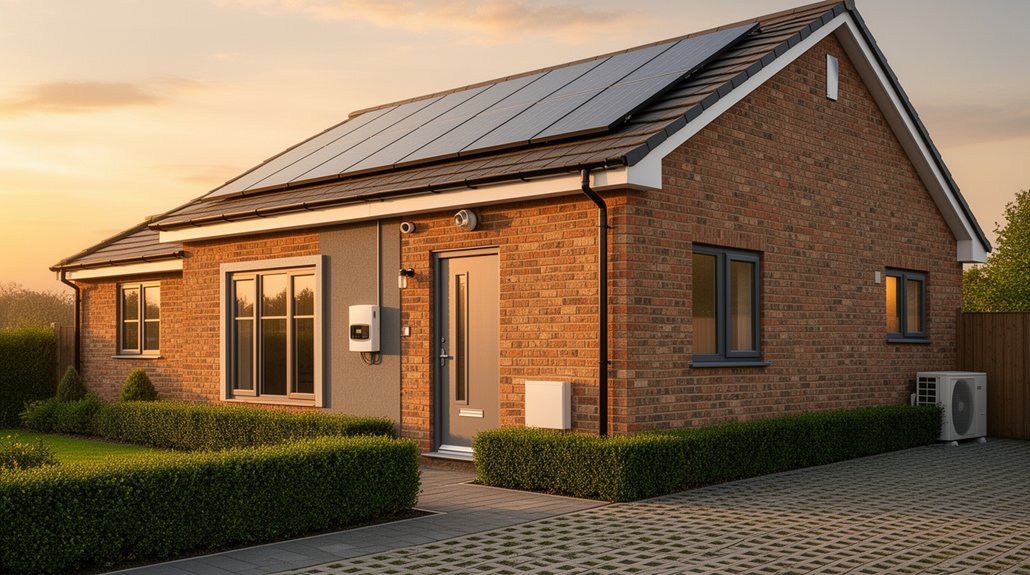
Add Solar PV: Roof Checks, Tariffs, and Batteries
Once you’ve reduced hot‑water waste, solar PV becomes one of the fastest ways to cut a 1970s detached home’s running costs by generating electricity on‑site. Before you sign, tighten the basics so the system performs and lasts.
- Confirm roof suitability: check orientation, shading, and structure; complete Roof maintenance (tiles, felt, flashing) first to avoid costly panel removal later.
- Specify the right inverter and monitoring so you can spot underperformance, strings out, or shading issues quickly.
- Use Tariff optimization: pick export terms and smart‑meter settings that reward daytime self‑use and accurate export readings.
- Add a battery only if your usage is evening‑heavy; size it to solar output, keep a backup‑safe isolator, and plan ventilation and fire‑safe siting.
Build a Phased Plan: Budget, Grants, Payback
Because retrofit costs in a 1970s detached home add up fast, you’ll get better results if you build a phased plan that ties each upgrade to a clear budget cap, any available grants, and a realistic payback window. Start with fabric-first measures (loft and cavity insulation, draughtproofing) because they’re low disruption and shorten payback on heat pumps later. Price each phase using three quotes, then reserve 10–15% for remedial works you’ll uncover. Check national and local schemes for insulation, heating controls, and low-carbon heating; apply before you sign contracts. Track payback using your current kWh, tariff, and expected savings, not generic averages. Sequence messy work before finishes to protect Home aesthetics, and coordinate trenching with garden landscaping for cables, drains, or external insulation details.
Frequently Asked Questions
Do I Need Planning Permission for Insulation, Windows, or Solar Panels?
You often don’t need Planning permissions for insulation, replacement windows, or solar panels under permitted development, but you must meet insulation regulations and limits on appearance, height, and conservation areas—always confirm with your local council’s planner.
How Can I Improve EPC Rating Quickly Before Selling or Remortgaging?
Coincidentally, you can boost your EPC fast by adding loft insulation, draught-proofing, LED lighting, and a smart thermostat. Install Energy saving gadgets and smart home technology, document upgrades, and book a reassessment before viewings.
What Are the Safest Ways to Deal With Asbestos in 1970S Materials?
You’ll handle 1970s asbestos safest by stopping disturbance, arranging a UKAS-accredited survey, and using licensed Asbestos removal for high-risk materials. For Safe handling, isolate areas, wear PPE, dampen debris, bag waste, and document disposal.
How Do I Choose Trustworthy Installers and Verify Their Certifications?
Why risk your project? You choose trustworthy installers by checking Installer credentials, demanding insurance, and calling references. You perform Certification verification by matching license numbers with official registers, confirming training dates, and requesting written scope and warranties.
Will Upgrades Increase Home Insurance Costs or Require Policy Changes?
Upgrades can raise or lower Insurance costs, and you’ll often need Policy adjustments. Tell your insurer before work starts, update rebuild value, document permits, and confirm coverage for new systems, batteries, or altered wiring.
Conclusion
Future-proofing your 1970s detached home is like sealing a leaky boat before you sail into rougher waters. You’ve surveyed the fabric, prioritised the biggest heat-loss paths, and topped up loft and cavity insulation safely. You’ve tackled draughty floors, prepped for a heat pump, and cut hot-water waste at the cylinder and pipes. Add solar PV once the roof’s checked. Now build a phased plan with budgets, grants, and payback dates.


