
You can’t restore a Victorian townhouse on optimism; you start with measured surveys, defect mapping, and a consent strategy that matches your scope and budget. You then make the shell weathertight—roof coverings, leadwork, gutters, and ground drainage—before you touch plaster or finishes. You repair floors and lime-based plaster in sequence to keep the building breathable, and you route new services through reversible paths to protect original fabric. Next comes the part that usually goes wrong…
Key Takeaways
- Commission a measured and condition survey to define scope, quantify risks, and build a phased cost plan with contingencies.
- Confirm statutory constraints early—listing, conservation area, party wall, and building control—and create a consent matrix for each intervention.
- Make the building weathertight first by repairing roof slates, lead flashings, chimneys, gutters, and downpipes using like-for-like materials.
- Rebuild floors and plaster in sequence: complete subfloor repairs and services, relay numbered boards, then repair breathable lime plaster after stability.
- Upgrade services through existing voids with reversible fixings, and restore Victorian features—sashes, cornices, fireplaces—using repair-first, compatible materials.
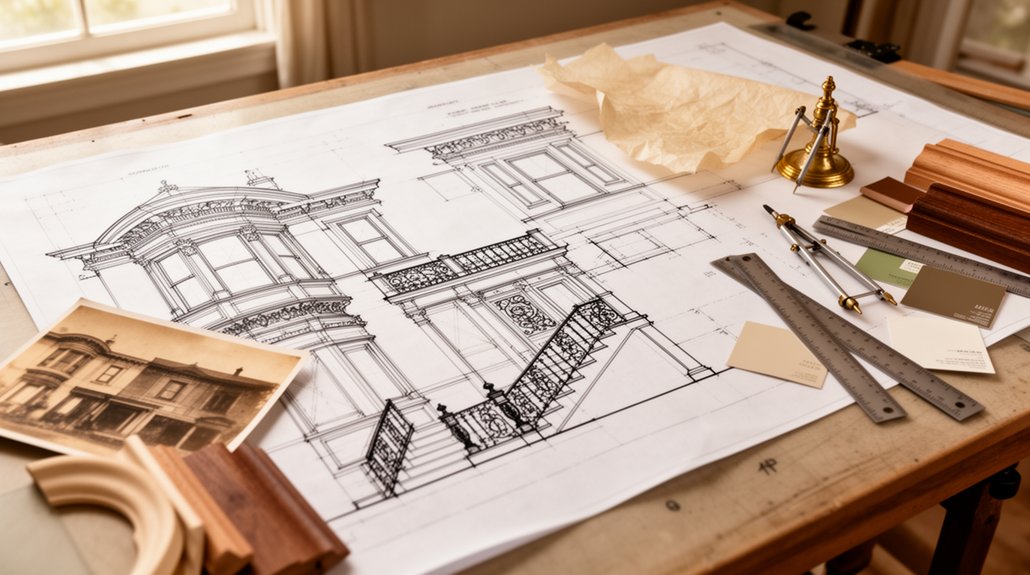
Survey Your Victorian Townhouse: Scope, Budget, Consents
Before you price a single repair, commission a full measured and condition survey so you can define scope, quantify risk, and sequence works properly. Capture floor levels, wall thicknesses, joinery profiles, and service routes; log defects with photos, moisture readings, and crack gauges. Use findings to build a cost plan with contingencies tied to uncertainty, not guesswork, and split allowances for enabling works, specialist trades, and preliminaries. Check statutory status early: listing, conservation area constraints, party wall obligations, and building control strategy. You’ll need a consent matrix that maps each intervention to approvals, drawings, and heritage statements. Protect Historical accuracy by specifying like-for-like repairs and reversible upgrades. Lock Material sourcing through sample panels, lead times, and supplier traceability.
Make It Weathertight: Roof, Damp, Brickwork
Although you might be tempted to jump straight into interiors, you should make the building envelope weathertight first by stabilising the roof covering and rainwater goods, then stopping moisture at its sources, and only then repointing and repairing external masonry. Start at the ridge: replace slipped slates with like-for-like, renew lead flashings to code, and verify valleys, parapet gutters, and chimney abutments. Clear, realign, and test gutters and downpipes; add leaf guards only where access is poor. Track damp scientifically: inspect subfloor vents, ground levels, and bridging at thresholds, and use salts and moisture profiling before specifying remedies. For brickwork, prioritise Historical accuracy and Material selection: use compatible lime mortar, match joint profiles, and cut out failed cement pointing carefully to avoid spalling.
Rebuild Floors and Plaster in the Right Order
Once you’ve stopped external moisture and verified the structure is dry, rebuild from the ground up: complete all subfloor repairs and services first, then reinstate joists and deckings, and only then close walls with lath-and-plaster or compatible plaster systems. Start by lifting boards methodically, numbering them for relay, and inspect joist bearings, sleeper walls, and air paths. Replace decayed timbers like-for-like, keeping original depths to avoid step changes at thresholds. During flooring replacement, keep boards acclimating on site, then fix with cut nails or screws into sound joists to reduce squeaks. Only after floors are stable should you tackle plaster repair: rake out loose keys, resecure laths, apply breathable base coats, and finish flush with existing plane. Allow cure times before decorating.
Upgrade Victorian Townhouse Services Without Damage
How do you bring a Victorian townhouse’s electrics, plumbing, heating, and data up to modern spec without chasing historic brickwork or compromising breathable fabric? You route new services through voids you’ve already opened: floor zones, ceiling cavities, and redundant chimney flues (with liners) using reversible fixings. Specify surface-mounted mini-trunking in secondary areas, or skirting-level conduits behind removable boards, keeping penetrations minimal and sleeved. For plumbing, run PEX in continuous lengths, clip to battens, and isolate with accessible manifolds to avoid buried joints. Upgrade heating with low-temperature emitters and weather-compensated controls to support modern energy targets. For electrics, use RCD/AFDD protection, label circuits, and keep junctions in service boxes. Deliver contemporary lighting via shallow downstand pelmets and track fed from accessible routes.
Restore Victorian Features: Sash, Cornices, Fireplaces
Because these elements sit at the interface of structure, moisture movement, and day-to-day use, you should treat sash windows, cornices, and fireplaces as repair-first components and specify interventions that stay reversible and breathable. Overhaul sash by splicing decayed timber, renewing parting/staff beads, fitting new cords and weights, and upgrading to slimline double glazing only where profiles allow; otherwise add brush seals and secondary glazing. Use linseed oil paint and keep putty traditional to manage vapor. For cornices, map cracks, pin loose runs, and reinstate missing sections in lime plaster with hessian scrim; avoid gypsum where damp risk persists. For fireplaces, sweep flues, reline with flexible stainless if required, and ventilate redundant chimneys. Retain Victorian charm by conserving original grates, tiles, and other Architectural details.
Frequently Asked Questions
What Insurance Coverage Do I Need During a Victorian Townhouse Restoration?
You’ll need builder’s risk, general liability, and workers’ comp, plus umbrella and pollution coverage; add endorsements for Historical accuracy and Material sourcing. Confirm vacant-property, theft, and water-damage riders, and require contractor certificates and additional insured status.
How Can I Live in the House While Restoration Work Is Underway?
You can live onsite by fencing work zones like a ship’s bulkheads, sequencing trades, and maintaining dust control, egress, and utilities. Plan Living arrangements per room, and line up Temporary accommodations during lead, demo, or abatement.
What Are Common Hidden Costs in Victorian Townhouse Restorations?
You’ll face hidden costs from structural rot, damp remediation, outdated wiring/plumbing, asbestos/lead abatement, party-wall surveys, permits, and specialist labor for historical accuracy. You’ll also pay extra for preservation techniques, material matching, access scaffolding, contingencies.
How Do I Choose a Contractor Experienced With Victorian Properties?
Choose contractors with documented Victorian case studies, conservation certifications, and references. You’ll verify their approach to Historical accuracy, inspect mockups, and confirm Material sourcing networks for period-appropriate joinery, lime plaster, and slate.
How Long Does a Full Victorian Townhouse Restoration Typically Take?
You’re typically looking at 9–18 months; I once saw a “12‑month” job stretch to 16 when hidden rot surfaced—like opening a watch case. Your restoration timeline hinges on permitting, MEP, and renovation milestones sequencing.
Conclusion
You finish your Victorian townhouse restoration by treating the project like a precision instrument: tune each system in sequence, and it performs as designed. You’ve surveyed, budgeted, and secured consents, then locked out water with roof, rainwater goods, and breathable masonry repairs. You’ve rebuilt floors and plaster in the correct order to protect substrates. You’ve routed services reversibly to preserve fabric. You’ve repaired sash, cornices, and fireplaces to original profiles and tolerances.


