
You’re not just building a shepherd’s hut; you’re specifying a UK‑ready micro‑dwelling that must tow legally, stay warm, and manage moisture off‑grid. You’ll need to pin down your use case, check planning status and access for delivery, then lock in a chassis, FSC timber, and natural insulation with proper airtightness. Get heating, ventilation, and water/waste right, or damp will win. The real question is where you site it without scarring the ground…
Key Takeaways
- Define the hut’s use case, performance targets, and daily energy loads to size insulation, glazing, ventilation, and off‑grid systems correctly.
- Confirm UK planning status and caravan-size limits, and design for safe towing access, delivery logistics, and demountable services.
- Choose reversible, low-impact groundworks like ground screws or jack pads on geotextile and compacted permeable sub-base to protect soil.
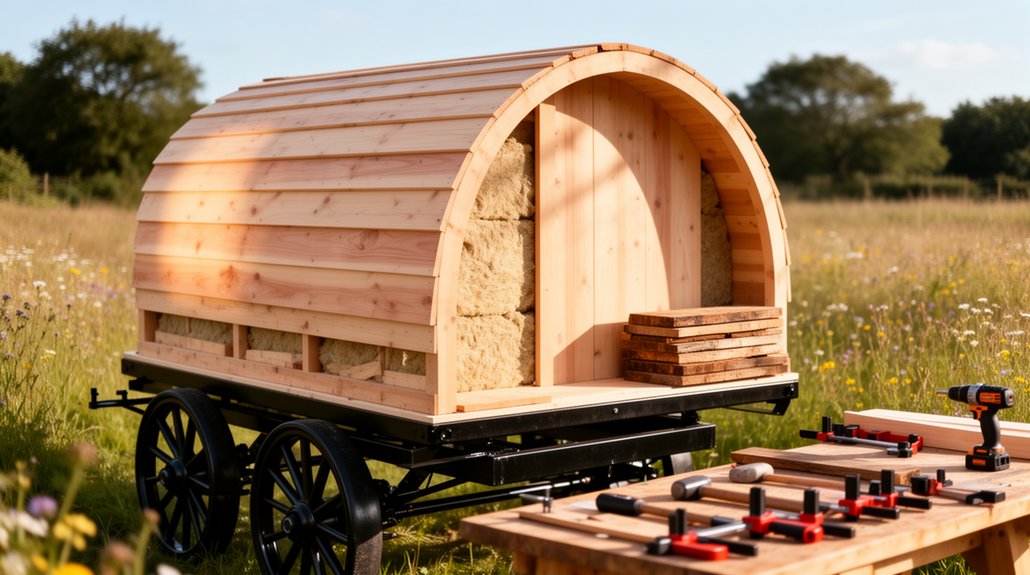
- Build on a lightweight galvanised steel chassis and FSC/PEFC-certified timber frame, using standardized stud bays to reduce waste.
- Prioritise airtightness with vapour-open natural insulation, sealed penetrations, and humidity-controlled ventilation to prevent drafts and condensation.
Define Your Shepherd’s Hut Use Case
Before you lock in dimensions, insulation specs, or chassis choice, define exactly how you’ll use the shepherd’s hut, because the brief drives every design decision. Will it serve as a full‑time micro‑dwelling, an off‑grid studio, or a short‑stay let? Your answer sets heat‑loss targets, glazing ratios, ventilation strategy, and whether you prioritise wet‑room resilience, desk space, or sleeping capacity. Map daily loads: cooking type, hot‑water demand, and appliance watts, then decide on grid tie, battery, or LPG. Consider UK siting: towing frequency, access tracks, and whether you need demountable services. Acknowledge the hut’s Historical significance and Cultural symbolism, but translate that into details—arched roof, timber lining, and proportion—without compromising fire safety and moisture control.
Set Budget, Timeline, and DIY vs Pro Build
Once you’ve pinned down how the hut must perform day‑to‑day, you can cost it honestly and decide how fast you can build it. Price the shell, services, and finishes separately, then add 10–15% contingency for UK timber volatility and specialist labour. Your programme depends on whether you fabricate or commission.
- Budget bands: chassis, cladding, roof, windows, stove, electrics, plumbing.
- Thermal spec: choose insulation materials (sheep’s wool, PIR, woodfibre) and vapour control early to avoid rework.
- Fit‑out scope: built‑ins, moisture‑resistant linings, and Interior decor dictate joinery hours and lead times.
- Delivery route: DIY suits carpentry‑heavy shells; pros accelerate welding, flashing, and certified electrics.
Set milestones: frame, weatherproof, first‑fix, second‑fix, snagging.
Check Planning Rules, Access, and Delivery
Before you finalise the design, you’ll check whether your shepherd’s hut sits within Permitted Development limits or needs planning consent, factoring in use, location, and services. You’ll then assess site access and groundworks—track width, turning radius, gradients, and a stable pad or micro‑piles—so the chassis loads and drainage falls work. Finally, you’ll plan delivery and crane logistics, confirming HIAB reach, lift points, overhead constraints, and a safe set‑down zone without exceeding ground bearing capacity.
Permitted Development Limits
Although a shepherd’s hut reads as a “moveable” micro‑dwelling, UK planning control usually follows its real‑world use, so you should confirm whether it qualifies as a caravan under the Caravan Sites and Control of Development Act 1960 and the Caravan Sites Act 1968, or whether the council will treat it as operational development or a material change of use. You can’t rely on Permitted Development if you introduce primary residential use, run a business, or site it in AONB, National Park, listed curtilage, or conservation area constraints. Use Historical examples and cultural significance to justify form, but keep compliance evidence-led.
- Check external dimensions against caravan limits before detailing chassis.
- Map setbacks, sightlines, and overlooking to protect neighbour amenity.
- Confirm services don’t trigger “building operations” beyond PD scope.
- Record stays, occupants, and purpose to evidence incidental use.
Site Access And Groundworks
How will a 2.4–3.0 m‑wide hut, on a trailer or skids, physically reach and sit on your plot without triggering avoidable planning or highways issues? You’ll check title constraints, easements, and any Article 4 Direction, then confirm your access route’s clear width, turning radius, gradients, and overhead obstructions against likely vehicle dimensions. If you need to cross a footway, you’ll consult the highway authority and avoid unauthorised verge damage.
For groundworks, you’ll keep it demountable: set adjustable jack‑pads or steel ground screws on a geotextile‑separated, compacted Type 1 sub‑base, with soakaway routing away from neighbours. You’ll manage garden privacy with planted screens, and preserve wildlife corridors by keeping permeable edges and dark‑sky lighting.
Delivery And Crane Logistics
Once you’ve proved the hut can sit demountably on its pads or skids, you’ll plan the delivery like a temporary works package: confirm whether it travels as a “wide load” under UK Construction & Use regs, agree the route with the haulier (and, where relevant, the highway authority), and decide early if you’re craning from the highway, a neighbour’s drive, or within the plot. Use Drone surveying to verify turning radii, overhead lines, tree canopies, and outrigger footprints. Programme seasonal delivery around soft verges, farm traffic, and school‑run pinch points. Lock down:
- Crane lift plan, LOLER certificates, lift supervisor.
- Ground bearing checks and mats for outriggers.
- Banksman route, exclusion zones, and neighbour notices.
- Offload geometry, skids alignment, and final level tolerances.
Choose a Hut Size and Space-Smart Layout
You’ll start by right-sizing the hut to your plot and tow limits, balancing an 8–12 ft width and a length that fits your chassis, turning circle, and intended insulation build-up. You’ll then set a space-smart layout around a clear circulation line, placing the stove, wet room, and services on one compact “utility spine” to reduce pipe runs and heat loss. You’ll make every element multi-use—bench-to-bed, fold-down table, stair-drawers—so the same square metres work for cooking, washing, storage, and sleeping.
Right-Sizing Your Hut
Because a shepherd’s hut gives you only a few square metres to work with, getting the footprint and internal zoning right at the outset will dictate everything from chassis spec and tow weight to how cleanly you can meet Building Regulations (or justify an off‑grid, non‑permanent setup). In UK practice, start with road constraints: 2.55 m max width if you’ll tow on public highways, and check plated MTPLM against your tow vehicle.
Model your plan at 1:10 and lock in clearances, then set your length to suit:
- 12–14 ft: day hut, minimal services, lighter running gear.
- 16 ft: balanced wet area and galley without crowding.
- 18–20 ft: proper insulation build-up and plant space.
- 22 ft+: studio feel, more Artistic expression, richer interior decor.
Multi-Use Layout Planning
Although the footprint stays tight, a shepherd’s hut can work like a much larger micro‑dwelling if you plan every zone to do double duty and you match the layout to a realistic towing width (typically 2.55 m max on UK roads) and build-up thickness for insulation and services. Set a clear circulation line: door to kitchenette to loo, so you don’t waste width on corridors. Use a drop-leaf table as desk and dining, and a bench with battery, water and shoe storage. Specify a daybed that converts to a full berth, with overhead lockers between ribs. Keep wet services on one wall to shorten pipe runs and protect your vapour control layer. Your Artistic interior comes from built-in joinery; your Custom exterior follows window placement and awning geometry.
Pick a Low-Impact Shepherd’s Hut Chassis
Before you cut timber or price up cladding, lock in a chassis that delivers strength with the smallest material and carbon footprint. In the UK, favour a lightweight galvanised steel ladder chassis with optimised section sizes, verified weld specs, and a removable axle for siting. Specify a raised, ventilated subframe to reduce damp risk without extra mass, and choose bolt-together components so you can repair, reuse, and recycle.
- Set track width and drawbar length to suit rural lanes and gateways.
- Keep ground pressure low so you don’t scar verges or Wildlife corridors.
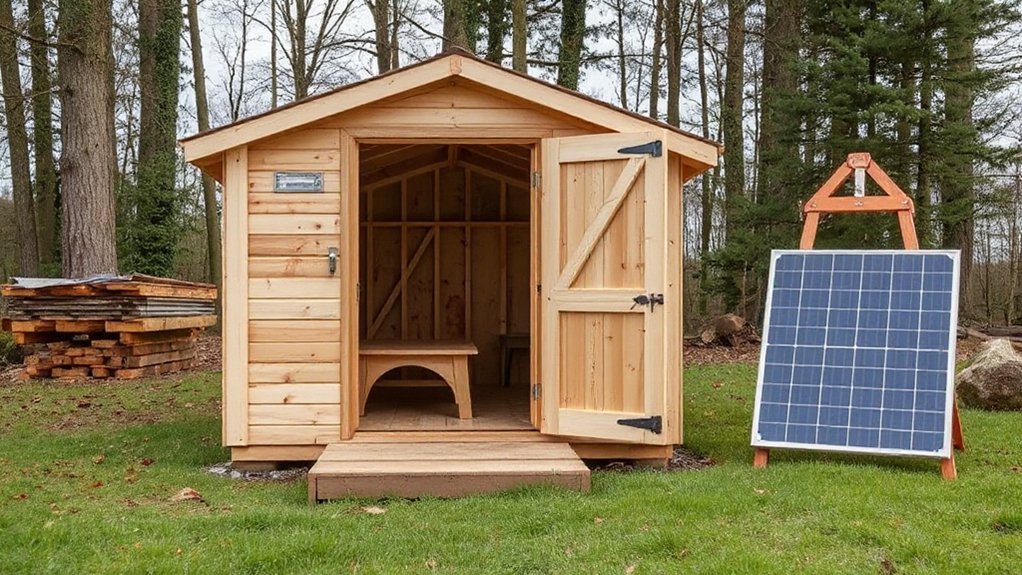
- Add pre-run conduits and mounting points for Solar panel integration.
- Use screw-jack corner steadies to level precisely, avoiding concrete pads.
Frame the Hut With Responsibly Sourced Timber
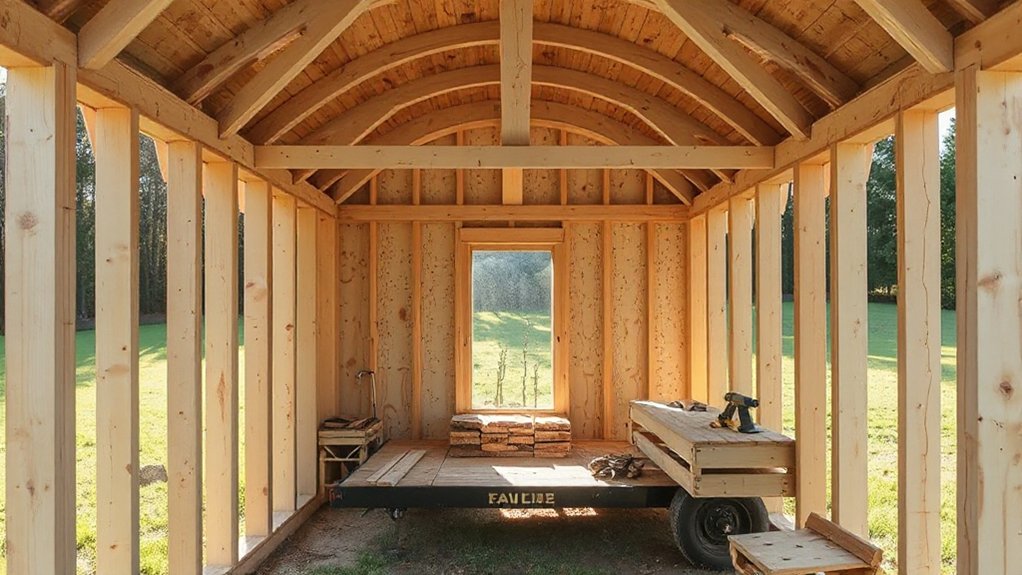
You’ll specify FSC or PEFC‑certified softwood (or home‑grown larch/doug fir) with documented chain‑of‑custody, sized to suit your chassis centres and insulation build‑up. You’ll set out a low‑waste frame using standardised stud bays, optimised cut lists, and offcut planning for noggins, linings, and blocking. You’ll lock in long‑term rigidity with durable joints—housings, half‑laps, and gusseted connections—then protect end grain and fixings to meet UK moisture exposure and towing loads.
Certified Timber Selection
When you specify certified timber from the outset, you lock in a structural frame that’s traceable, compliant, and lower‑impact without compromising strength or durability. In the UK, ask your merchant for FSC® or PEFC chain‑of‑custody evidence and match grades to your spans—C16 for non‑critical studs, C24 for primary rails and bearers. Choose home‑grown larch, Douglas fir, or spruce where possible to cut transport emissions and improve moisture performance.
- Verify certification code on invoices and delivery notes.
- Specify kiln‑dried, strength‑graded sections to BS EN 14081.
- Detail preservative treatment to Use Class 2/3 for exposed zones.
- Coordinate timber haul routes to protect wildlife corridors and native plantings.
Low-Waste Framing Methods
Certified, graded timber gives you a reliable baseline; low‑waste framing turns that spec into a cutting plan that uses every metre you’ve paid to transport. Set out your wall and roof module on a 600mm grid to align with UK sheet goods and insulation widths, then design studs, noggins, and rafters to standard lengths stocked by local merchants. Create a cut list from a full CAD elevation, nesting components so offcuts become blocking, service battens, or floor bearers. Keep openings to rational sizes so you don’t create short, unusable pieces. Mark members with colour-coded chalk and pre-drill for temporary fixing to reduce split waste. Reserve straightest lengths for visible Eco friendly finishes, and route voids early for renewable energy cabling and inverter bays.
Durable Jointing Techniques
Although responsibly sourced C16/C24 softwood gives you consistent strength, the frame only stays square and weather‑tight if your joints resist racking, shrinkage, and repeated towing loads. Choose jointing techniques that suit UK moisture swings and site handling, then lock them down with mechanical fixings and smart detailing:
- Cut housed mortice-and-tenon at primary posts; peg with oak dowels to keep faces flush.
- Use half-lap bridle joints at ring beams; add structural screws for clamp force.
- Install galvanized angle plates at corners and axle bearers; you’ll spread shear into end grain safely.
- Seal every junction with EPDM gaskets, DPC strips, and butyl tape—your core weatherproofing methods—before cladding.
You’ll minimise squeaks, stop twist, and keep door reveals true over time.
Insulate With Natural Materials (and Stop Drafts)
Because a shepherd’s hut has a high surface‑area‑to‑floor‑area ratio and sits exposed to wind, your insulation strategy needs to pair breathable natural materials with meticulous draft control to avoid cold bridging and interstitial condensation. Specify Natural insulation such as woodfibre boards, sheep’s wool, or hemp batts between studs, then add a continuous insulated lining to reduce thermal breaks at ribs and sole plates. Keep build‑ups vapour‑open to the outside and use UK‑available intelligent membranes on the warm side where needed, taped to form a continuous air layer. For draft prevention, fit compressible tapes behind cladding, seal service penetrations with grommets, and use airtightness tapes at corners, window reveals, and floor‑to‑wall junctions. Add brush seals to the door threshold and latch edge, maintaining tight tolerances throughout.
Choose Heating + Ventilation to Prevent Damp
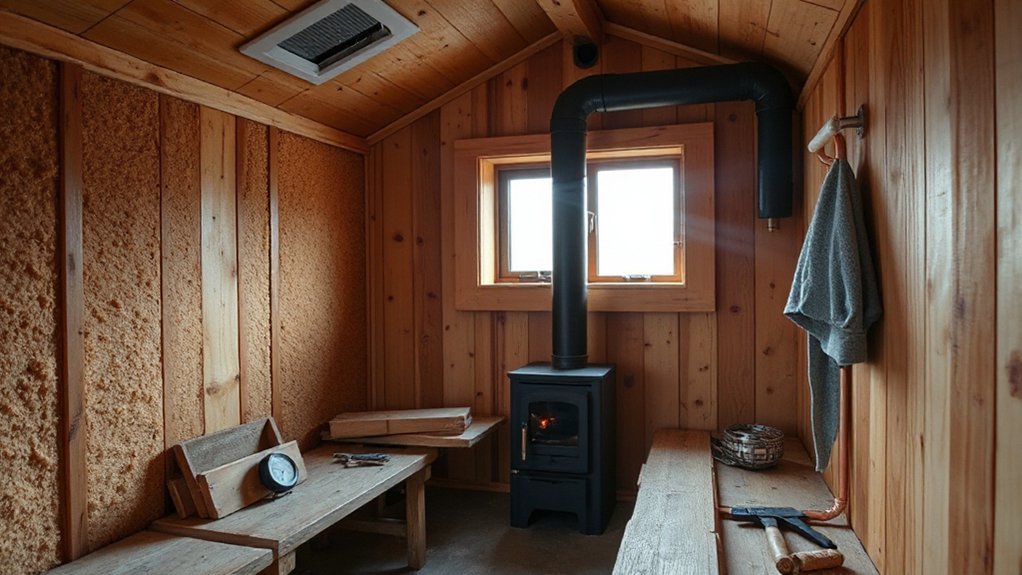
Once you’ve insulated and taped the hut into a reliable air barrier, you must manage moisture with controlled heat input and deliberate ventilation rather than relying on accidental leakage. Aim for steady, low‑level warmth and predictable air changes so surfaces stay above dew point in UK winter swings. Specify balanced extract, then detail the penetrations so they don’t compromise your build-up.
- Fit a small wood stove or diesel heater with a dedicated air supply, keeping combustion off the room’s oxygen budget.
- Add a humidity‑sensing continuous extract fan (wet room) plus trickle inlets sized for the volume.
- Insulate flues/ducts and use vapour‑open linings so interstitial moisture can dry inward.
- Coordinate Solar panel placement and Rainwater harvesting downpipes to avoid blocking vents or saturating cladding.
Plan Off-Grid Power, Water, and Waste
How will you keep a shepherd’s hut genuinely liveable year‑round without a mains hook‑up? Start with an energy budget: LED lighting, 12V USB, and a high‑efficiency DC fridge. Size roof PV for winter yield, then pair it with LiFePO4 storage and a 1–2kW inverter; fit an RCD, DC isolators, and UK‑compliant earthing. Add a small LPG hob or induction only if your battery can cope.
For water, specify food‑grade tanks, a frost‑protected pipe run, and a 12V pressure pump with sediment and carbon filtration; include a short electric trace heater if needed. Handle waste with a separating compost toilet and sealed greywater container, protecting Wildlife habitat. Keep routing discreet to respect Cultural significance and avoid nuisance.
Site the Shepherd’s Hut With Minimal Ground Damage
Even if you plan to tow the hut in and out, you’ll get the least ground damage by choosing a naturally well‑drained, level-ish spot and spreading loads from day one. In the UK, check clay content, soakaway potential, and winter access before you drop wheels. Keep the chassis on bearers so you’re not rutting turf, and avoid tree root zones and service corridors.
- Set recycled plastic or FSC timber sleepers on a geotextile to separate soil.
- Add a thin, permeable Type 3 sub-base; compact it to reduce pumping.
- Use screw piles or padstones where you need Ground stabilization techniques without concrete.
- Finish with removable ground mats under steps and tow paths.
This approach supports Sustainable material selection and stays reversible for planning and ecology.
Frequently Asked Questions
How Do I Prevent Condensation Behind Interior Wall Linings Year-Round?
You’ll prevent condensation by designing continuous ventilation strategies, fitting taped moisture barriers (VCL) on the warm side, minimising thermal bridges with insulated battens, and maintaining trickle vents/extract fans with controlled background heating year-round, UK.
What Insurance Options Cover a Shepherd’s Hut Used as a Rental?
UK holiday lets account for ~10% of accommodation nights; you’ll need specialist Rental insurance for a shepherd’s hut. You should add public and employer’s liability coverage, contents, accidental damage, business interruption, and legal expenses.
Which Finishes and Paints Are Safest for Indoor Air Quality?
Choose Eco friendly paints with UK/EU Ecolabel, low odour, and <1g/L VOC; specify Low VOC finishes like water‑based lacquers and hardwax oils. You’ll improve IAQ by priming, sealing MDF edges, and ventilating.
How Often Should I Recoat the Exterior Cladding for Weather Protection?
Recoat every 3–7 years—like armour that could outlast a thousand storms. You’ll schedule Exterior maintenance annually: wash, inspect, spot-prime. Refresh Weatherproof coatings sooner on south-facing cladding or coastal UK sites; follow manufacturer specs.
Can a Shepherd’s Hut Be Financed With a Traditional Mortgage or Loan?
You usually can’t finance a shepherd’s hut with a traditional residential mortgage; lenders treat it as a chattel. For Mortgage options, use specialist caravan/park-home finance. Loan eligibility improves with planning consent, fixed services, insured site.
Conclusion
You’ve now shaped a shepherd’s hut that works like a Swiss Army knife: compact, efficient, and ready for real life. By nailing the brief, budget, and planning, you avoid costly redesigns. You’ve specified an FSC timber shell, lightweight chassis, and natural insulation with airtight detailing to cut heat loss. Pair balanced ventilation with right‑sized heating to beat damp. Finally, you’ve planned solar, water, waste, and a reversible UK site set‑up.


