You’re not just cleaning an old hearth—you’re deciding how much Victorian fabric you can save, and what must be rebuilt for safety. Start by identifying the original surround and insert materials (cast iron, slate, tile, lime mortar) and check for cracks, loose fixings, and signs of past sealing. Then choose: a decorative feature or a working fireplace, because that dictates flue checks, liners, and ventilation. Next, you’ll open it up without damaging the chimney…
Key Takeaways
- Identify what’s original versus later additions by examining ornamentation, joinery, and material clues like casting seams, grain, and magnet tests.
- Prioritize safety: inspect lintels, jambs, hearth stability, and flue condition; stop using the fireplace if cracks, damp staining, or smoke spillage appear.
- Get the chimney swept and CCTV-checked to confirm clear draw, intact liner, and no creosote glaze, voids, or blockages.
- Restore components correctly: de-rust and polish cast iron, clean slate gently, and repair stone or timber with compatible pins, epoxy, or hide glue.
- Improve performance by sealing leaks, pre-warming cold flues, correcting downdraughts with cowls or stack height adjustments, and repointing with breathable lime mortar.
Identify Your Victorian Fireplace Style and Materials
Before you pick up a scraper or order replacement parts, identify exactly what kind of Victorian fireplace you have and what it’s made from, because the style and materials dictate the safest cleaning methods, the right repairs, and the finishes that will look period-correct. Start by dating it: early Victorian pieces favor heavier Gothic and classical lines; later examples lean toward Aesthetic and Arts-and-Crafts simplicity. Then map the structure—surround, mantel shelf, and insert—so you don’t misread later additions as original. Inspect Victorian ornamentation closely: crisp, undercut details suggest carved stone or wood; repetitive relief often points to cast iron. Confirm Fireplace materials with magnet, scratch tests in hidden spots, and a loupe for grain, pores, or casting seams. Photograph everything and note dimensions for sourcing.
Is It Safe to Restore: and Safe to Use?
Although a Victorian fireplace can look solid at a glance, you should treat it as unsafe until you’ve checked the structure, the flue, and the surrounding fabric of the house. Start with Safety considerations: look for cracked lintels, loose jambs, spalled brick, and failing hearth slabs; any movement needs stabilising before you touch finishes. Inspect the flue for blockages, collapsed liners, tar deposits, or historic ventilation changes, and get it swept and CCTV-checked if you can. Test for damp staining and salts that signal water ingress. Confirm Material compatibility before repairs: match lime mortar to original masonry, avoid hard cement on soft brick, and use heat-rated adhesives and sealants only where specified. If you smell fumes or see soot leakage, stop and seek help.
Decide: Decorative Feature or Working Fireplace
Before you restore your Victorian fireplace, decide whether it’ll be a decorative feature or a working heat source, because that choice drives every technical step. You’ll need to confirm safety and building-code requirements for liners, clearances, ventilation, and permits, then weigh upfront costs against ongoing energy efficiency. Finally, balance the visual authenticity you want with the heat output you’ll realistically get from the original design or a modern insert.
Safety And Building Codes
Why does your Victorian fireplace restoration plan need a safety-and-code decision from the start? Because “decorative” and “working” trigger different requirements for clearances, materials, and inspections. If you’ll keep it as fireplace décor, you can often cap the flue, seal openings, and focus on historical accuracy without introducing combustion risks—yet you must still protect nearby combustibles and confirm the chimney won’t shed soot or masonry.
If you’ll make it operational, you’ll need a certified chimney inspection, liner verification, sound hearth construction, and compliant mantel and surround clearances. You must also confirm venting, damper function, and smoke-tight joints. Pull permits where required, document changes, and schedule final sign-off before first use.
Cost And Energy Tradeoffs
Once you choose between a decorative feature and a working fireplace, you lock in two very different cost-and-energy profiles that affect everything from your restoration budget to your heating bills. If you keep it decorative, you’ll spend mainly on cosmetic repair—tile replacement, grate refurbishment, surround refinishing—plus optional lighting or a sealed insert. You also avoid chimney relining, flue work, and appliance certification, so your Cost analysis stays predictable and your ongoing costs stay near zero. If you restore it to operate, budget for liner, damper, hearth upgrades, ventilation, and swept-and-inspected flues, then add the firebox or stove unit and commissioning. Factor fuel price, servicing, and measurable Energy efficiency gains by choosing tight-sealing components and controlling air leakage.
Aesthetic Versus Heat Output
Although a Victorian fireplace can anchor a room with period character, you’ll get a very different end result depending on whether you prioritize visual authenticity or usable heat. Decide early, because the specs, approvals, and budget shift fast once you commit.
- Decorative-only: You can restore tiles, cast-iron insert, and mantel for maximum Aesthetic appeal, then cap the flue and fit a discreet vent to prevent damp.
- Working open fire: You keep the look, but accept low Heat efficiency and higher soot; add a fire-back and throat restrictor to improve draw.
- Stove or gas insert: You boost heat output while preserving the surround; confirm clearances and liner suitability.
- Hybrid: Use electric for daily heat, reserve solid fuel for occasions.
Tools and Supplies You’ll Actually Need
Before you lift a scraper or mix a patch, gather the right tools and supplies so you’re not improvising on fragile Victorian materials. Start with a carbide paint scraper, dental picks, nylon and brass brushes, and a HEPA vacuum nozzle for controlled debris capture. Keep a pH-neutral stone/ceramic cleaner, denatured alcohol for final wipe-downs, and microfiber cloths.
For repairs, use lime-based filler for plaster surrounds, refractory mortar for firebox joints, and a small pointing trowel plus margin trowel. Add a hawk, mixing tub, and digital scale so ratios stay consistent. For cast iron, bring wire wheels, rust converter, high-heat stove black or paint, and new rope gasket. Choose profiles and finishes that match Victorian design and preserve historical accuracy.
Prep the Room: Dust Control and Floor Protection
You’ve got the right scrapers, brushes, and repair mixes—now keep that work from spreading Victorian soot and plaster dust through the house. Seal the zone, protect finishes, and preserve Room ambiance while you work, so your decorative accents don’t end up gritty.
- Clear and cover: Remove soft furnishings, then cover remaining furniture with taped-down poly sheeting.
- Protect floors: Lay ram board or thick drop cloths, then tape seams and edges to stop grit migration.
- Control air: Shut vents, close doors, and hang a plastic zipper barrier; run a HEPA air scrubber if you’ve got one.
- Capture dust at source: Keep a HEPA vacuum nearby and clean as you go, especially around the hearth and skirting.
Strip Paint Safely (Cast Iron, Wood, and Masonry)
Once the room’s sealed and protected, you can strip layers of Victorian paint without scorching cast iron, raising wood grain, or softening historic mortar. Start with Paint removal tests in a hidden spot, then choose the gentlest method that works. On cast iron, use a pH-neutral stripper or low-odour gel, keep it wet, and lift residue with nylon or brass brushes—not grinders. On wood surrounds, avoid caustic paste; use solvent gel, scrape with a sharpened card scraper, and wipe with white spirit to prevent grain lift. On masonry, skip acids and high-pressure rinsing; use poultice stripper and stiff natural bristles. Follow safety precautions: gloves, goggles, P2/P3 mask, ventilation, and safe waste bagging.
Clean Tiles, Marble, Slate, and Encaustics Without Damage
Although Victorian hearth materials look tough, the wrong cleaner can etch marble, dull glazed tiles, and pull pigment from encaustics in minutes, so treat each surface as a separate job. Start dry: vacuum grit, then test every product in a hidden corner and use minimal water.
- Glazed tile cleaning: wipe with warm water plus a pH-neutral soap; lift soot with a nylon pad, not abrasives.
- Marble polishing: skip vinegar and limescale removers; use a marble-safe poultice for stains, then a fine polishing powder and felt pad.
- Slate: scrub with a soft brush and stone cleaner; rinse lightly and towel-dry to prevent blooming.
- Encaustics: avoid soaking; use distilled water and cotton swabs, then seal with breathable wax.
Restore Cast Iron Inserts, Grates, and Summer Covers
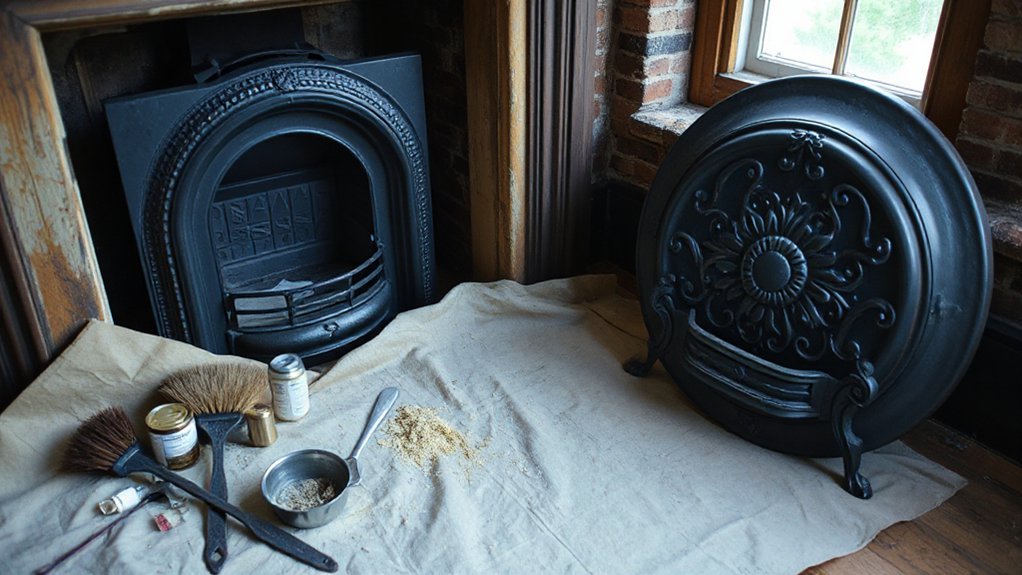
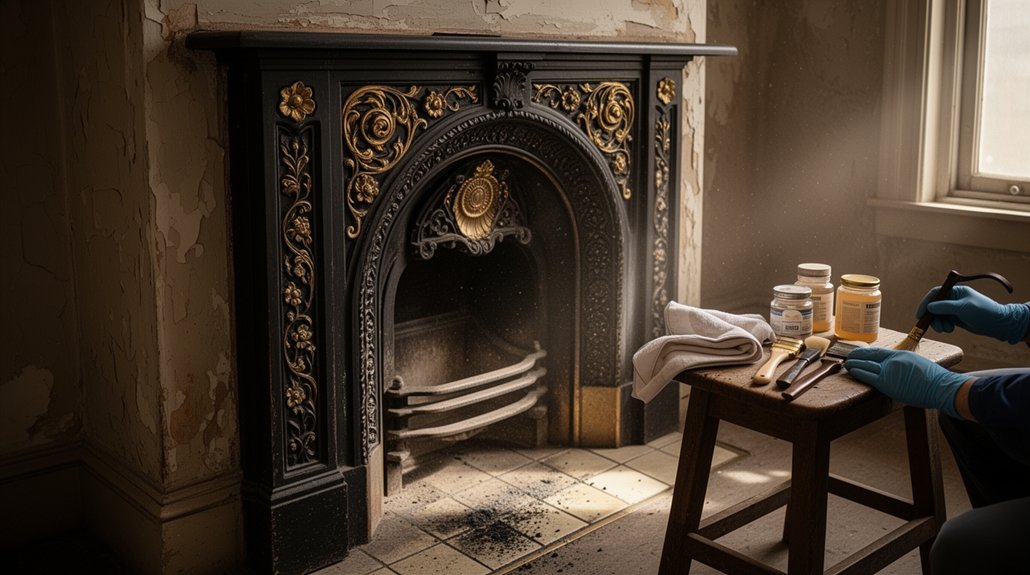
If your Victorian fireplace looks tired, the cast iron insert, grate, and summer cover usually carry the blame: soot, rust, and failing blacking flatten the detail fast. Start by removing ash and loose scale with a vacuum and stiff brush, then do Cast iron cleaning using a nylon abrasive pad and mineral spirits; avoid soaking joints. For rust, use fine wire wool or a rust converter only where pitting persists, and wipe back to bare metal. If you find Antique paint on ornate panels, test a small spot with a gel stripper and neutralise thoroughly to prevent bloom. Warm the iron slightly, then apply stove black or high-temperature polish in thin coats, working it into crevices. Buff hard once dry, and reassemble with new grate bars if needed.
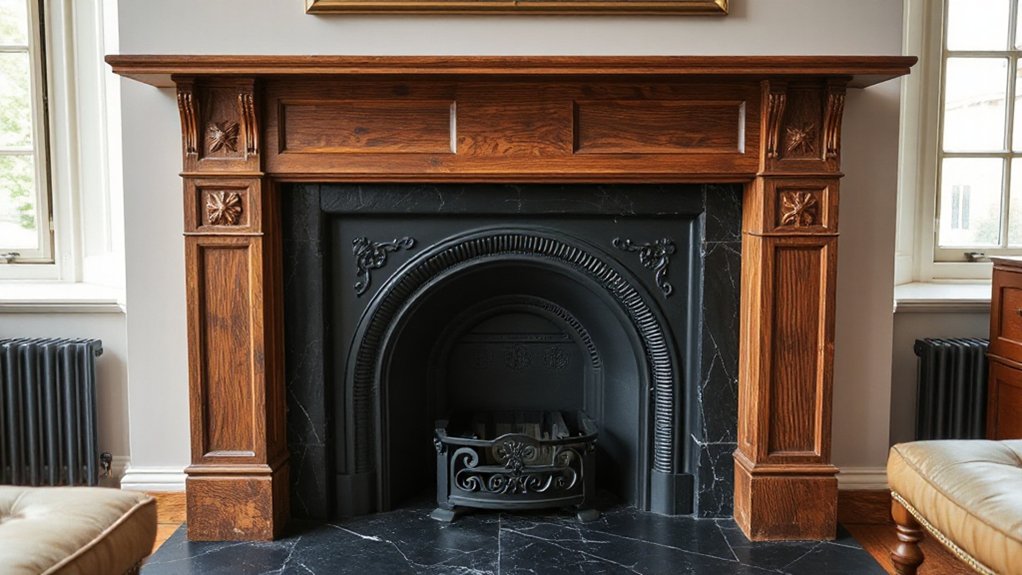
Repair Cracked Surrounds (Marble, Slate, Stone, Wood)
With the cast iron insert and grate back to a clean, crisp finish, flaws in the surround stand out straight away—hairline cracks, open joints, and slipped sections that can widen every time the fireplace heats and cools. Tackle Cracked surrounds methodically, and don’t rush cosmetic fillers over movement.
- Diagnose: probe cracks, tap for hollows, and check if the lintel or fixings are loose.
- Stabilise: pin stone/marble/slate with stainless dowels and epoxy; clamp timber, then reglue with reversible hide glue.
- Rebuild joints: reset slipped pieces on a flat bed; use thin shims, not wedges that telegraph.
- Finish: prioritize Material matching—colour, veining, sheen, and grain—then polish stone, or wax and tone wood for a seamless read.
Repoint Brickwork With Lime Mortar (Not Cement)
You’ll repoint Victorian fireplace brickwork with lime mortar because it stays breathable and flexible, letting moisture escape without cracking the bricks the way hard cement can. First, you rake out failed joints to a sound depth, brush and dampen the masonry, then pack fresh lime mortar firmly in thin lifts and tool the joint to match the original profile. You keep it lightly misted and protected from heat, frost, and fast drying until it cures slowly and bonds properly.
Why Lime Mortar Matters
Although cement mortar seems like the “stronger” choice, lime mortar is the correct material for repointing Victorian brickwork because it moves, breathes, and sacrifices itself before the bricks do. Cement’s rigidity locks moisture in; trapped salts and freeze-thaw cycles then spall faces, crumble arrises, and scar your fireplace surround. Lime mortar stays vapor-permeable, so damp can evaporate through the joints instead of migrating through brick. It’s also closer in strength to soft, fired Victorian brick, preserving Historical accuracy and reducing stress.
- It accommodates thermal and structural movement without cracking.
- It wicks and releases moisture, limiting decay behind the firebox.
- It’s reversible: joints fail first, protecting bricks.
- It matches historic texture and colour when finished.
Proper Repointing Technique Steps
Before you mix a single batch of lime, repointing a Victorian fireplace demands a methodical sequence. Rake out failed joints to a consistent depth (about 15–20mm), keeping the brick arrises sharp, and vacuum dust. Lightly mist the work so the masonry won’t rob moisture. For Historical accuracy, choose a breathable NHL 2/3.5 or lime putty mortar matched to original colour and aggregate—material sourcing matters, so buy graded sand and fresh lime from reputable suppliers. Pack mortar in thin lifts with a pointing iron, fully compacting to avoid voids. Finish to the original profile (often flush or slightly recessed), then brush back when thumbprint-hard. Protect from drafts, heat, and sun; keep damp-cured several days.
Open Up a Sealed Fireplace Without Harming the Chimney
When a Victorian fireplace has been sealed for decades, the goal isn’t to “rip it open” but to uncover it methodically so you don’t crack the original brickwork, disturb a fragile flue lining, or trigger a cascade of loose soot inside the chimney. Treat the sealed fireplace as a historic assembly, not demolition.
- Mark the original chimney opening by tapping for hollow sound and tracing brick bonds; photograph every layer before you lift anything.
- Remove modern infill first (plasterboard, breeze block, cement) with hand tools, working from the centre outward to keep edge bricks supported.
- Stop at any loose lintel or arched header; prop temporarily, then expose bearing ends before taking weight off.
- Bag soot as you go, seal the room, and cap debris paths to protect the flue.
Fix Draughts, Poor Draw, and Smoke Blowback
You’ll start by diagnosing your chimney’s draft with simple checks—flue obstruction, liner condition, and whether the stack height and pot are creating proper pull. Next, you’ll seal air leaks around the hearth, surround, and register plate so room air isn’t short-circuiting up the chimney and weakening the draw. Finally, you’ll prevent smoke blowback by addressing common triggers like a cold flue, negative pressure from extractor fans, and an oversized opening that needs a properly sized throat or canopy.
Diagnose Chimney Draft Issues
Although a Victorian fireplace can look perfectly restored, the chimney still has to pull hard enough to carry smoke up and out—otherwise you’ll fight draughts, a weak draw, or sudden smoke blowback into the room. Start with a methodical Chimney inspection and confirm performance with Draft measurement, so you fix causes, not symptoms.
- Check the flue is fully open and unobstructed; verify the damper plate isn’t warped or jammed.
- Inspect for soot falls, bird nests, or a failed liner; use a mirror, torch, or camera where safe.
- Measure draft with a manometer at the firebox; compare readings cold vs. pre-warmed to spot stack-effect problems.
- Test for downdraught by noting wind direction and chimney height relative to nearby roofs/trees; add a temporary cowl for proof.
Seal Air Leaks Around Hearth
Draft readings and flue checks can look fine on paper, yet gaps around the hearth still let room air short-circuit the fire and upset the chimney’s pull. Start by removing the fender and grate, then torch-test with a smoke pencil or incense along the hearth-to-floor joint, skirting, and fireplace surround edges; mark every draw point. For Air sealing, rake out loose mortar and ash, vacuum clean, then repoint with lime mortar on masonry joints or apply a fire-rated sealant where metal meets stone. Don’t block intentional vents. Add Hearth insulation by packing non-combustible mineral wool into voids behind the cast insert and under the hearth slab, then cap with mortar. Refit and retest; the room should feel calmer and steadier.
Prevent Smoke Blowback Causes
- Cold flue: Pre-warm it with a rolled newspaper torch or a heat gun up the throat to start upward pull.
- Competing extraction: Cooker hoods, bathroom fans, and tight windows can reverse flow; crack a nearby window during lighting.
- Obstructions: Birds’ nests, fallen liner, or heavy soot reduce draw; sweep and CCTV-inspect.
- Top-end faults: A low pot, downdraught, or missing cowl needs a taller terminal or anti-downdraught cowl.
Flue Liners and Chimney Fixes: When You Need Them
Before you light a restored Victorian fireplace, you need to know whether the flue can safely contain heat, smoke, and fumes—because a failing liner or damaged chimney won’t just reduce performance, it can push carbon monoxide, soot, and moisture back into the room and the masonry. During chimney maintenance, make flue inspection non-negotiable: look for crumbling parging, missing mortar joints, glazed creosote, or brick spalling inside the throat and smoke chamber. You’ll need a liner if the flue is oversized for the appliance, shows cracking or gaps, or leaks staining onto upstairs walls. You’ll need chimney fixes if the crown is cracked, flashing lets water in, or the stack leans. Don’t ignore persistent damp smells or white efflorescence.
When to Call a Professional (and What to Ask For)
Call a professional when you spot persistent smoke spillage, cracked firebrick, loose or missing mortar, damp staining around the breast, or any sign of a compromised flue. Choose a specialist who can show proven experience with Victorian materials, current compliance knowledge, and a clear plan for inspection, repair, and certification. Ask what tests they’ll run (smoke test, CCTV scan, draught and ventilation checks), what repairs they recommend and why, what approvals you’ll need, and what warranty you’ll get.
Signs You Need Help
Although plenty of Victorian fireplace work looks like simple cleaning or repointing, certain warning signs mean you shouldn’t keep poking at it yourself: persistent smoke spillage into the room, crumbling or missing firebrick, loose or bulging hearth tiles, salt staining or damp patches on the chimney breast, a strong soot/creosote odour, visible cracks through the surround or opening, or any evidence the lintel has shifted. When you spot them, stop using the fire and document what you see. You’re protecting both historical significance and safety, even when Modern innovations tempt quick fixes.
- Ask for a flue draw test and smoke test.
- Request a camera inspection of the liner and voids.
- Get a structural check of the lintel, jambs, and hearth bed.
- Confirm a written scope covering ventilation, clearances, and compliance.
Choosing The Right Specialist
When your Victorian fireplace shows any sign of structural movement, persistent smoke spillage, damp-related salt staining, or a suspect flue, you need a specialist—not a bigger brush or a faster patch. You should call one before you disturb soot, loose masonry, or cracked liners that can worsen drafts and carbon monoxide risk.
Choose a pro who restores, not just installs. Look for proven experience with Victorian fireplace history, listed-building constraints, and period-accurate detailing. They should understand Antique materials—lime mortar, soft brick, cast iron, glazed tiles—and how cleaning or repointing affects them. Prioritise someone who can inspect the flue path, assess hearth load paths, and specify reversible repairs. If they only propose cement, aggressive grinding, or “making it look new,” keep looking.
Questions To Ask Pros
How do you know it’s time to stop troubleshooting and bring in a professional? Call one when you smell persistent smoke, see cracked firebrick, notice crumbling mortar, or suspect a blocked flue. Before you hire, question them like you’d vet a conservator for Victorian decor or Antique furniture—materials and methods matter.
- What inspections will you run (CCTV flue scan, smoke test, draw test), and will you document findings?
- Which repairs do you recommend, and why: repointing, lining, replacing fireback, or stabilizing the surround?
- What historic-appropriate materials will you use (lime mortar, cast-iron parts), and what will you avoid?
- What’s your scope, timeline, total cost, and what warranty or compliance certificates (HETAS/Gas Safe) do you provide?
Frequently Asked Questions
How Do I Date My Victorian Fireplace and Confirm It’s Original?
Check casting stamps, maker’s marks, and patent dates, then match tiles, grate, and mantel profiles to dated Victorian design catalogs. Compare soot wear and mortise joints. Use antique cleaning, then inspect hidden screw heads for age.
What Restoration Steps Affect My Home Insurance or Listed-Building Consent?
You’ll trigger Insurance implications and Listed building regulations when you alter chimney structure, flue liners, hearth depth, or install stoves. Don’t hack masonry or remove surrounds; document works, use certified installers, and seek consent first.
How Can I Source Period-Accurate Replacement Parts and Reproduction Tiles?
You’ll secure period-accurate parts through discreet antique sourcing: salvage yards, reclamation dealers, auction houses, and specialist forums. For tile reproduction, use heritage manufacturers from pattern samples, insisting on glaze tests, dimensions, and documented provenance.
What Are the Typical Restoration Costs and Timelines for Different Fireplace Types?
You’ll typically spend $300–$1,500 and 1–3 days for cast iron; $1,500–$6,000 and 1–4 weeks for tile; $2,000–$10,000 and 2–8 weeks for stone, using restoration tools, historical references.
How Do I Maintain the Restored Fireplace to Prevent Future Corrosion and Stains?
You maintain it by cleaning, by drying, by sealing—regularly. Use gentle Cleaning techniques: soft brush, pH-neutral soap, no abrasives. Apply protective coatings: microcrystalline wax or heat-rated lacquer. Ventilate, fix leaks, wipe soot immediately.
Conclusion
You’ve now got the core steps to restore a Victorian fireplace with confidence: identify original materials, open it up carefully, fix draughts and draw issues, and only reline or repair the chimney when diagnostics prove it’s needed. Work methodically, protect the room, and match historic finishes rather than “upgrading” them. Done right, the result feels like polishing a heirloom watch—precise, restrained, and built to last. Call a pro when safety’s uncertain.