Skip the work triangle and design around your real workflow: list your top five repeat tasks, then map start, prep, heat and landing points for each. Build five zones—Pantry, Prep, Cook, Serve and Clean—and store tools where you use them (knives, boards and spices within one step of the main worktop). Keep clear routes at 1,000–1,200mm, allow door/drawer swings, and add 300–450mm landing at corners. Next, you’ll see layout-specific fixes.
Key Takeaways
- Map your top five repeated tasks and place pantry, prep, cook, serve, and clean zones to match real step-by-step workflows.
- Keep clear pathways: 1,000–1,200mm main routes, 1,100–1,200mm around islands, and avoid pinch points below 900mm when carrying hot trays.
- Put landing space where actions happen: 600–900mm prep run, plus 300–450mm corner landings to prevent handle clipping and collisions.
- Locate frequently used tools within one step of the main worktop using drawer inserts and vertical storage for spices, boards, and knives.
- Prevent clashes by mapping door swings and drawer pulls, keeping bins and dishwashers off main lanes, and aligning fridge near prep for unloading.
Define Your Real Kitchen Workflow (Not a Triangle)
Although the classic “kitchen triangle” still gets quoted in UK design guides, it rarely matches how you actually cook, unload the dishwasher, or make tea. Define your workflow by listing your top five repeated tasks: tea/coffee, breakfast, main meal prep, washing-up, and bin/recycling runs. Then assign each task a start point, prep zone, heat zone, and landing zone, noting where you pause, turn, or carry hot items. Use that map to drive Appliance placement: put the kettle near the sink and mugs, place the hob with a clear landing strip, and align the fridge with the main prep surface. Plan Kitchen lighting to match tasks—bright, shadow-free under-cabinet LEDs over prep, warmer ambient elsewhere.
Map Your Grab-to-Clean Path in 5 Minutes
Start by listing your high-frequency items (mugs, pans, chopping board, bin liners) and where they currently live. Then trace one “grab-to-clean” route—take item, prep/cook, plate, scrape, load dishwasher or wash-up, return—timing and counting steps. Mark bottlenecks (cross-traffic, tight corners, awkward reach) and note quick fixes like relocating storage, swapping hinge direction, or shifting the bin nearer the sink.
Identify High-Frequency Items
Before you move a single cupboard insert, map the items you touch most so your layout supports the real “grab-to-clean” workflow. Spend five minutes listing High frequency items by task, not by room: prep, cook, serve, wash-up. You’re building an ergonomic baseline for Kitchen essentials, so be ruthless—if you don’t use it daily or every other day, it’s not “high-frequency”. Use a notepad and tally each touch during a normal weekday meal; frequency beats preference. Then tag each item with a storage requirement (dry, chilled, heat-safe) and handling mode (one-handed, two-handed, sharp, heavy). This spec stops you wasting prime zones on rarely used kit. Prioritise:
- Kettle, mugs, tea/coffee, sugar
- Chopping board, knives, oils, salt
- Washing-up liquid, sponge, bin liners
Trace Grab-To-Clean Route
Once you’ve tagged your high-frequency kit, trace the exact route you take from first grab to final wipe-down so the layout matches your real movement, not an idealised plan. Set a 5‑minute timer, then run one normal task: make tea, prep lunch, load the dishwasher. As you move, note each touchpoint: drawer, worktop, sink, bin, hob, fridge, dishwasher, cleaning caddy.
Sketch a simple plan view on A4 and draw arrows in sequence. Add distances in centimetres and mark direction changes. Check that Appliance placement supports your order: kettle near socket and water, chopping zone beside sink, bin within a half-turn, cloths under the sink. Overlay Creative decor last—rail hooks, magnetic strips, or open shelves—only if they don’t force extra steps or reaches.
Mark Bottlenecks And Fixes
After you’ve drawn your arrows and touchpoints, circle every hesitation point—tight turns, cross-traffic, double-backs, and reach-over zones—and label the cause (blocked landing space, drawer clash, no socket, bin too far, dishwasher door in the way). These are your Bottleneck causes; quantify them fast: note the pinch width (aim 1,000mm clear), door swing arcs, and the number of steps lost per cycle.
Then apply Fixing solutions that don’t depend on a triangle: shorten transfers, reduce clashes, and add “landing” per UK Part P-safe power and sensible binning.
- Swap hinged doors for drawers, or fit 110° hinges to cut clash zones.
- Relocate bin to the prep edge; add a 300–400mm landing strip by sink/hob.
- Move sockets to the splashback; reposition dishwasher to avoid the main aisle.
Set Up 5 Kitchen Zones: Pantry, Prep, Cook, Serve, Clean
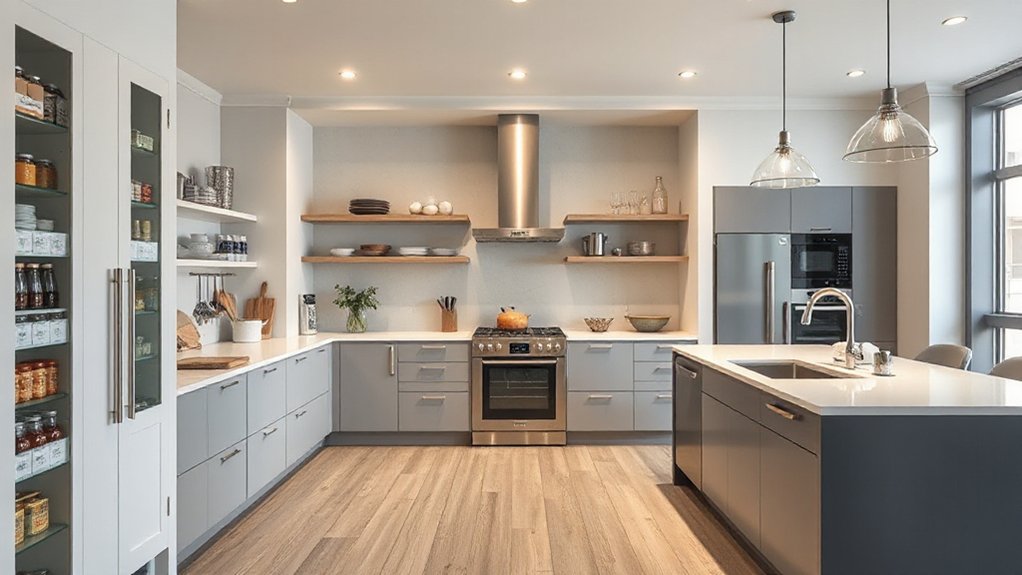
Although every kitchen has its quirks, you’ll get the most efficient workflow by setting it up as five distinct zones—Pantry, Prep, Cook, Serve, and Clean—so each task has a dedicated landing spot and you’re not criss-crossing the room. Start with Pantry storage near your main entry route: tall larder, pull-outs, and a counter drop-point. Keep Prep central: clear worktop, knife block, bins, and mixing bowls; use Decorative accents sparingly so they don’t steal usable depth. Put Cook where services already run: hob, oven, and extractor, with Appliance placement that keeps hot doors out of traffic. Create a Serve zone by the dining doorway with plates, cutlery, and a staging surface. Finally, anchor Clean around the sink, dishwasher, and recycling, with detergents and tea towels within arm’s reach.
Zone Spacing That Saves Steps (Rules of Thumb)
You’ll save time by setting practical separations between zones—keep Prep near Pantry and Cook, and place Clean close to Serve to cut return trips. Cluster high-frequency tasks (kettle, mugs, bin, chopping board) within a single turn or two steps of where you use them most. Protect movement by keeping primary walkways at least 1,000 mm clear (aim 1,100–1,200 mm for two-person traffic) and maintain safe clearance in front of ovens, dishwashers, and drawers.
Ideal Zone Separation Distances
How far apart should your kitchen zones sit to save steps without creating traffic jams? Aim for tight, legible spacing: you want one pivot, not a hike. In UK layouts, treat 600mm as your basic module and plan clearances around open doors and drawers. Keep your primary run compact, but don’t compress so much that appliance doors clash with cabinet finishes or you lose landing space on countertop materials.
- Between prep and hob: 900–1,200mm, giving a safe set-down strip and elbow room.
- Between hob and sink/clean-up: 1,200–1,800mm, so splashes and heat don’t collide, yet you’re still one step away.
- Between parallel runs (galley): 1,000–1,200mm clear, widening to 1,300mm if both sides use deep drawers.
High-Frequency Task Clustering
When you cluster the tasks you do most—making tea, prepping dinner, loading the dishwasher—you cut steps without squeezing the room into a bottleneck. Build “micro-zones” around sequences: kettle–mugs–tea/coffee; hob–prep–bins; sink–dishwasher–drying rack. As a rule of thumb, keep the primary items for each sequence within one arm’s reach or a single pivot, not a full stride. Place the most-used drawers between hip and shoulder height so you maintain ergonomic posture and don’t rack your back. Give landing space beside key kit: a short stretch of worktop next to the kettle, hob, and sink stops awkward hovering. Duplicate small tools (chopping boards, scissors) across zones to protect user comfort and speed.
Clear Walkway Width Rules
Although workzones should sit close enough to cut steps, you still need clear walkway widths so doors, drawers, and people don’t clash. Treat the Clear walkway as a dimensioned corridor, not leftover space, and you’ll maintain safety clearance during peak use. For UK homes, measure between finished faces (unit fronts, island panels) and check appliance doors at 90°.
- Aim for 1,000–1,100mm between opposing runs for two-person passing; 900mm is a tight single-cook minimum.
- Keep 1,100–1,200mm between an island and a run so drawers can open while you stand behind them.
- Allow 1,200mm where a walkway crosses the fridge, oven, or dishwasher zone, preventing door-swing pinch points.
Mark these widths on plan before fixing cabinetry.
Put the Sink Where You Actually Prep
If your main prep zone sits on one stretch of worktop, put the sink there too so rinsing, washing, and draining happen without crossings. You’ll cut steps, reduce shoulder twists, and keep knives and wet veg in one controlled area.
Set the bowl so its front edge aligns with your normal Counter height and stance; you shouldn’t need to hunch or reach. Choose a sink depth that won’t force wrist flexion when lifting pans. Optimise Faucet placement for your dominant hand, with the lever reachable without stretching across the bowl. Keep the spout centred over the drain line to minimise splash. In compact UK kitchens, a 1.0–1.5 bowl often gives enough wash volume while preserving continuous prep flow.
Build a Prep Zone With Landing Space on Both Sides
Because most cuts, chops, and mixes happen in a tight footprint, you’ll get a safer, faster workflow by building a dedicated prep zone with clear landing space on both sides of the board. Aim for a 600–900mm run, centred on your primary worktop, so you can park ingredients left and finished prep right without crossing hands. Keep the surface continuous and wipe-clean; undermount sinks and flush hobs help Kitchen aesthetics while preserving usable depth.
- Leave at least 300mm “landing” each side of the board for bowls, scales, and trays.
- Plan Appliance placement so the hob and oven sit adjacent, not within the cutting run.
- Use task lighting and a contrasting worktop edge to improve visibility and finger clearance.
If space is tight, add a pull-out worktop to create temporary landing space.
Keep Knives, Boards, and Spices Within One Step
You’ll cut prep time and awkward reaches if you consolidate your prep tools into one tight zone: knives, boards, and core spices all within a single step of your main worktop. Use vertical spice storage (wall rack, rail, or inside-cupboard pull-out) to keep seasonings visible without stealing counter space. Park chopping boards by the sink—upright in a slot or divider—so you can rinse, drain, and reset fast.
Consolidate Prep Tool Zone
When you consolidate your prep tool zone, you cut micro-movements and reduce cross-traffic between hob, sink, and worktop. Build one prep station on the main run, ideally 600–900 mm of clear worktop, and keep everything you touch in arm’s reach. Use consolidated storage so you don’t hunt through mixed drawers, and so guests don’t interrupt your workflow.
- Place knives and boards in the same drawer stack, directly under the primary chopping area.
- Store your everyday spices in a shallow internal drawer beside the boards, not across the kitchen.
- Add a small caddy for peelers, microplane, thermometer, and digital scales, kept front-of-drawer.
You’ll reduce turning, cut reach distance, and keep pans and washing-up routes separate.
Use Vertical Spice Storage
A consolidated prep station works best if spices sit in the same one-step radius as your knives and boards, and vertical storage makes that easy without stealing worktop. Mount a slim rail with clip jars, or fit a narrow pull-out rack beside your prep run so you reach seasonings without turning away from the board.
Prioritise spice organization by grouping by cuisine or frequency, then label jar lids for top-down reading under UK under-cabinet LEDs. Keep jar heights uniform to prevent knock-overs and ensure the rack clears cabinet doors. If you rent, use adhesive-backed metal strips with magnetic tins; for owners, screw a plywood backer into studs and fix the rack to it. Set your “daily six” at eye level, and store refills higher up nearby.
Place Boards By Sink
Where do most food-prep steps start and end? At the sink, so treat it as your micro-prep hub. Prioritise placing boards beside the bowl, not across the room, to cut steps and reduce drip trails. Use sink organization to stage knives, boards, and spices within one reach zone, so you can rinse, chop, season, and rinse again without turning. Keep clearances tight but safe: allow a 300–450 mm landing strip on at least one side of the sink, and store boards vertically to dry.
- Fit a slim board rack in the adjacent base unit or on the end panel
- Add a magnetic strip or in-drawer knife tray within one step
- Park everyday spices in a narrow pull-out or wall rail by the sink
Place Appliances to Match Your Zones (Fridge, Oven, Microwave)
Although your kitchen zones can look tidy on paper, they won’t feel ergonomic unless the fridge, oven, and microwave sit exactly where the work happens. Start with appliance placement by locking each unit into its primary task zone, then refine for zone matching and reach. Put the fridge on the edge of your prep zone, close to the main worktop, so you can unload and grab chilled items without crossing the room. Place the oven within the cook zone, ideally beside your hob run, with a heat-safe landing surface at one side for trays. Position the microwave where you plate and reheat: near crockery storage and a clear counter. Keep door swings clear of drawers and corner units for reliability.
Plan Traffic Lanes: Aisle Widths and “No-Collision” Paths
Once you’ve locked the fridge, oven, and microwave into their zones, check that people can move between them without pinching past open doors or each other. Good traffic management starts with clear, measurable aisles: aim for 1,000–1,200mm in primary routes, and don’t drop below 900mm where you’ll carry hot trays. Map door swings and drawer pull-outs so they don’t overlap your walking line; that’s collision prevention, not luxury. Keep routes straight, and avoid forcing U-turns around islands or peninsulas.
- Allow 1,200mm between opposing runs when appliances face each other
- Keep 300–450mm ‘landing’ space at corners to avoid clipping handles
- Put bins, dishwashers, and tall units off the main lane, not on it
Design for Two Cooks (Separate Prep + Cook Areas)
If you regularly cook as a pair, split the kitchen into a dedicated prep station and a separate cook zone so you’re not sharing the same 600mm of worktop. Put the sink, bin and 900–1200mm landing space in the prep run, ideally under task lighting, with clear access to the fridge. Keep the cook zone around the hob and oven with 300–600mm heat-safe landing on both sides, plus a clear route to pans. Aim for 1000–1200mm between opposing runs so you can pass without contact. Choose Kitchen color schemes that visually separate zones (lighter prep, darker cook) to reduce errors. Specify Appliance energy efficiency (A-rated, induction) to cut waste heat and shorten cooking cycles.
Store Items Where You Use Them: A Drawer-by-Drawer Plan
Separate prep and cook zones only work at full speed when your storage mirrors those workflows. Map each drawer to a task, then lock it in with drawer organization inserts so you don’t migrate tools mid-recipe. Prioritise item accessibility: heavy, daily-use kit goes between knee and shoulder height; occasional items shift lower or higher. Keep duplicates minimal and store by “point of use”, not by category, so you cut steps and reach. Label dividers on day one, then review after a week’s cooking and adjust by frequency.
- Prep drawer: knives (inserts), peelers, graters, microplane, measuring spoons.
- Hob-side drawer: spatulas, tongs, ladles, thermometer, splash guard clips.
- Cleaning/tea drawer: bin liners, cloths, washing-up brush, teabags, teaspoons.
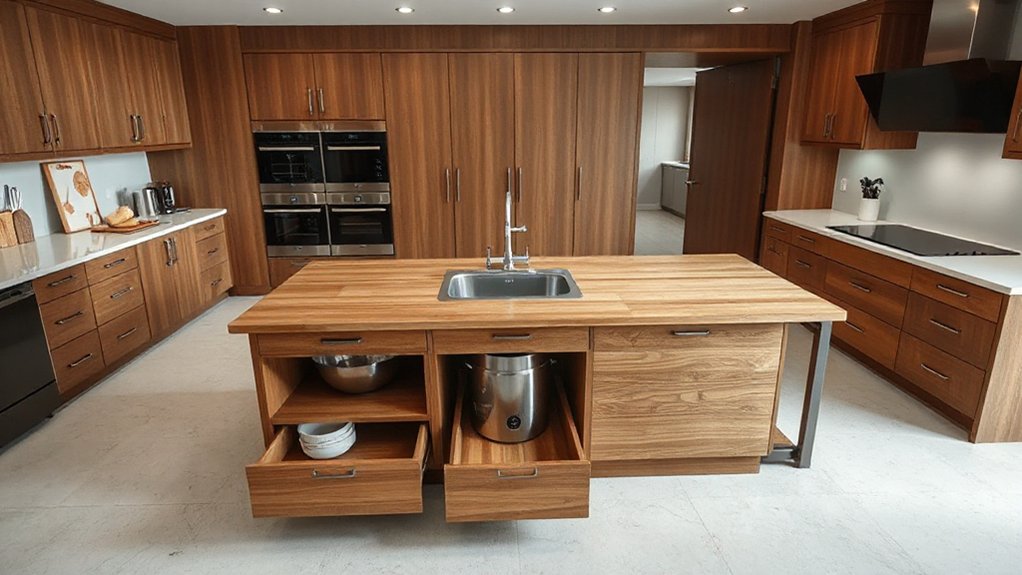
Optimize Corners and Islands for Storage + Flow
Although corners and islands often look like “bonus” space on a plan, they can either streamline your routes or create dead zones that trap kit. Treat them as engineered zones, not leftovers.
For corner storage, avoid deep shelves you can’t see. Specify LeMans pull-outs, a carousel, or a full-height corner larder; label the intent by task (pans, small appliances). Keep weight low and retrieval single-handed. If you’ve got a blind corner, use a wide drawer bank on the adjacent run instead.
For island flow, protect clearances: aim for 1,000–1,200mm aisles where two people pass, and don’t place appliances so doors conflict. Put bins, prep tools, and a power point on the island face you’ll actually use.
Ergonomic Layouts for Galley, L, U, and Open-Plan Kitchens
You’ll tune ergonomics by matching the layout to your workflow: in a galley, set clear prep–cook–clean zones and keep the aisle wide enough for two-way use. In L and U kitchens, position hob, sink, and fridge to cut reach and turning, and protect corners from dead space that blocks flow. In open-plan schemes, you’ll prioritise straight, obstruction-free pathways past the kitchen and set landing space at key appliances to stop cross-traffic collisions.
Galley Workflow Zones
When you’re working with a galley kitchen, define clear workflow zones along the two runs so movement stays linear and interruptions don’t bottleneck the aisle. Put “wet” tasks (sink, dishwasher, bins) on one side and “hot” tasks (hob, oven, microwave) on the other, keeping prep between them. Aim for a 1,000–1,200 mm clear aisle so two people can pass without twisting, and keep frequently used items between knee and shoulder height.
- Set a prep stretch of 600–900 mm beside the sink for rinse-to-chop flow.
- Use drawer-based storage to cut reach, especially for pans under the hob.
- Apply zone color coding on handles, end panels, or LED strips to reinforce Galley aesthetics without clutter.
L, U, Open-Plan Pathways
As soon as you move beyond a straight galley, you need to control turning points and through-routes so the sink–prep–hob sequence stays short and uninterrupted. In an L-shape, keep the main run on the longer leg and place the fridge at the open end to stop cross-traffic. Use a 1,000–1,200mm aisle if you expect two cooks. In a U, reserve the base of the U for prep, put hob and sink on opposing legs, and maintain 1,050–1,200mm between runs to prevent door clashes. For open-plan, define a “no-cut-through” lane with an island or peninsular and align sockets, bins, and landing zones on the working side. Protect kitchen aesthetics with coherent color schemes that visually separate traffic from task areas.
Outlets and Lighting That Reduce Reaching and Squinting
Although worktops and appliance zones get most of the attention, outlet and lighting placement often decides whether a kitchen feels effortless or annoying. Plan outlet placement around where you actually prep, blend, charge and clean, so leads don’t cross walkways. Put sockets in upstands or under wall units to keep splash zones clear and reduce bending; use RCD protection and follow UK Part P and BS 7671 via a qualified electrician.
Lighting positioning should eliminate shadows from your body at the hob and sink. Layer task and ambient light, and keep colour rendering high so you can judge food.
- LED strips under wall units, diffused, 4000K for prep
- Pendant or track over islands, glare-controlled
- Switched socket bank near tea/coffee station, at hip height
Ergonomic Kitchen Layout Mistakes to Avoid (and Fixes)
If your kitchen still feels awkward after you’ve chosen “nice” units and appliances, the layout usually carries a few repeat-offender ergonomic faults: pinched routes, mis-sized work zones, poorly placed tall storage, and doors or drawers that clash in daily use.
Fix pinch points by keeping main walkways at 1,000–1,200mm and allowing 1,200mm behind seats. Stop “micro-prep” by giving your primary prep run 900mm minimum, with the bin and chopping board within arm’s reach. Put ovens and tall larders where you don’t cross the hob zone; aim for a straight, low-traffic retrieval line. Prevent clashes by checking door arcs and specifying pull-outs, pocket doors, or reduced-depth units. Keep Cooking accessories in shallow drawers near prep, and treat Kitchen decor as vertical, out-of-the-way storage.
Frequently Asked Questions
How Do I Adapt an Ergonomic Layout for Wheelchair or Limited Mobility Use?
Prioritise clear 1200mm turning space, specify Accessible countertops at 760–860mm with knee clearance, fit wheelchair friendly fixtures (lever taps, pull-out shelves), place appliances at mid-height, and guarantee 900mm circulation routes throughout.
What Countertop Height Works Best for Tall or Short Cooks?
You’ll get best results with countertop height 850–900mm for average; go 920–950mm for tall cooks, 800–850mm for short. Specify Adjustable countertops or mixed-height runs; align hob lower, prep higher, minimise shoulder strain.
How Can I Reduce Noise Between Appliances in an Open-Plan Kitchen?
Like turning down a radio, you’ll cut open-plan appliance noise by adding appliance insulation, specifying low‑dB models, fitting anti‑vibration feet, separating units with soundproof barriers, and sealing gaps with acoustic mastic. Keep clearances per UK specs.
What Are Budget-Friendly Upgrades That Improve Ergonomics Without a Remodel?
Add Affordable accessories: pull-out organisers, soft-close dampers, and D-handles to reduce wrist strain. Fit non slip mats, under-cabinet LEDs, and a tap aerator. Adjust shelf heights, add a perching stool.
Which Kitchen Layout Changes Add the Most Resale Value?
You’ll add most resale value by opening sightlines, maximising usable worktop runs, and improving flow. Prioritise Smart storage, Lighting improvements (task LEDs, under-cabinet), and better extraction. Keep plumbing in place; upgrade doors/worktops.
Conclusion
You don’t need a work triangle to build an ergonomic kitchen; you need a workflow that matches how you cook. Map your grab-to-clean path, then lock in clear zones—pantry, prep, cook, serve, clean—with sensible spacing and task lighting. Put the sink where you actually prep, and use corners and islands for storage without blocking circulation. Add outlets at use points to cut reaching. Why walk extra steps every day?