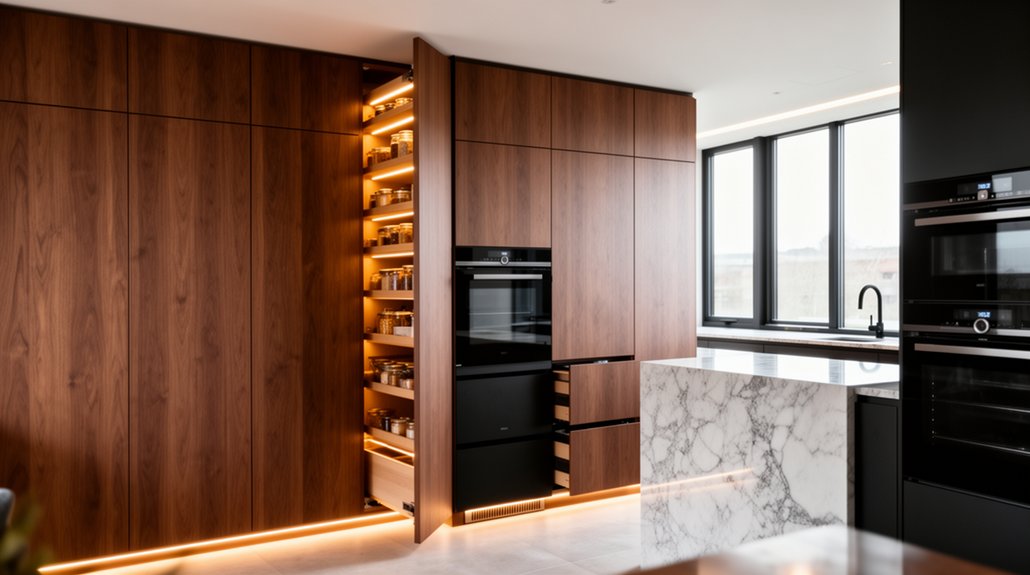
You’ll get concealed storage and a hidden pantry right in a modern UK refurb by measuring the full envelope first (depth, clearances, services), then designing joinery to disappear behind 2–3mm reveals, shadow gaps, and matched paint sheen. Place it near the fridge–sink–hob zone without blocking aisles, and choose walk-in, pull-out larder, corner swing-out, or a false-wall nook to suit your shop. Use push-to-open, soft-close hardware rated for door weight, plus ventilation and task lighting. There’s more to refine next.
Key Takeaways
- Measure usable envelope, clearances, and service routes, then audit shopping habits to specify pantry capacity in shelf metres or litres.
- Choose the concealed format—false wall, full-height larder, under-stairs, or nook—positioned near prep zones without blocking aisles or door swings.
- Build flush panelled doors with consistent 2–3mm reveals, shadow gaps, and matching paint sheen; use push-to-open or recessed pulls.
- Specify robust, adjustable hardware: concealed hinges and touch latches rated for door weight, fixed into solid carcass timber with soft-close dampers.
- Plan moisture control, ventilation, task lighting, and wipe-clean MR MDF finishes early; avoid heat sources and confirm stud walls, services, and escape-route rules.
Set Your Hidden Pantry Goals (Space, Look, Budget)
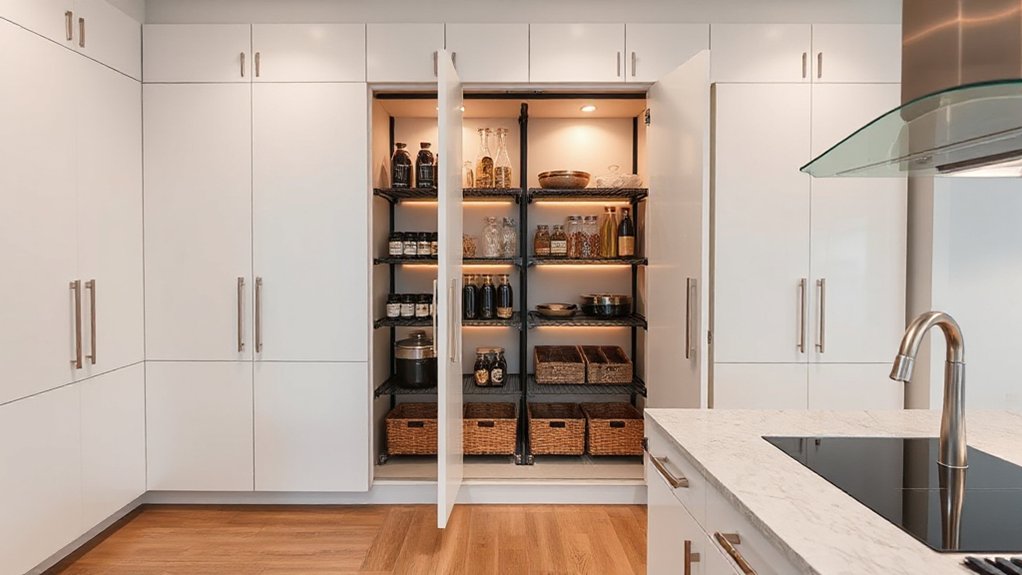
Before you start sketching door ideas or buying shelving, set clear goals for your hidden pantry around three constraints: space, look, and budget. Measure the usable envelope: depth behind the run, swing clearance, and service routes for sockets, pipework, and ventilation. Decide whether you’re building a full-height larder, under-stairs store, or a shallow “false wall” pantry, and write target capacities in litres or shelf metres. Lock in the visual intent early: match door lines, reveals, and handle strategy to the kitchen, and specify Color schemes that blend with cabinetry or deliberately mask shadow gaps. Then set budget bands for joinery, hardware, and fire-rated linings if near escape routes. Make Material choices based on moisture, load rating, and cleanability, not trend.
List Your Daily Clutter Zones (What to Hide)
Three clutter zones usually drive the need for concealed storage: the worktop “drop zone” (post, keys, chargers, kid’s kit), the kitchen-service strip (small appliances, mugs, washing-up bits, tea/coffee supplies), and the bulk-backup area (multipacks, pet food, recycling bags, cleaning products).
Walk your kitchen at peak times and log what lands where for a week. Measure each zone’s footprint in mm, note power points, and record how often you touch each item. Group by task: arrivals, drinks, cooking prep, washing-up, and replenishment. Then decide what must stay accessible versus what you can hide daily. Keep only one “open” surface per zone to control visual noise. Align fronts, Decorative accents, and colour schemes with the room so hidden items don’t force mismatched caddies or jars onto view.
Hidden Pantry Options: Walk-In, Pull-Out, Nook, Wall
Where can you hide a pantry without sacrificing workflow or floor space? You’ve got four reliable formats, each with different build requirements. A concealed walk-in suits deeper plans; specify pocket or jib doors, fire-rated linings if needed, and plan hidden lighting on PIR sensors. Add ventilation options: a ducted extract, passive grilles, or a dehumidifier point.
Pull-out pantries work in 150–300mm voids; choose full-extension runners, anti-rack frames, and adjustable wire trays for tins. A nook pantry uses an existing recess; fit shallow shelving, door-mounted racks, and low-heat LED strips. A wall pantry becomes a cabinet run; integrate push-to-open fronts, internal drawers, and task lighting to keep labels readable. All four benefit from wipe-clean finishes.
Where to Place a Hidden Pantry in Your Layout
Although a hidden pantry disappears visually, its position still needs to support your main prep route, so place it tight to the fridge–sink–hob zone without cutting across the working aisle. In UK kitchens, aim for a short reach from the fridge for unloading and from the hob for grabbing staples, while keeping door swing or pull-out travel clear of the 1,000–1,200mm aisle.
- Tuck it on the return of an L or U to avoid through-traffic.
- Use an end-of-run tall housing beside the fridge for clean lines.
- Put it behind Decorative door finishes that match adjacent cabinetry.
- Add Hidden lighting options triggered by a door reed switch.
- Avoid placing it opposite ovens or dishwashers where heat/steam builds.
Check stud walls, services routes, and ventilation before finalising.
How Much Pantry Space You Really Need
Because hidden pantries can swallow floor area quickly, you’ll get the best result by sizing yours to your actual buying and cooking habits rather than copying a showroom. Start by auditing two typical shops: one “big” and one “top-up”, then count how many categories you store (tins, dry goods, small appliances, cleaning products). If you batch-cook or buy from Costco, you’ll need more volume; if you shop little-and-often, you can stay compact. In UK homes, a concealed pantry often replaces a run of base units, so check you’re not sacrificing essential worktop. Plan Kitchen lighting so you can see labels in a deep recess without glare. Choose cabinet materials that cope with humidity, spills, and frequent door cycles.
Shelf and Drawer Sizes for Real Groceries
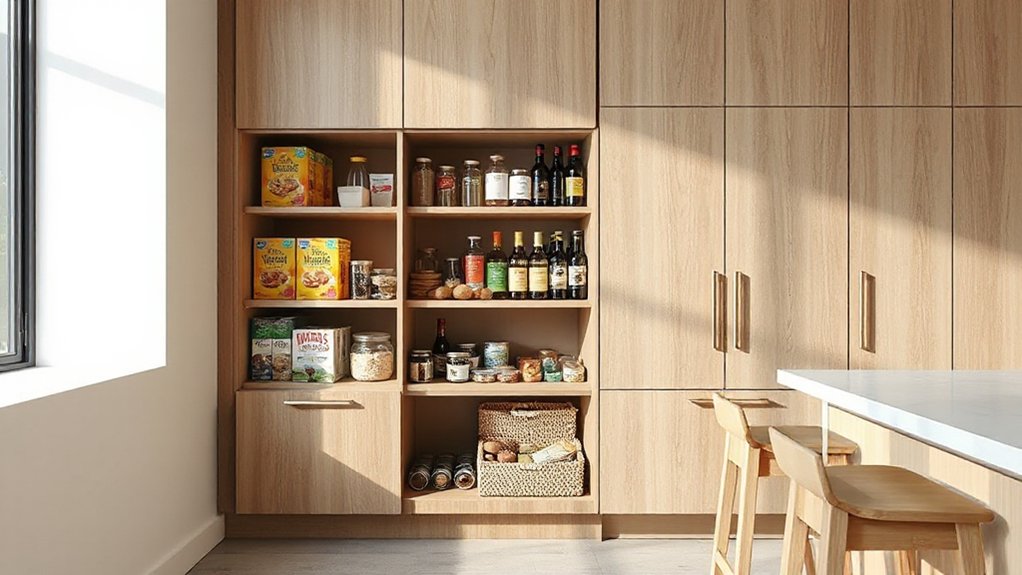
Once you move past generic “pantry shelves”, you’ll get far better day-to-day usability by sizing shelves and drawers to the packs you actually buy in UK supermarkets. Build Grocery organization around typical heights and depths, then lock it in with Shelf customization so nothing topples or gets lost at the back. Use 300–330mm internal depth for tins and jars; go 380–450mm for cereal boxes and family crisps. Keep shelf clear heights adjustable in 25–32mm steps, but start from real goods. Prefer full-extension drawers for packets, with 90–120mm sides to stop slumping. Leave 10–15mm finger clearance above high-turnover items for fast grabs.
- 160–200mm: tins, spreads
- 220–260mm: jars, sauces
- 280–320mm: pasta, rice
- 330–380mm: cereal
- 450mm: bulk packs
Plan Outlets, Lighting, and Ventilation Early
Where will you actually plug things in, and how will you stop a sealed-in pantry turning damp or stale? Decide early whether you need sockets for a stick vacuum, coffee kit, or charging station, then set cable routes before you close studwork. Put outlets above worktop height and include a switched spur for integrated LEDs or a small extractor. Use low-profile LED strips in aluminium channels under shelves to avoid hot spots and to keep sightlines clean behind disguised doors. Choose 3000–3500K to suit your colour schemes and stop labels looking dingy. For ventilation, build in a discreet transfer grille to the room or duct to existing extract if practical. Your material choices matter: moisture-resistant MDF, sealed ply edges, and wipeable finishes reduce odour retention.
Meet Code: Clearances, Egress, Accessibility
Before you fix a concealed door or pantry opening, you’ll check clearances and door swing so it doesn’t foul walkways, appliances, or emergency escape windows. You’ll keep egress routes clear and make sure the hidden entry can be opened quickly without special knowledge or key-operated latches. If you’re aiming for inclusive design, you’ll also allow for wheelchair access and usable reach ranges, aligned with UK Building Regulations and BS 8300 guidance.
Clearance And Door Swing
How much space do you really need for a concealed pantry door to open safely and still meet UK requirements? You’ll need enough swing clearance to avoid pinch points and collisions, while balancing privacy concerns and aesthetic considerations. Use Approved Document M as a baseline for clear opening width and approach space, then detail the door set so skirtings, architraves, and concealed hinges don’t reduce the effective aperture.
- Allow a clear opening width that isn’t narrowed by stops or rebated frames
- Keep a clear zone beside the latch side for approach and handle reach
- Check door leaf thickness vs concealed hinge throw to prevent binding
- Avoid swing into tight corridors; choose pocket/slide if clearance is limited
- Maintain floor level thresholds; no raised lips that snag feet or trolleys
Egress Routes And ADA
Although a concealed pantry door can disappear visually, it still has to behave like a normal door in a protected route: you must keep escape widths, sightlines, and access clearances intact even when the door’s “hidden” detailing is shut. Check Approved Document B for escape routes and avoid placing the door where it narrows a corridor below required width or creates a dead end. Guarantee the door opens easily without a key and doesn’t rely on magnetic catches that could hold in fire conditions. Provide clear signage only where required for Egress compliance; don’t disguise emergency exits. For accessibility, follow Approved Document M and target ADA accessibility principles: level thresholds, adequate manoeuvring space, and reachable handles at suitable heights. Keep lighting and contrast so users can find it quickly.
Flush Cabinet Walls That Hide Full Storage Banks
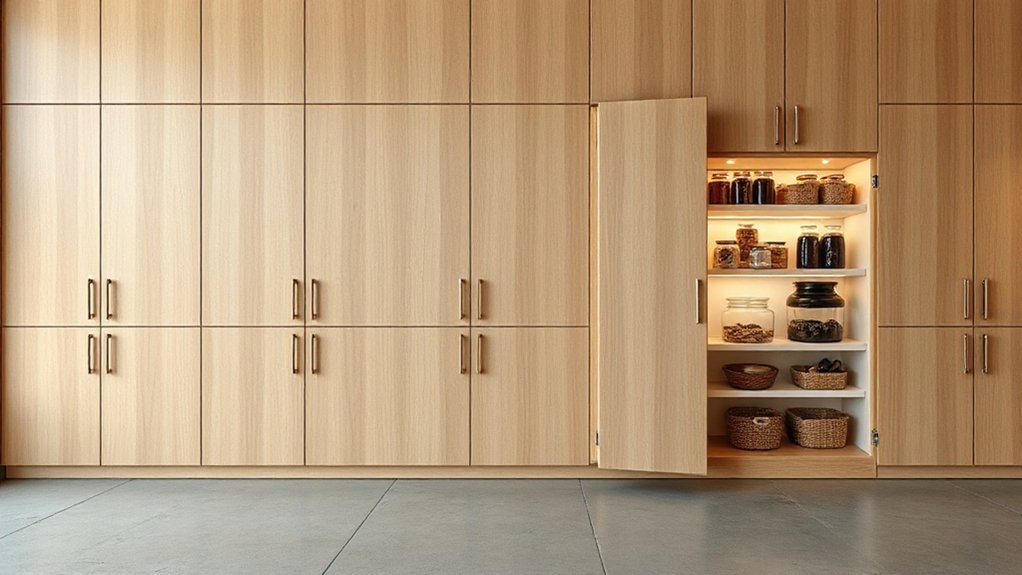
Where can you put an entire pantry without breaking the clean lines of a fitted kitchen? You’ll get it by building a flush cabinet wall that reads as panelling yet opens to a full storage bank. Set the carcase on a plinth, align door planes to 2–3mm reveals, and run continuous shadow gaps to match adjacent tall units. Use push-latches or recessed pulls so nothing projects, and specify 18mm MR MDF with durable laminate or sprayed finish.
- Plan a 600mm module grid for UK appliance and jar sizes
- Use full-height hinges rated for heavy loads
- Add LED strips with PIR sensors inside
- Coordinate Color schemes with adjoining cabinetry and Vintage accents
- Include vented shelves for onions, potatoes, and cleaning products
Pocket Doors to Conceal a Pantry Niche
When you’re concealing a pantry niche with pocket doors, you need hardware that suits the door weight, wall build-up, and clearance, so the leaf runs true and stays quiet. You’ll choose between top-hung or floor-guided systems, soft-close and anti-jump fittings, and tracks that can be serviced once the casing is on. You’ll also set flush trim details—shadow gaps, push-to-open pulls, and matching architraves—so the door face sits dead level with adjacent cabinetry.
Pocket Door Hardware Choices
If you’re using pocket doors to hide a pantry niche, the hardware you choose will dictate how smoothly the door runs, how much weight it can carry, and how reliably it stays aligned over time. Specify tested pocket door hardware to suit your door thickness and mass, and prioritise UK-available spares. You’ll get better results by selecting:
- Top-hung track rated above the door’s weight (allow margin)
- Sealed-bearing rollers with height adjusters for on-site tuning
- Soft-close dampers to prevent rebound and frame wear
- Rigid track fixings into solid timber or metal studs, not plasterboard
- Anti-jump guides and floor channel to stop sway
Use concealed hinges only where you’re pairing a pocket leaf with an adjacent swing panel; don’t mix hinge loads into the pocket track. Check clearances before ordering.
Flush Trim Finish Details
Although the pocket door hardware does the heavy lifting, the flush trim details determine whether your hidden pantry reads as a clean wall or a bodged add-on. Set the door leaf dead flush with plasterboard by packing the pocket frame and setting correct stud depth before boarding. Use a shadow gap bead or 3–5mm perimeter reveal instead of bulky architrave, and keep the skirting running past the opening with a scribed return. Specify a flush pull and edge finger pull so nothing projects into the pocket. Align the door face with adjacent cabinetry fronts, then match paint sheen and caulk lines to your wall finish. If you’re tiling, stop short with a trim and allow movement joints to prevent cracking. Check for racking and bind points.
Appliance Garages for Clutter-Free Counters
To keep your worktops clear without losing easy access to everyday kit, you can build an appliance garage—a dedicated cupboard bay that houses small appliances behind a shutter, tambour, or bi-fold door. You’ll reduce Countertop clutter and improve Appliance organization while keeping everything plug-ready.
- Specify a 300–350mm deep bay to suit kettles and toasters.
- Fit a heat-resistant shelf and allow 50mm rear ventilation.
- Install twin UK sockets on a switched spur, cable grommets, and an RCD.
- Choose soft-close hinges and an internal LED strip on a door sensor.
- Use wipe-clean laminate, stainless splashback, and a drip tray for steam.
Set the base at standard 900mm worktop height and align the door to adjacent fronts for a flush look. Keep doors clear of appliance cords.
Toe-Kick Drawers for Low-Profile Hidden Storage
You can turn the plinth space under your base units into toe-kick drawers that hide low-profile items without changing the kitchen’s look. You’ll need a rigid drawer box, low-clearance runners, and a removable or hinged plinth, set out to suit standard UK cabinet heights and any service voids. Fit a push-to-open catch or discreet finger pull, and keep access smooth by checking floor levels, clearances, and load limits during installation.
Toe-Kick Drawer Design
Where can you add secure storage without changing the look of your fitted kitchen? You can exploit the plinth void with toe kick drawer design that keeps cabinet lines untouched while delivering low-profile capacity. Specify a shallow drawer box to suit typical UK 150–170mm plinths, and choose moisture-resistant birch ply or MR MDF for longevity near sinks and dishwashers. Hidden compartment innovations focus on rigidity, anti-rack geometry, and discreet fronts that match the plinth finish.
- Use full-width fronts with consistent plinth returns
- Limit depth to avoid services and adjustable feet
- Add internal dividers for baking trays, wraps, tools
- Choose push-to-open or magnetic catches for concealment
- Detail edges with ABS or lacquer to resist mopping water
Installation And Access Tips
A well-proportioned toe-kick drawer only works if the install keeps clear of feet, services, and cleaning water while staying effortless to open. Set the drawer back 10–15mm behind the cabinet face and keep a 3–5mm perimeter gap so it won’t bind when floors move. Use low-profile runners rated for kitchen loads, fixed to a solid plinth frame, not thin MDF. Seal exposed edges and fit a drip lip to resist mop water. For access, choose push-to-open with a strong latch or a discreet finger pull; test it with shoes on. Route cables for Hidden lighting in conduit and leave service slack. Include ventilation planning so the void doesn’t trap damp or heat.
False Panels and Secret Doors (When They Work Best)
Although open shelving and standard cupboards suit most kitchens, false panels and secret doors excel when you need discreet access without advertising storage. You’ll get the best results where runs of cabinetry can hide a full-height void, or where a tall unit can mask an opening without breaking the datum line. Specify hidden hinges rated for the door weight, and set a 2–3 mm reveal so the panel reads as a normal filler. Add concealed lighting on a door-activated micro-switch to avoid fumbling in dark cavities. In UK refurb projects, check Part B routes and don’t conceal gas isolation valves.
- Appliance end panels hiding pull-out larders
- Tall-unit “bookcase” doors to utility stores
- Matching filler panels over shallow recesses
- Flush skirting kick-panels with push latches
- Wall panelling doors aligned to grout lines
Corner Pantry Systems That Actually Reach Deep Space
Hidden panels keep storage discreet, but corners still waste the most usable volume unless you fit hardware that pulls items right out of the blind space. Specify a corner pantry carcase with full-height, pull-out larders or swing-out frames so you can access jars from the door line, not by crawling inside.
You’ll get best reach with a 900–1000mm corner and 500–600mm deep units, set on heavy-duty runners rated for tins. Add adjustable wire or solid trays with 25–32mm front lips to stop spillages. For Material choices, moisture-resistant MDF carcases and powder-coated steel baskets suit UK kitchens; use birch ply if you want a premium feel. Match Color schemes to adjacent tall units so the corner reads seamless, even when loaded. Always allow for door swing clearances.
Hardware That Disappears: and Common Mistakes to Avoid
If you want concealed storage to read as a plain run of cabinetry, you’ll need hardware that disappears, and touch latches or push-to-open systems are the go-to in UK kitchens. You must set the latch position and door reveal precisely, because even a 1–2 mm misalignment shows up as uneven gaps and doors that won’t sit flush. You’ll also want to plan for adjustment access and consistent panel thickness, or you’ll end up with binding fronts and unreliable opening.
Touch Latches And Push-To-Open
When you want a concealed pantry door to read as a clean wall panel, touch latches and push-to-open systems let you ditch handles and keep the hardware out of sight. You’ll get the best results if you spec the right mechanism for door weight and use UK-available fittings (Blum, Häfele, Hettich) rated for frequent use. Touch latches work well on lighter doors; Push to open with a magnetic catch suits heavier panels and resists bounce-back.
- Match latch strength to door mass and hinge type
- Use a positive catch to stop the door drifting open
- Allow clearance for a full push stroke behind the panel
- Fix to solid carcass timber, not just plasterboard
- Add a soft-close damper to prevent slam and wear
Alignment Errors And Gaps
Because a concealed pantry door relies on shadow gaps and flush reveals for the illusion, even a 1–2mm alignment error jumps out under UK downlights and daylight raking across the wall. You’ll see it most at the head and hinge stile, where plasterboard isn’t perfectly true and carcasses settle after fitting. Set out from a fixed datum (laser to finished floor level), then shim the frame and cabinet run before you hang the door. Maintain alignment consistency by checking reveals on all four sides with feeler gauges, not your eye. For gap minimization, specify quality concealed hinges with 3-way adjustment, and leave a serviceable 2–3mm shadow gap rather than chasing “zero”. Finally, seal and paint after final adjustment; paint build-up can close gaps.
Frequently Asked Questions
How Do I Keep a Hidden Pantry Door Aligned as My Home Settles?
Fit adjustable concealed hinges and keep 3mm reveals; re-shim the frame as it moves. Use decorative door hardware with slotted fixings. Check with a spirit level quarterly. Maintain lighting concealment clearances, and tweak latch strikes.
Which Concealed Hinges Work Best for Heavy, Fully Loaded Pantry Doors?
You can’t just use kitchen-style concealed hinges; pick heavy-duty 3D-adjustable concealed door hinges rated 60–80kg. They’ll handle full loads if hinge installation uses reinforced timber and long screws, matching the door’s weight capacity.
How Can I Prevent Odors and Pests in Enclosed Hidden Storage Areas?
You’ll prevent odours and pests by sealing gaps with brush strips, fitting draught excluders, and using Odor control carbon sachets. Add mesh vents, keep humidity low, and store food in airtight tubs for pest prevention.
What Materials Resist Warping in Pull-Out Pantries Near Heat Sources?
Pick plywood panels and aluminium frames for pull-out pantries; they’ll stay stable near heat. Prioritise materials selection with phenolic-faced birch ply and stainless fixings for warp resistance, and specify moisture-resistant MDF only away from ovens.
How Do I Ensure Hidden Pantries Still Allow Strong Wi‑Fi and Smart Devices?
You’ll keep Wireless signals strong by avoiding foil insulation and metal doors, fitting a mesh vent panel, and adding a UK-spec ceiling access point; guarantee smart device integration with Zigbee hubs and mains sockets.
Conclusion
Set clear goals, map your clutter zones, and choose the hidden pantry type that suits your layout and budget. You’ll gain space without losing the modern look: store more, see less, clean faster. Place it where you work, size it to your shop, and build it to UK standards. Use toe-kick drawers, use false panels, use corner systems that reach. Specify push-to-open hardware, align reveals, and avoid wasted depth and awkward access.
About the Author