
You can test whether the “do no harm” approach is the only reliable way to keep a traditional flint cottage sound and beautiful. Start by checking knapped flint faces, lime mortar joints, and roof edges for movement, open pointing, and water paths. You’ll focus on breathable lime repairs, sensible drainage, and ventilation that won’t trap moisture behind hard finishes. But one common upgrade can quietly undo all that—so you’ll want to spot it first.
Key Takeaways
- Survey flintwork first: map loose stones, failed joints, and past repairs, and confirm mortar type and salts before intervention.
- Manage moisture at source: maintain gutters, flashings, and ground levels, and divert runoff to prevent splashback, tracking, and rising damp.
- Repoint and repair with lime mortar: match colour, aggregate, and joint profile, pack in lifts, and avoid hard cement pointing.
- Keep finishes breathable: choose limewash, mineral silicate paint, or clay plasters, and avoid acrylic paints, cement renders, and polymer sealants.
- Upgrade comfort gently: use vapour-open insulation and ventilation, and repair timber windows and doors with splices and linseed putty.
What Makes a Flint Cottage Special?
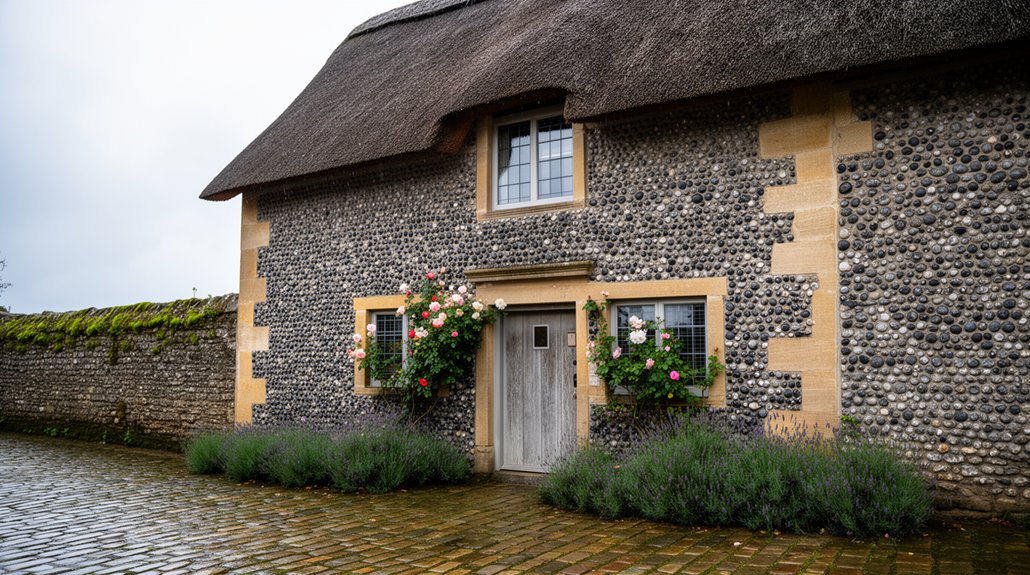
Why does a flint cottage feel instantly distinctive? You read its Historical significance in the wall itself: knapped flint set in lime mortar, often gathered locally, creating a surface that catches light like a mosaic. You’ll notice how the dark stones contrast with pale joints, giving every elevation crisp depth and a handmade rhythm you can’t fake. Inside and out, Architectural details stay purposeful—thick masonry for thermal mass, small openings with deep reveals, and simple, steep roofs that shed weather efficiently. You can trace craft choices in quoining, brick or stone dressings, and neatly struck pointing that frames each flint. When you understand these cues, you don’t just see a cottage—you see a regional building language.
First: Flint Cottage “Do No Harm” Checks
Before you change anything, you’ll run “do no harm” checks that protect the cottage’s fabric and finish. Start by evaluating the existing flintwork for loose stones, failed joints, and uneven bedding, then check moisture paths by inspecting ground levels, drainage falls, and internal damp indicators. Finally, evaluate past repairs—especially hard cement pointing, patchy render, and incompatible sealants—so you can specify like-for-like materials and avoid trapping moisture.
Assess Existing Flintwork
Although flint walls can look immovable and “maintenance-free,” you should treat the first inspection as a do‑no‑harm check: identify what’s original, what’s already failing, and what’s been patched with incompatible materials. Start with a slow, raking-light visual sweep to read the surface: tight, well-bedded knapped faces; proud or recessed stones; and any loss of definition along margins. Map repairs and note mortar color, aggregate size, and tooling so you can distinguish lime work from hard cement. Probe joints gently with a wooden pick, not metal, and record where mortar powders, debonds, or bridges across flint. For Historical preservation, document patterns, coursing, and detailing before you touch anything. Your Material analysis should confirm binder type and salt presence to guide like-for-like repairs.
Check Moisture And Drainage
Once you’ve mapped the flintwork and identified any incompatible patching, turn your attention to moisture paths, because water—not time—does most of the damage. Start at the roofline: confirm sound flashings, clear gutters, and downpipes that discharge well away from the wall. Check eaves drips and verges so water can’t track back onto the flint face.
At ground level, measure finished external levels against internal floors; you want the wall base to breathe, not sit in splashback. Inspect for bridging at paths, raised beds, or render plinths. Probe soil for persistent damp and note green staining, algae, or salt bloom. Prioritise Moisture management with simple Drainage solutions: regrade falls, add gravel margins, keep air bricks clear, and route runoff to soakaways.
Evaluate Past Repairs
After you’ve controlled the obvious moisture routes, scrutinise any past repairs with a strict “do no harm” mindset, because the wrong materials can trap water and accelerate decay in flint and lime work. Check for hard cement pointing, polymer sealants, or dense renders bridging joints; they block vapour movement and force moisture into flint faces and soft lime bedding. Tap and probe: hollow-sounding patches often hide debonding and salt damage.
Match replacements to the original wall’s behaviour and appearance. Specify lime-based mortars with appropriate aggregate, joint profile, and flushness so you restore capillary break and shedding without over-tight joints. Compare colour, texture, and tooling to maintain aesthetic consistency, and confirm detailing aligns with historical accuracy. Record what you find, photograph edges, then phase careful removal and like-for-like repair.
Survey Your Flint Cottage Before Repairs
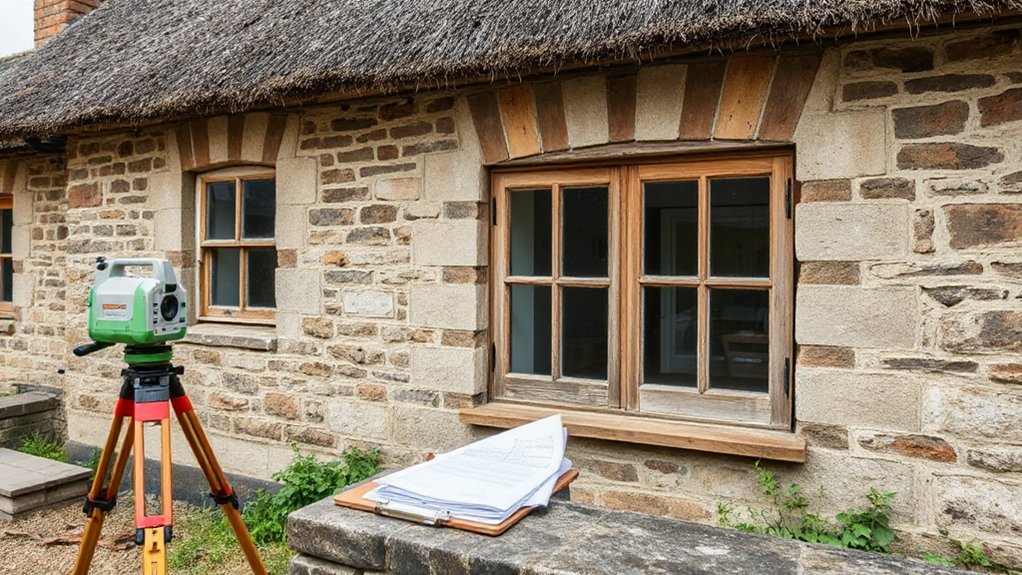
Before you touch a single stone or mix any mortar, survey your flint cottage methodically so you understand what’s failing, what’s merely weathered, and what must stay untouched. Walk the exterior in consistent light, then repeat after rain, photographing every elevation and marking defects on a sketch plan. Note bulges, open joints, loose knapped faces, and cracks that step through mortar rather than flint. Check window and door reveals for racking, and track any changes with dated gauges. Inspect eaves, verges, chimneys, and plinths where detailing protects walls. Inside, map hairline cracks, distorted skirtings, and uneven floors to spot movement patterns. This record safeguards Flint craftsmanship and honours historical significance by guiding minimal, accurate intervention later.
Find Damp Causes Around Flint Walls
Three damp sources usually explain most problems in flint walls—rain driven in through failed details, moisture pulled up from the ground, or humid air condensing on cold masonry—so you need to pin down which one you’re seeing before you change any finishes or repointing. Start outside: track staining beneath eaves, around chimneys, and at window heads; localised dark patches after storms point to rain ingress. Check sheltered, north-facing panels for moss growth that signals persistently wet surfaces. Then read the wall base: a horizontal tide mark, crumbling skirting, and salt efflorescence on plaster suggest rising moisture. Indoors, note condensation patterns—black spotting behind furniture or on cold corners—often seasonal and worst after cooking or bathing. Map each symptom by height, aspect, and timing.
Fix Damp Safely: Drainage and Ventilation
Because flint walls need to shed water quickly yet still breathe, you’ll fix damp most safely by improving drainage outside and controlling air movement inside, rather than sealing the masonry with hard renders or tanking. Start at ground level: lower soil that bridges the plinth, clear splashback zones, and keep a gentle fall away from the wall. Maintain gutters, downpipes, and soakaways, and schedule routine landscape maintenance so ivy, planters, and raised beds don’t trap moisture.
Inside, aim for steady, low humidity: run extract fans, open trickle vents, and keep furniture off cold external walls for airflow. Use a hygrometer to verify results. Before redecorating, commission historic paint analysis so you don’t introduce impermeable coatings that re-create damp patterns.
Use Lime Mortars to Keep Walls Breathable
Once you’ve reduced external wetting and balanced indoor humidity, turn to the fabric of the wall itself: lime mortar lets a flint cottage manage moisture the way it was built to. You’ll get a softer, capillary-active matrix that releases vapour instead of trapping it, protecting flints and historic bricks. Prioritise Lime mortar compatibility: match permeability, strength, and aggregate size so the wall dries evenly and stays visually crisp. Finish with Breathable wall coatings that complement the mortar and keep the elevation reading as one coherent surface.
- Choose lime putty or NHL based on exposure and substrate.
- Specify well-graded sand for tight, refined joints.
- Keep mixes weaker than the masonry units.
- Control curing: mist, shade, and slow carbonation.
- Pair with vapour-open limewash or mineral paint.
Repoint Flint Walls Without Cement Mistakes
Although cement looks like a tidy, durable fix, it usually causes the most expensive failures in flintwork, so you’ll repoint for breathability and movement rather than brute strength. Rake out joints by hand to a sound depth, keeping arrises crisp and the flint faces protected. Avoid Modern cement: it’s too hard and too dense, trapping moisture, forcing salts to the surface, and cracking at the flint-lime interface.
Set a lime-based mortar to match the original colour, aggregate size, and joint profile, then pack it firmly in lifts so it keys without smearing the stone. Finish slightly recessed or brushed to suit your cottage’s character, not flat and shiny. Use Alternative pointing only where historic detailing demands it, and keep joint widths consistent throughout.
Clean and Repair Flint With Gentle Methods
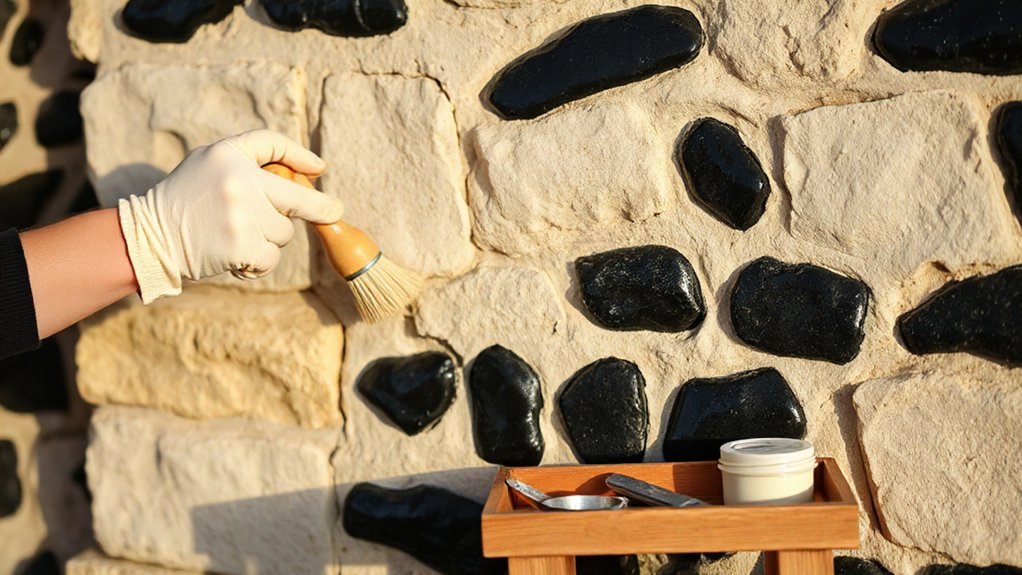
When you clean flint, treat it as a hard surface set within a comparatively soft, porous lime matrix, and choose methods that respect both. Start dry, work small, and let the wall guide you. Your goal is to lift grime without scouring the knapped faces or flushing salts deeper into joints.
- Use soft natural-bristle brushes and vacuum extraction for Gentle cleaning.
- Mist with clean water; avoid saturation and never pressure-wash.
- Spot-clean algae with a diluted, pH-neutral biocide; rinse lightly.
- Replace loose flints by bedding them back into lime mortar, not adhesive.
- For Eco friendly repairs, stitch hairline cracks with lime putty slurry and match aggregate.
Finish by documenting treated areas so future maintenance stays consistent and design-led.
Pick Breathable Finishes for a Flint Cottage
Because flint walls rely on lime mortar joints to manage moisture, you need finishes that stay vapour-open, flexible, and salt-tolerant rather than film-forming. Choose Breathable finishes such as limewash, mineral silicate paint (on suitable substrates), and clay-based plasters that can buffer humidity without sealing the face of the wall. Avoid vinyl emulsions, acrylic masonry paints, and cement-rich renders; they trap moisture, concentrate salts, and accelerate spalling at the joints. For interiors, specify ecological paints with high vapour permeability and low VOCs, then pair them with lime or clay skim coats to even out texture while keeping the flint’s irregular character legible. Detail edges carefully: keep paint off exposed flint, finish onto the mortar arris, and allow generous curing between coats.
Insulate a Flint Cottage Without Trapping Damp
How do you add insulation to a flint cottage without turning its lime-built walls into a damp trap? You respect vapour movement first, then you layer warmth where it won’t block drying. For Historical preservation, avoid impervious foams and cement-backed systems; they force moisture inward and salt-blast surfaces. Choose Modern insulation that stays breathable, capillary-active, and reversible, and detail junctions so you don’t create cold bridges or hidden condensation.
- Use woodfibre boards or cork internally with lime adhesive and lime skim.
- Insulate roofs with sheep’s wool or woodfibre, leaving ventilation paths clear.
- Add insulated limecrete floors with glass foam aggregate and a breathable finish.
- Keep services on battens or shallow zones to avoid chasing historic masonry.
- Control humidity with extract ventilation and steady, low-temperature heating.
Repair Windows and Doors, Keep Originals
Although replacement units promise quick gains, you’ll preserve a flint cottage’s character—and usually improve performance more reliably—by repairing original windows and doors and upgrading them with subtle, reversible details. Start with window restoration: strip failing paint carefully, splice in matching timber where rails or sills have softened, and reset loose glazing with linseed-based putty. Keep historic glass; its waviness is part of the elevation’s rhythm. Improve comfort by fitting brush seals, rebalancing sash cords, and adding slim, internal secondary glazing you can remove later. For door preservation, retain the original leaf and frame, tighten joints, and repair thresholds with like-for-like hardwood. Add discreet draught strips, a traditional rim lock, and period-appropriate ironmongery to keep proportions crisp.
Look After Roof, Chimneys, and Flashings
Once you’ve tightened up windows and doors, turn your attention upward, where the roofline and chimney stacks do most of the heavy lifting against wind-driven rain. Prioritise Roof maintenance to protect the flint walls below: keep coverings sound, details crisp, and water paths predictable. Check Chimney integrity before small defects become structural or stain ceilings.
- Inspect slipped, cracked, or missing tiles/slates after storms
- Clear gutters, valleys, and eaves to stop backflow under coverings
- Repoint ridge tiles and verges with breathable lime, not hard cement
- Check lead flashings and soakers for splits, lifting, or pinholes; dress neatly
- Examine chimney pots, flaunching, and haunching; cap or line where needed
Treat roofs as a design edge: neat lines, consistent materials, and sharp junctions preserve the cottage’s silhouette and weathering performance.
Add Services or Extensions With Minimal Loss
When you introduce new plumbing, wiring, heating, or extra floor area, treat the flint cottage as a finite fabric and make every intervention reversible, legible, and as small as you can. Route Modern utilities through existing voids, redundant chimneys, or floor zones so you don’t chase channels into flint and lime. Use surface-mounted conduits in service cupboards, and specify compact manifolds to reduce penetrations.
If you need more space, choose lightweight, breathable construction and connect it with a narrow link so the original massing stays dominant. Keep Structural modifications to openings minimal: reuse existing window bays, avoid widening heads, and support new loads with discreet steel that bears onto new pads, not historic walls. Match eaves lines, set back glazing, and detail junctions cleanly.
Frequently Asked Questions
Do Flint Cottages Cost More to Insure Than Brick Houses?
Yes, you’ll often pay more to insure flint cottages than brick houses, because insurers factor higher Construction costs, specialist repairs, and limited contractor availability into Insurance premiums. You’ll reduce costs with detailed surveys.
Are There Heritage Grants Available for Restoring Traditional Flint Cottages?
Yes—you’ll find heritage grants, and they can feel like a financial lifeline from the heavens. You should check Historic England, local councils, and the National Lottery, requiring Historic craftsmanship plans and rigorous Preservation techniques documentation.
How Can I Find a Conservation-Accredited Builder for Flint Cottage Work?
Find a conservation-accredited builder by checking IHBC, FMB Heritage, and SPAB directories, then verifying references and insurance. You’ll prioritise Traditional craftsmanship and Local sourcing, and you’ll demand lime-mortar experience, sample panels, schedules.
What Planning Permissions Apply if My Flint Cottage Is Listed?
You can’t skip permissions even for “minor” works: if your flint cottage is listed, you’ll usually need Listed Building Consent, and sometimes planning permission too. Historic preservation and Building regulations apply; consult conservation officers early.
Does Owning a Flint Cottage Affect Resale Value in the Local Market?
Owning a flint cottage often lifts resale value locally, if you document Historical preservation and maintain Architectural authenticity. You’ll attract design-led buyers, but you must price in specialist repairs, lender scrutiny, and conservation-area constraints.
Conclusion
You preserve a flint cottage by balancing restraint with precision: you change less, yet achieve more. Check knapped flint, lime joints, rooflines, and openings; record defects before you touch anything. Chase damp at its source—gutters, ground levels, splashback—then improve drainage and ventilation instead of sealing walls. Insulate lightly with breathable systems, not impermeable foams. Repair windows, doors, chimneys, and flashings like-for-like. Add services discreetly, so character stays.


