
You can convert a timber-frame tithe barn, but you’ll only get a workable result if you start with the frame’s condition, moisture pathways, and what consent will allow. You’ll need a survey that maps joint movement, insect attack, and foundation settlement, then you’ll plan breathable insulation, airtight layers, and discreet service runs that don’t cut historic timbers. Budgeting has to include fire strategy, access, and heat for big volumes—then the real constraints appear…
Key Takeaways
- Confirm planning, listed building consent, access, parking, drainage, and protected species requirements through early pre-application discussions and a heritage statement.
- Survey the timber frame for alignment, joint integrity, racking, decay, and insect activity, mapping defects and verifying load paths.
- Control moisture by fixing rainwater goods, improving ground drainage, removing cementitious traps, and monitoring timber moisture content and indoor humidity.
- Design vapor-open, airtight assemblies using lime or clay finishes, hygroscopic insulation, and vapor-variable membranes, with taped junctions and sealed penetrations.
- Plan reversible interventions and service routes that avoid cutting principal timbers, using floor voids or freestanding chases and exposing key structural features.
Is a Tithe Barn Conversion Feasible Here?
Before you commit to a timber-frame tithe barn conversion, you need to confirm that the building can legally and structurally take a new use without compromising its historic fabric. Check listing status, curtilage constraints, and local plan policies; verify whether change-of-use, parking, access, drainage, and protected-species consents apply. Assess headroom, bay spacing, and egress routes to see if layouts can meet Building Regulations without cutting principal posts, braces, or wall plates. Confirm that foundations and floor buildup can accommodate services and new loads with minimal excavation. Plan moisture control early: if you introduce Modern insulation, you must maintain vapor-open assemblies and ventilation paths to protect oak and infill. Specify Eco friendly materials compatible with lime, not cement.
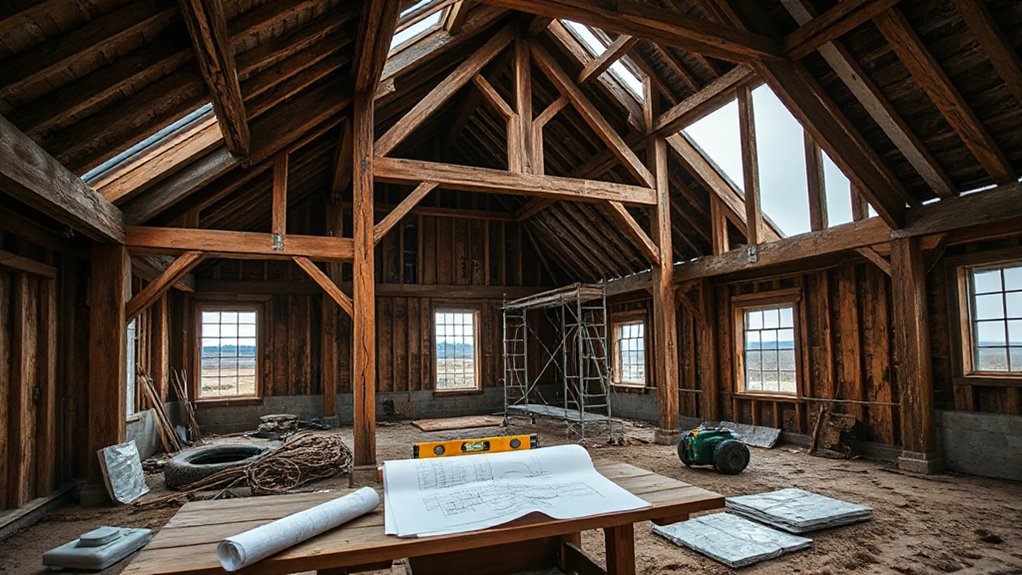
What a Timber-Frame Survey Should Cover
You should start your timber-frame survey with a structural frame assessment that checks post-and-beam alignment, joint integrity (mortise-and-tenon, pegs), racking, and any overloaded or altered members. You’ll then map moisture pathways by measuring timber moisture content, tracing damp sources at wall plates, sole plates, and masonry interfaces, and noting condensation risk from proposed insulation. Finally, you should test for decay and infestation—probing for soft rot, identifying fungal mycelium, and confirming beetle activity via exit holes and frass—so you can specify repairs and treatment with confidence.
Structural Frame Assessment
While a tithe barn can look solid from a distance, a timber-frame survey needs to verify how every post, tie beam, brace, and joint actually performs under load. You’ll map the load path from roof to ground, check plumb and level, and quantify movement at bay intervals. You should confirm Timber integrity by grading members for section loss, checking bearing length at joints, and measuring deflection against span and species assumptions. For historic preservation, you’ll record original carpentry, identify later alterations, and target repairs that keep the frame working as designed.
- Measure racking with diagonal checks and laser lines
- Probe joint fit, peg condition, and tenon withdrawal
- Assess bearing at posts, sills, and masonry interfaces
- Verify bracing patterns against wind and roof thrust
Damp, Rot, And Insects
A sound load path on paper can still fail in service if moisture and pests keep weakening the fibers at the joints and bearings, so the next part of a timber-frame survey tracks damp, decay, and insect activity with the same bay-by-bay discipline. You’ll map moisture sources first: failed gutters, ground splashback, blocked vents, and cementitious pointing trapping water. You’ll probe sills, post feet, wall plates, and peg holes for softening, cuboidal cracking, and fungal mycelium, then record moisture readings at comparable depths. You’ll identify beetle flight holes, frass type, and fresh exit dust to separate historic from active attack, and specify Woodworm prevention only where activity’s confirmed. You’ll check ventilation paths, add insect screening to openings, and note detailing that keeps end grain dry and durable.
Planning & Listed Consent for a Tithe Barn
Because most tithe barns sit on sensitive sites and carry protected historic fabric, planning permission and listed building consent (and sometimes scheduled monument consent) will dictate what you can alter, how you’ll build it, and which details you must retain. Start with a pre-app meeting, bring measured surveys, a heritage statement, and a method statement that proves Historic preservation. You’ll need community engagement early, especially if access, traffic, lighting, or noise changes.
- Commission a significance assessment: frame joints, threshing floor, aisles, cladding, and any later inserts.
- Map every intervention on drawings: repairs vs alterations, reversible fixings, and service routes.
- Agree materials: lime mortar, breathable finishes, timber species, and salvage strategy.
- Specify archaeology, ecology, and bat mitigation triggers, plus conditions and discharge evidence.
Set a Realistic Tithe Barn Conversion Budget
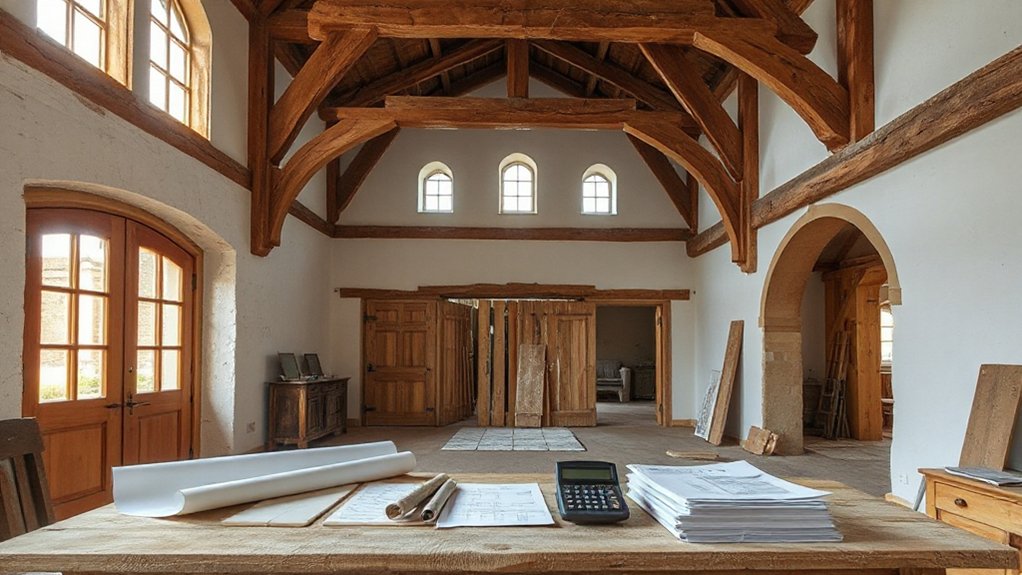
Even if your drawings look straightforward, a tithe barn conversion budget must price in conservation-led repair, specialist labour, and compliance work that can’t be value-engineered away. Start with a measured building survey and timber condition report, then cost repairs as Historic preservation: splice repairs, beetle treatment, lime mortars, and breathable finishes. Add allowances for enabling works, scaffolding, temporary weathering, and careful strip-out with salvage handling.
Next, budget for services integration and Modern adaptations: new drainage runs, electrical upgrade, heating distribution, and ventilation, plus acoustic and fire strategies acceptable to Building Control. Carry 15–25% contingency for unknowns, and ring-fence professional fees, inspections, and testing. Finally, phase cashflow to match lead times for bespoke joinery and specialist trades.
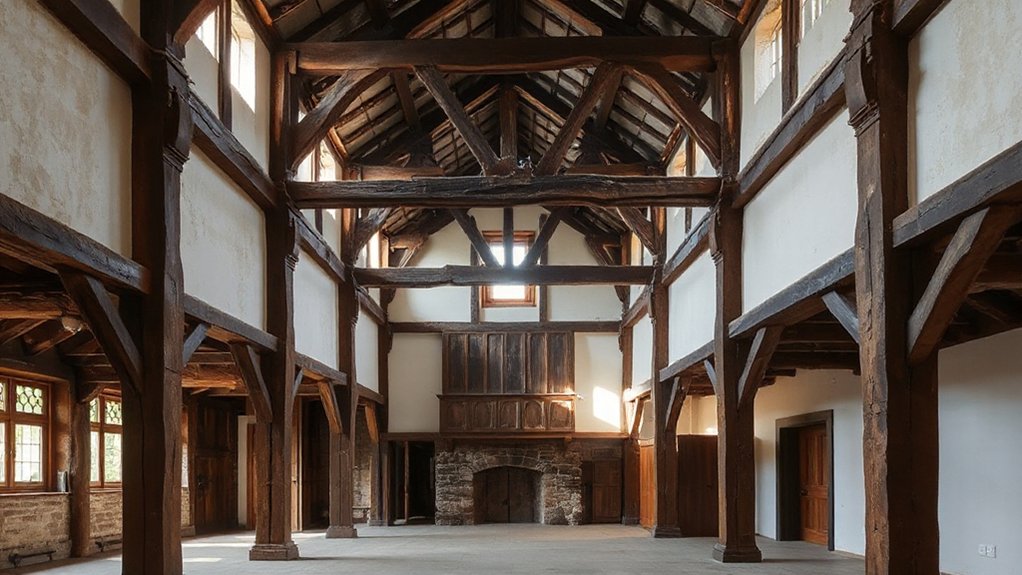
Design Around the Existing Timber Frame
Where do you start when the building’s structure is also its primary finish? You map the timber frame like a grid and let it dictate room modules, circulation, and sightlines. Keep posts and braces exposed, then pull new partitions back to form shadow gaps so movement doesn’t abrade oak and junctions read as reversible—key for Historic preservation.
- Survey every bay, peg, and camber; note deflection before fixing layouts
- Route services in floor voids or freestanding chases, not through principal timbers
- Use Modern lighting on tracks or discreet uplights to wash rafters without drilling
- Detail joinery interfaces with compressible gaskets and slip joints to tolerate seasonal movement
You’ll get a legible old structure with precise new insertions, not a disguised rebuild.
Control Damp First: Ground, Drains, Airflow
Once you’ve set your plan lines to the timber grid and decided what stays exposed, tackle moisture next—barn conversions fail fast when the frame sits in damp ground air. Start outside: regrade to fall away 1:60 minimum, clear gutters, and add downpipes to tight drains or soakaways. Install a perimeter French drain with clean stone and filter fabric, keeping it below interior slab level, and rod it to verify fall.
Inside, break capillary rise: lay a vented sub-base, then a capillary break layer; keep timber posts off wet masonry with stainless shoes where feasible. For Moisture control, monitor RH and timber moisture content, and fix leaks before finishes. For airflow management, maintain clear underfloor and roof void paths, fit insect mesh, and avoid blocking existing vents.
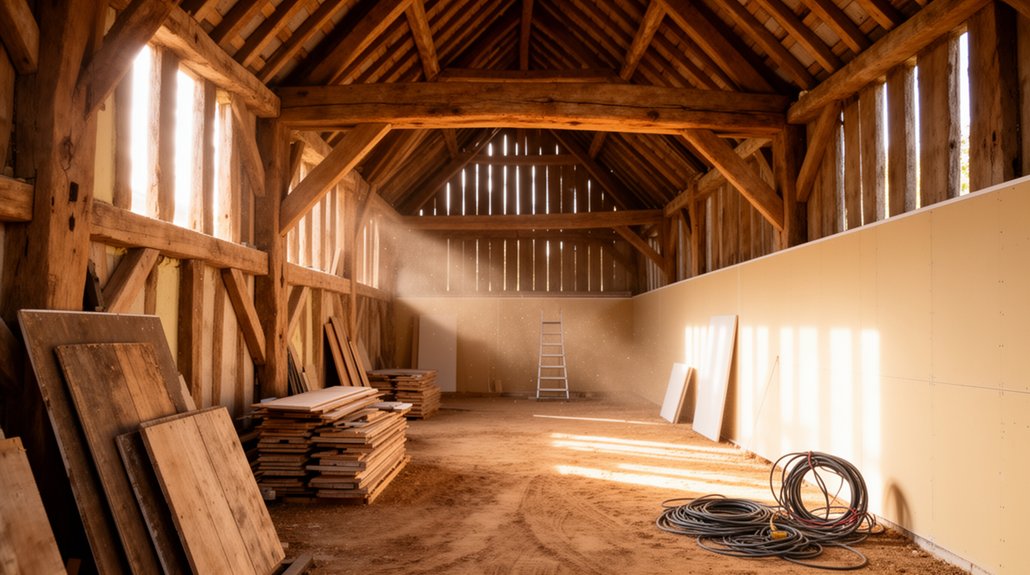
Insulate a Tithe Barn Without Trapped Moisture
Because a timber-frame tithe barn can’t tolerate moisture locked behind new linings, you should insulate it in layers that stay vapour-open and that preserve a continuous ventilation route from eaves to ridge and beneath any new floor. Keep original posts and infill able to dry to both sides, and choose capillary-active insulation that buffers short wetting events without slumping. Protect Historic preservation by avoiding cement renders and impermeable membranes that force decay into oak joints. Reduce environmental impact by prioritising low-embodied-carbon products and reversible fixings.
- Use woodfibre or hemp-lime between studs with lime plaster, not gypsum.
- Fit a ventilated service void inside so wiring doesn’t puncture linings.
- Add insulated limecrete or foamed-glass aggregate floors over a ventilated sub-base.
- Detail junctions with timber battens to maintain airflow paths around braces.
Airtightness That Still Lets the Barn Breathe
You’ll target airtightness by creating a continuous air barrier while keeping the assembly vapor-open, so air movement stops but moisture can still dry. You’ll choose materials like variable-perm membranes, wood-fibre boards, and lime-based plasters, then pair them with compatible tapes and gaskets that won’t block drying. You’ll detail every timber-frame junction—post-to-beam, sole plate, infill edges, and service penetrations—using compressible seals, taped laps, and airtight collars so the line stays unbroken through seasonal movement.
Breathable Airtightness Principles
Although airtightness often gets framed as “sealing everything up,” in a timber-frame tithe barn you need a breathable airtightness strategy that stops uncontrolled draughts while still allowing moisture vapour to move safely through the build-up. You’ll plan a continuous air barrier line, then detail every junction so air can’t bypass it through cracks, sockets, or beam pockets. Keep the barrier serviceable and inspectable to support timber preservation and avoid trapping damp at hidden interfaces. Once airtight, you’ll control fresh air deliberately with planned ventilation, improving comfort and stabilising barn acoustics by cutting low-frequency air-rumble.
- Map the air barrier on drawings; mark every transition.
- Tape and gasket junctions at posts, plates, and floor edges.
- Seal penetrations with collars; minimise service holes.
- Pressure-test early and after finishes; smoke-check leaks.
Vapor-Open Material Choices
When you tighten up a tithe barn against draughts, you still need assemblies that can shed incidental moisture, so specify vapor-open layers that manage vapour diffusion while the air barrier handles air leakage. Choose hygroscopic insulation (wood fibre, hemp, cellulose) so the wall can buffer humidity swings without trapping water at timbers. Use a vapour-variable membrane where seasonal drying matters, not a fixed polyethylene vapour barrier. Back it with service cavities so penetrations don’t compromise performance. Select sheathing with high permeability (wood fibreboard, lime-plaster carrier, or boards with open joints behind a membrane) to keep drying paths. Finish interiors with breathable finishes like lime plaster, clay plaster, or silicate paint; avoid vinyl wallpaper and high-build acrylics that throttle diffusion. Confirm μ/SD values in datasheets.
Detailing Timber-Frame Seals
Because a timber frame expands, shrinks, and racks over centuries, you can’t rely on rigid foams or hard-set mastics to keep a tithe barn airtight. You’ll get better results by detailing flexible, vapor-open seals that tolerate movement at Timber joints while still controlling air leakage. Treat airtightness as a continuous line you can inspect, not a one-off bead. During Sealant application, clean to sound timber, prime dusty surfaces, and tool for full contact without thin edges. Keep joints serviceable so future repairs don’t destroy historic fabric.
- Use compressible tapes behind cover battens at posts and studs
- Install smart membranes with taped laps at infill panels
- Backer-rod deep gaps to set correct sealant geometry
- Verify with smoke pencil and blower-door before lining
Add Daylight Without Harming Barn Character
To bring daylight into a timber-frame tithe barn without stripping its agricultural character, treat every new opening as a structural and visual intervention, not just a glazing choice. Start with Natural lighting audits: map sun paths, existing door leaks, and reflective surfaces, then size openings to target task zones, not whole-volume wash.
Prioritise Window placement within existing bays, between posts, and clear of braces, tie beams, and mortice-and-tenon joints. Use slim-profile steel or timber subframes that pick up loads at the sill and head, and detail movement joints to tolerate seasonal timber shrinkage. Keep reveals deep, align glazing with boarding lines, and set sills high to preserve plinth proportions. Consider discreet rooflights on rear slopes, flush-fitted, to avoid changing ridge silhouettes. Use low-iron glass only where colour accuracy matters.
Heating and Hot Water for Tithe Barn Volumes
Daylight gains quickly expose the next challenge in a tithe barn: you’re trying to heat a huge, leaky volume without turning the frame into a radiator or the running costs into a liability. You’ll get best results by prioritising fabric fixes, then sizing systems for low flow temperatures and steady output, not quick blasts. Use zoning so you only heat occupied bays, and treat hot water as a separate load with storage.
- Specify Radiant flooring with dense insulation below, perimeter edge insulation, and 35–45°C flow temps.
- Pair it with a heat pump and weather compensation to avoid overshoot in tall spaces.
- Add a high-capacity cylinder; preheat via Solar heating for DHW and shoulder-season top-up.
- Use destratification fans to push warm air down without cranking setpoints.
Hide Electrics and Plumbing Without Cutting Timbers
Even if you’re upgrading everything behind the scenes, you can’t treat a tithe barn like a stud wall build-up—route services so you preserve historic timbers and keep the assembly inspectable. Run Electrical wiring in surface-mounted metal conduit on secondary elements, or in detachable timber trunking fixed to infill, not the frame. Use existing voids behind new linings, but stop short of burying junctions; place accessible draw boxes at beam lines. For plumbing concealment, keep wet services within new service zones: boxed skirtings, floor build-ups, or freestanding partitions that don’t touch posts. Take drops and rises in corners, then bridge to fixtures with flexible tails. Where you must cross a frame, span on brackets and leave a visible gap to prevent abrasion and allow movement. Label routes clearly.
Fire Safety, Access, and Safe Stair Design
Once you’ve kept wiring and pipework readable and reachable, you need to treat fire safety and access with the same “inspectable and reversible” mindset, because escape routes and stair geometry can’t rely on hidden fixes in a moving timber frame. You’ll map exits early, then size openings and landings to suit real use, not drawings.
- Specify fire resistant finishes that don’t seal moisture into historic oak.
- Do emergency exit planning with two independent routes where practical.
- Design stairs with consistent rise/going, secure handrails, and headroom; avoid winders if you can.
- Keep access upgrades bolt-on: protected lobbies, intumescent strips, and reversible smoke seals.
You’ll also separate accommodation with fire-rated doors and linings, and route alarms and lighting visibly so you can test and change them without disturbing joints.
Frequently Asked Questions
What Warranties and Insurance Cover a Newly Converted Tithe Barn?
You’ll typically hold Insurance policies for buildings/contents, public and employer’s liability, and latent defects; you can add Building warranties (10–12 years) plus contractor guarantees. Check exclusions, subsidence, timber decay, fire, and compliance certificates.
Can I Legally Run a Business or Holiday Let From the Converted Barn?
Yes—but only if planning permission and change-of-use allow it. Check Historic building regulations, fire safety, access, and licensing. During Farmhouse renovation, confirm rates, tax, parking, noise limits, and local covenants.
How Long Does a Typical Tithe Barn Conversion Project Take?
You’ll typically need 12–24 months, depending on surveys, consents, and contractor availability. Historic architecture constraints and preservation techniques slow demolition, timber repairs, damp mitigation, and services integration, but they reduce rework and defects.
What Ongoing Maintenance Will the Timber Frame Require After Conversion?
You’ll maintain the timber frame like a ship’s hull: keep water out, or rot wins. Schedule annual inspections for structural integrity, manage moisture/ventilation, repair joints, recoat finishes, treat pests, guarantee timber preservation.
Do Bats or Other Protected Species Restrict Renovation Work and Timelines?
Yes—bats and other wildlife can delay works: bat conservation surveys may be mandatory, and protected species restrictions can stop demolition or roof repairs. You’ll need ecological assessments, seasonal windows, mitigation licences, and revised schedules.
Conclusion
You’re stewarding a ship built from seasoned oak, not refitting a new hull. You test the frame, map moisture paths, and choose vapor-open, reversible fixes. You secure listed consent, then budget for hidden repairs and airtight detailing. You cut daylight like careful portholes, protecting elevations and joints. You heat the volume with efficient, low-temperature systems, and you route services through voids, not timbers. You meet fire, access, and stair rules without scarring the fabric.


