Wellness-driven design boosts your home productivity because you shape light, air, acoustics, ergonomics, and layout to protect attention and reduce fatigue. You cut stress by identifying top triggers like glare, clutter hotspots, and noise peaks, then fixing the highest-impact irritants first. You support steady energy with layered lighting, appropriate lumens and Kelvin, and better ventilation (CO₂ above ~1,000 ppm signals you need fresh air). Next, you’ll see how to set focus and rest zones that reinforce habits.
Key Takeaways
- Wellness-driven design boosts productivity by supporting mental clarity, stamina, and easier task switching through predictable focus, movement, and recovery zones.
- Biophilic cues—daylight, plants, natural textures, and outdoor views—lower stress and fatigue, helping you sustain attention longer.
- Ergonomic setups prevent strain: neutral posture, monitor at eye level, elbows near 90°, and essentials within forearm reach to reduce cognitive load.
- Layered, glare-controlled lighting with tunable color temperature improves visibility, reduces eyestrain, and aligns energy with time-of-day.
- Cleaner air, less noise, and tighter organization cut drowsiness and distractions using ventilation, filtration, sound absorption, and simple labeled storage systems.
Define Wellness-Driven Design for Productivity
What does “wellness-driven design” mean when your goal is to get more done at home? It means you shape your environment to support your body and brain, not just your aesthetics. You prioritize factors linked to performance: light that matches your task, air that feels fresh, sound that stays controlled, and layouts that reduce unnecessary steps.
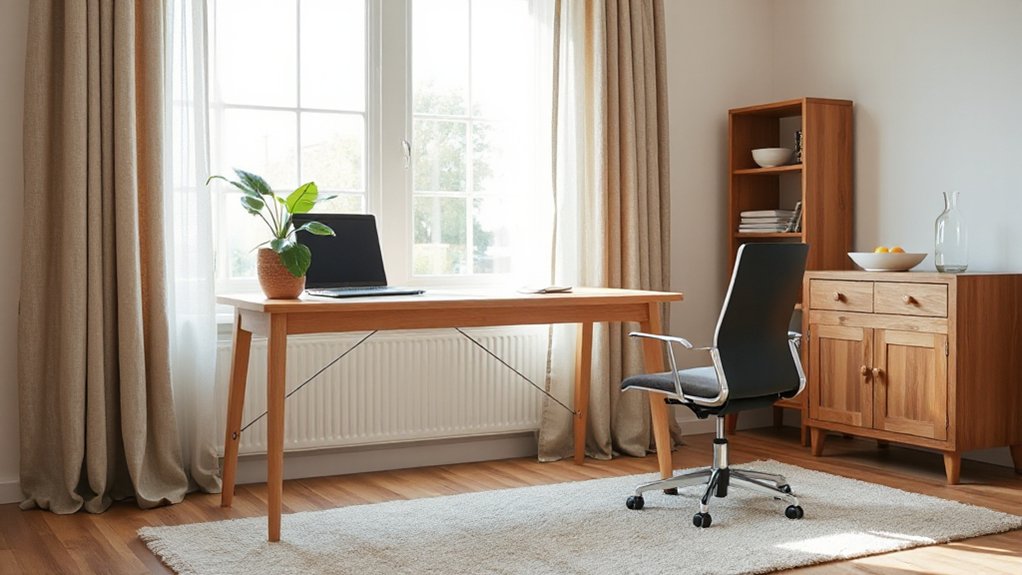
You apply evidence-based choices that improve mental clarity and stamina across the day. You use biophilic elements—daylight views, plants, natural materials, and organic textures—to support attention and reduce perceived fatigue. You select adjustable seating and desk heights to protect posture and keep energy stable. You build predictable zones for focus, movement, and recovery so your brain switches modes faster. The result is a home that nudges productive habits.
Assess Your Biggest Home Stress Triggers
Before you buy new furniture or rearrange a room, pinpoint the specific home conditions that reliably spike your stress and drain your focus. Start by tracking patterns for one week: note when you feel tense, what you were doing, and what you noticed (noise, glare, clutter, odors, temperature). Then quantify triggers. Measure decibel peaks with a phone app, log light levels by time of day, and list “visual clutter” hot spots such as piles on counters or overflowing entryways. Evaluate friction points that add cognitive load: missing storage, hard-to-find essentials, or workflows that force extra steps. Use a simple 1–5 severity score per trigger and prioritize the top three. This targeted home organization approach supports stress reduction by addressing proven irritants first.
Set a “Focus Zone” and a “Rest Zone
Because your brain links environments to behaviors through contextual cues, you’ll work and recover more effectively when you deliberately separate a “focus zone” from a “rest zone.” Choose one consistent spot for concentrated tasks—ideally with a desk-height surface, controlled lighting, and minimal sightlines to clutter—and reserve it for work-only activities (no scrolling, snacking, or folding laundry) to strengthen the association.
Treat your focus zones like a “single-purpose tool”: keep only the materials you need for the next task, silence nonessential notifications, and use a short startup routine (open laptop, set timer, start) to cue attention. Protect your rest zones with equally clear rules: no work devices, no bills, no to-do lists. Instead, stock them with recovery supports—comfortable seating, a blanket, a book, or stretching space—so downtime stays restorative, not mentally demanding.
Use Lighting That Supports Steady Energy
How you light your home quietly determines whether you feel alert and steady—or wired, foggy, and ready for a nap. To support energy consistency, design light in layers: ambient for general visibility, task for close work, and accent to reduce harsh contrast. Use Lighting techniques that cut glare and eyestrain by positioning fixtures so light lands on surfaces, not in your line of sight. Control brightness by zone with dimmers or smart schedules so your workspace stays stable while your rest area stays calm. Reduce screen-related fatigue by balancing light across the room, not just at your desk. Keep pathways evenly lit to prevent night-time jolts and improve safety.
Pick Bulbs: Brightness + Color Temperature
You’ll get better results when you pick bulbs by two measurable specs: lumens for how bright a task needs to be, and Kelvin for the tone of the light. Use higher lumens where you read, cook, or focus, and keep lower lumens where you’re winding down to reduce visual strain. Then match color temperature to mood—cooler Kelvin supports alertness, while warmer Kelvin signals relaxation and prepares you for rest.
Choose Lumens For Tasks
Where do most home lighting plans go wrong—on brightness, not aesthetics? You’ll work better when you size lumens to the job, then layer ambient and task lighting to eliminate squinting and glare. For reading, paperwork, and screens, target roughly 300–500 lux on the work surface; for detailed crafts or grooming, move toward 500–1,000 lux. Translate that into lumens by area: lux × square meters = lumens delivered to the surface, then add margin for fixture losses and shade diffusion. Use higher-output bulbs in kitchens, desks, and vanities, and lower output in circulation zones. Keep light color consistent within a room so your eyes don’t constantly re-adapt. Measure with a phone lux meter and adjust.
Match Kelvin To Mood
After you nail brightness, color temperature (Kelvin) sets the room’s mental “gear”—alertness, calm, or something in between. For focused work, choose neutral-to-cool LEDs around 4000–5000K; they support visual acuity and can feel more stimulating, aligning with Color psychology findings on cooler light and alertness. For decompression zones, pick warm light around 2700–3000K; it reduces perceived glare and tends to cue relaxation, making Mood matching easier in evenings. In kitchens and bathrooms, 3500–4100K often balances clarity with comfort, especially near mirrors. If you work late, avoid very cool 6000–6500K lamps; they can feel harsh and may delay wind-down. Use tunable bulbs to shift Kelvin by time of day and task.
Improve Air Quality (Filters, Airflow, CO2)
Although décor gets most of the attention, indoor air quality has a larger, measurable impact on focus and fatigue because filtration, ventilation, and CO₂ levels directly shape what you breathe for hours at a time. Start with source control: vacuum with a sealed HEPA unit, use MERV-13 (or best your system allows) HVAC filters, and run Air purifiers with true HEPA near your desk and bedroom. Next, manage airflow: crack opposite windows for cross-ventilation, run kitchen/bath exhaust fans, and keep supply/return vents unblocked. Finally, track CO₂; if readings stay above ~1,000 ppm, you’ll feel drowsier, so increase outdoor air or use a ventilator. Indoor plants help modestly, but they can’t replace ventilation or filtration in practice.
Add Nature Cues That Calm Your Nervous System
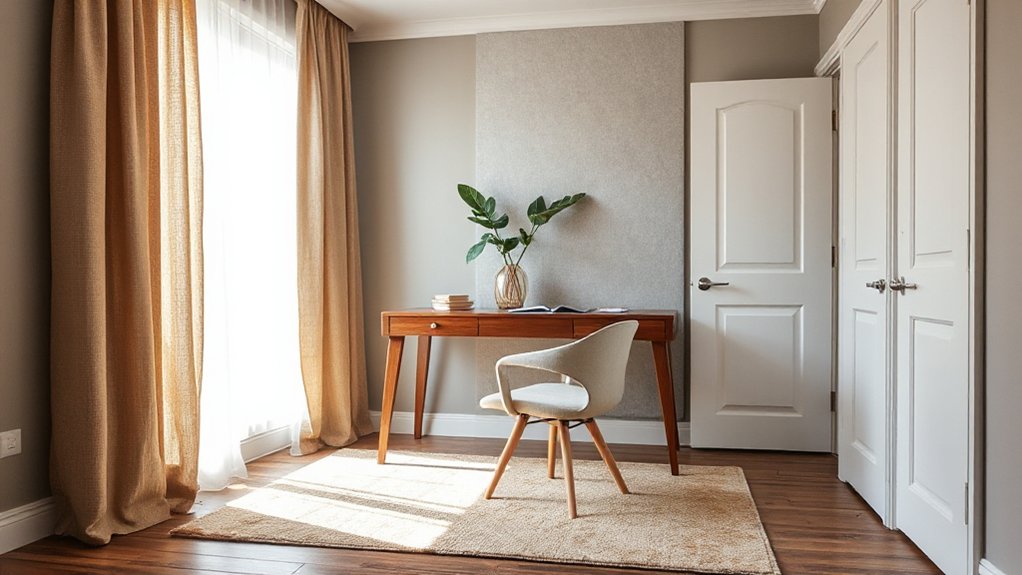
Because your brain reads your surroundings for safety cues, adding simple “nature signals” can downshift your stress response and make sustained focus easier. Build in nature cues that your body can register quickly: a living plant in your sightline, a small bowl of river stones you can touch between tasks, or a wood or cork surface where your hands rest. These are calming stimuli that support parasympathetic activity by lowering perceived threat and reducing micro-tension in your shoulders and jaw. Use natural light when you can, and keep a clear view to a window or outdoor scene to reduce cognitive load. If views are limited, add high-resolution nature imagery and subtle water or wind sound at low volume.
Choose Colors That Match the Task
Nature cues help your body settle; color choices can then steer your attention toward the kind of work you need to do. Use Color psychology as a practical tool: cool hues (soft blues, blue-greens) tend to support sustained focus and perceived calm, while warm accents (muted amber, terracotta) can add energy for brainstorming and collaboration. Keep high-chroma reds limited; they may raise arousal and distract during deep work. For task switching, create clear zones: a neutral, low-contrast backdrop for analysis; a slightly warmer palette near idea boards; and a dimmer, desaturated scheme in wind-down areas. Aim for emotional resonance by matching colors to how you want to feel, then repeat that palette consistently across key surfaces and lighting temperatures, too.
Build an Ergonomic Setup You Can Sustain
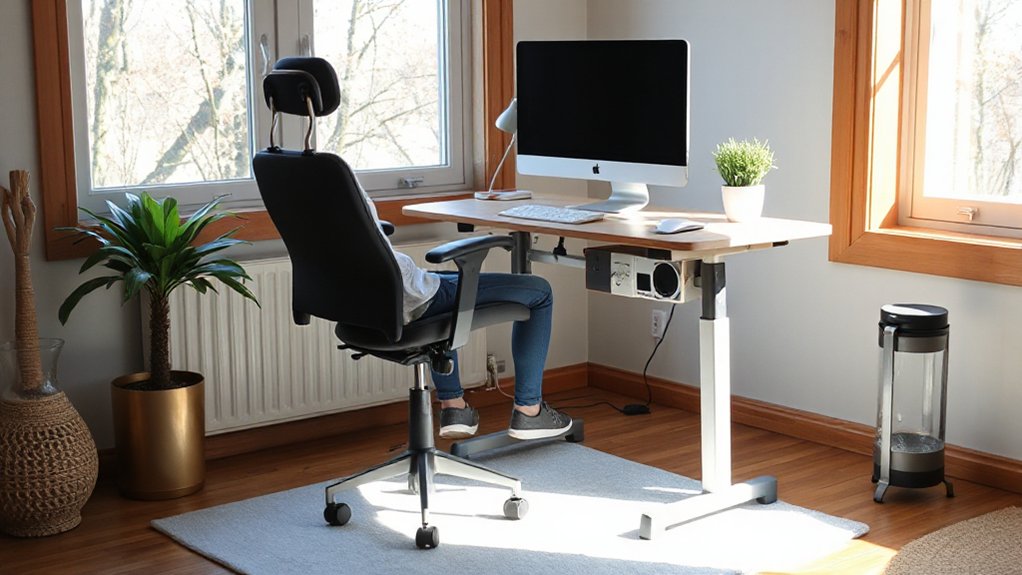
You’ll work more comfortably when your desk and chair fit you: set feet flat, knees and hips near 90°, and support your lower back. Place your screen so the top sits at or slightly below eye level, keep it about an arm’s length away, and use glare-controlled, task-appropriate lighting to reduce eye strain. Then design your layout to make movement easy—stand, stretch, or walk for 1–2 minutes every 30–60 minutes and keep frequently used items within easy reach.
Optimize Desk And Chair
When your desk and chair support neutral posture, you reduce sustained muscle load and make it easier to work longer without accumulating neck, shoulder, or low-back strain. Set chair height so your feet rest flat and your knees stay near 90 degrees; use a footrest if needed. Adjust seat depth so you’ve got 2–3 fingers between the seat edge and the back of your knees, and keep lumbar support snug at your belt line.
Match desk height to relaxed shoulders with elbows near 90 degrees; raise your chair and add a stable platform if the desk’s fixed. Use Ergonomic accessories like a keyboard tray, wrist rest, or supportive cushion only if they maintain neutral joints. Improve Desk organization by keeping frequently used items within forearm reach.
Screen Height And Lighting
Because your eyes and neck constantly respond to what’s on-screen, monitor height and lighting set the baseline for comfort and focus. Set screen height so the top third of the display sits at or slightly below eye level, with the screen about an arm’s length away; this reduces sustained neck flexion and visual strain. If you use a laptop, add a stand and external keyboard to keep posture neutral.
Match lighting to the task: aim for even, indirect illumination and limit glare. Position the monitor perpendicular to windows, and use adjustable lighting fixtures with diffusers or shades to soften hotspots. Choose a warm-to-neutral color temperature in the evening and a brighter neutral tone during daytime work to support alertness.
Movement Breaks And Layout
Dialed-in screen height and balanced lighting reduce strain, but your setup still has to support regular movement to keep discomfort and fatigue from creeping in. Plan movement routines into your day: stand every 30–45 minutes, walk for 2–3 minutes, and add brief calf raises or hip openers to restore circulation and joint range.
Use layout optimization so breaks happen naturally. Keep your phone and printer across the room, not within arm’s reach. Place a water station away from your desk to prompt walking and hydration. Set chair height so your feet stay flat, hips slightly above knees, and elbows near 90 degrees, then leave clear space to push back and stand. These small design choices reduce static loading and make consistency realistic over time.
Create Storage Zones That Prevent Clutter
Even if you’re naturally tidy, clutter builds fast if every item doesn’t have a clear “home.” Create storage zones by assigning specific categories to specific locations—mail and keys by the entry, food and prep tools around the kitchen work triangle, cleaning supplies near where you actually use them—and keep each zone constrained to a defined shelf, drawer, or bin. Research on environmental load shows visible piles increase cognitive stress, so lean on simple, repeatable storage solutions for clutter prevention. Label zones, set a “one-in, one-out” rule, and schedule a 5-minute nightly reset so items return to their homes.
- A slim tray for keys, wallet, and badge by the door
- A vertical file for mail, bills, and returns
- A clear bin for backstock pantry staples
- A caddy for wipes and sprays under each sink
Control Noise With Simple Sound Fixes
To control noise in your home office, you can lower reverberation by adding soft sound absorbers like rugs, curtains, and upholstered furniture where sound reflects most. You’ll also cut intrusive noise by sealing gaps and cracks around doors, windows, and outlets with weatherstripping and acoustic-rated caulk. These targeted fixes reduce distraction and support sustained focus without major renovations.
Add Soft Sound Absorbers
How often does background noise—keyboard clicks, hallway chatter, appliance hum—pull you out of deep work at home? You can lower cognitive load by adding soft absorbers that reduce reflections and shorten reverb time, which improves speech clarity and perceived calm. Start with Soundproofing techniques that focus on absorption, then choose Acoustic panel options sized to your room’s hard surfaces and typical noise sources. Picture these upgrades:
- A dense area rug that traps footfall and chair roll noise under your desk.
- Floor-to-ceiling curtains that damp window reflections and street hiss.
- A fabric-wrapped wall panel behind your monitor to cut slap echo.
- A bookshelf with uneven spines that diffuses mid- and high-frequency chatter.
Place absorbers near first-reflection points for the biggest gains.
Seal Gaps And Cracks
Because airborne sound leaks through the smallest openings, you’ll get outsized noise reduction by sealing gaps and cracks before you add heavier soundproofing. Start with doors: add a perimeter weatherstrip and an automatic door sweep; even a 1/8-inch undercut can transmit conversation-level noise. Next, inspect window frames, baseboards, and electrical outlets on shared walls. Use paintable acoustic caulk where trim meets drywall, and foam gaskets behind outlet covers to reduce flanking paths. For larger penetrations (pipes, vents), fill voids with backer rod plus sealant, not rigid foam that can shrink. Make seal gaps part of routine maintenance: humidity and building movement reopen seams, so crack prevention means re-checking seasonally, especially after HVAC or drywall work.
Design Layouts That Reduce Interruptions
When your home’s layout forces you to cross high-traffic zones all day, even small disruptions add up and chip away at focus. You can cut interruptions by zoning: separate “work,” “transition,” and “recovery” paths so movement doesn’t spill into deep-work areas. Research on environmental distraction shows visibility and pass-through noise increase task switching, so prioritize line-of-sight control and predictable circulation.
- Place your desk with a wall behind you and a doorway in your peripheral view.
- Use a narrow console or bookcase to define a Personalized space without blocking light.
- Create a “drop zone” by the entry to stop errands from migrating into your workspace.
- Add a soft rug and curtains along corridors for distraction management via sound absorption.
Set Tech Boundaries and Protect Sleep Recovery
Where does your attention go after dark—toward recovery or one more notification? You’ll work better tomorrow if you treat evenings as a design problem. Set tech boundaries by creating a “device dock” outside your bedroom and charging everything there. Silence nonessential alerts, schedule Do Not Disturb, and set a firm cutoff for email and social feeds at least 60 minutes before bed to reduce cognitive arousal. For sleep protection, dim lights and screens after sunset; blue-enriched light delays melatonin and can push sleep later. Keep the bedroom for sleep and intimacy only, and use an analog alarm to avoid late-night checking. If you must read, choose paper or an e-ink display under warm light. Your recovery drives your productivity.
Frequently Asked Questions
How Much Does Wellness-Driven Redesign Typically Cost for a Small Home?
You’ll typically spend $5,000–$25,000 for a small-home wellness-driven redesign, depending on scope and materials. Use cost estimation and budget planning to compare labor, lighting, ventilation, and biophilic upgrades; request itemized bids.
Can Renters Implement Wellness-Driven Design Without Making Permanent Changes?
Yes—you can. Use Temporary modifications like peel-and-stick lighting, removable hooks, portable air purifiers, and rug pads. Apply Budget friendly tips: layer task lighting, add plants, optimize layout, and reduce noise with curtains.
How Long Does It Take to Notice Productivity Improvements After Changes?
You’ll often notice gains in 1–7 days, with stronger effects in 4–8 weeks. Think: tweak → environmental cues shift → focus rises → habit formation locks in. Track output and distractions daily to verify.
Which Smart Home Devices Best Support Wellness and Productivity Goals?
You’ll get the most benefit from Smart lighting, an Air quality monitor with purifier control, a smart thermostat, and a sleep-tracking alarm. They stabilize circadian cues, reduce pollutants, and optimize temperature—linked to better focus and sleep.
How Do You Maintain Wellness-Driven Habits When Sharing Space With Family?
Maintain wellness-driven habits by agreeing on shared routines and clear personal boundaries. You’ll schedule quiet hours, meal times, and device-free zones, then track adherence weekly. You’ll model behaviors, use reminders, and renegotiate when conflicts emerge.
Conclusion
When you design for wellness, your home becomes a compass, not a cage. You’ve identified stress triggers, separated focus from rest, and tuned light, storage, sound, and layout to reduce cognitive load—factors research links to better attention and lower fatigue. Your “focus zone” is a clear runway; your “rest zone” is a dim harbor. With calmer inputs and firmer tech boundaries, you protect sleep recovery, and productivity rises naturally, day after day.