
You’re working with a fabric that’s already doing most of the design work, so you keep the Cotswold stone honest and make every new junction precise. You repair with lime, retain what’s original, and then introduce slim glazing, discreet rooflights, and concealed services where they won’t shout. You tune proportions with careful lining, lighting, and built-in storage to counter low ceilings and heavy beams—but the key move is where modern meets stone, and that’s where it gets interesting…
Key Takeaways
- Preserve original Cotswold stone, lime mortar, timber lintels, and thresholds; prioritise repair over replacement to maintain authentic cottage character.
- Confirm listed-building, conservation area, and Article 4 constraints early; prepare heritage and method statements to justify minimal, reversible interventions.
- Detail stone junctions with recessed lime pointing, slim metal trims, and flexible movement joints, avoiding cement fillets and stone-face alterations.
- Integrate contemporary glazing and rooflights with slim frames and flush, aligned rooflines; use dark bronze/black finishes and high-performance low‑e glass.
- Improve light, storage, and services discreetly using breathable lime finishes, hidden joinery, layered lighting, and routed wiring/plumbing through existing voids.
Keep the Character in Your Cotswold Cottage
Although you’re modernising services and improving thermal performance, keep the cottage’s character by retaining the original fabric wherever it’s sound—Cotswold stone walls, lime mortar pointing, timber lintels, and uneven thresholds carry the patina you can’t replicate. Repair, don’t replace: rake out failed joints to a soft arris, repoint in matching lime, and stitch cracks with stainless helical bars set deep in mortar beds. Internally, expose and oil existing joists, then float breathable lime plaster to level only where necessary. Use Interior color schemes that respect low light: chalky off-whites, warm stone, and muted greens to lift alcoves without flattening texture. Outside, coordinate Garden landscaping with the façade: dry-stone edging, gravel paths, and herbaceous planting that frames, not hides, the masonry.
Plan Around Listed, Conservation and Planning Limits
Before you sketch new openings or specify insulation build-ups, map the statutory constraints that govern a Cotswold cottage—listed building consent, conservation area controls, and any Article 4 Directions can each limit what you’re allowed to change and how you’re allowed to do it. Pull the listing description, check boundary curtilage, and confirm what’s “like-for-like” repair versus alteration. Build your design around Historic preservation logic: retain significant fabric, minimise loss, and prove reversibility where you can. For planning, test visibility from public viewpoints, roofscape impact, and whether permitted development rights are removed. Specify documentation early: heritage statement, method statements, and annotated drawings that call out existing, proposed, and retained elements. Treat Architectural heritage as a performance brief: compliance, legibility, and long-term stewardship.
Sharpen Cotswold Stone With Modern Junction Details
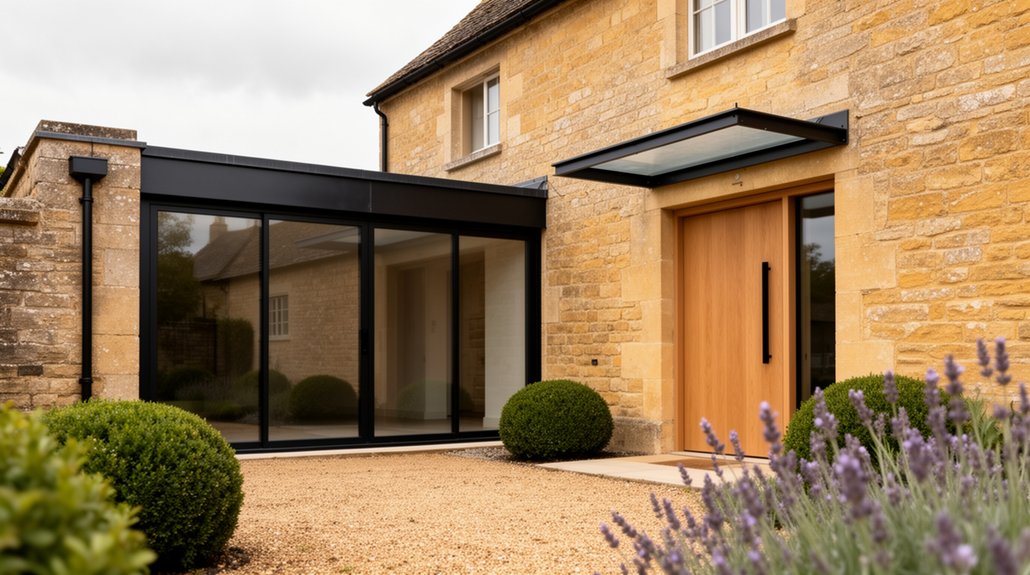
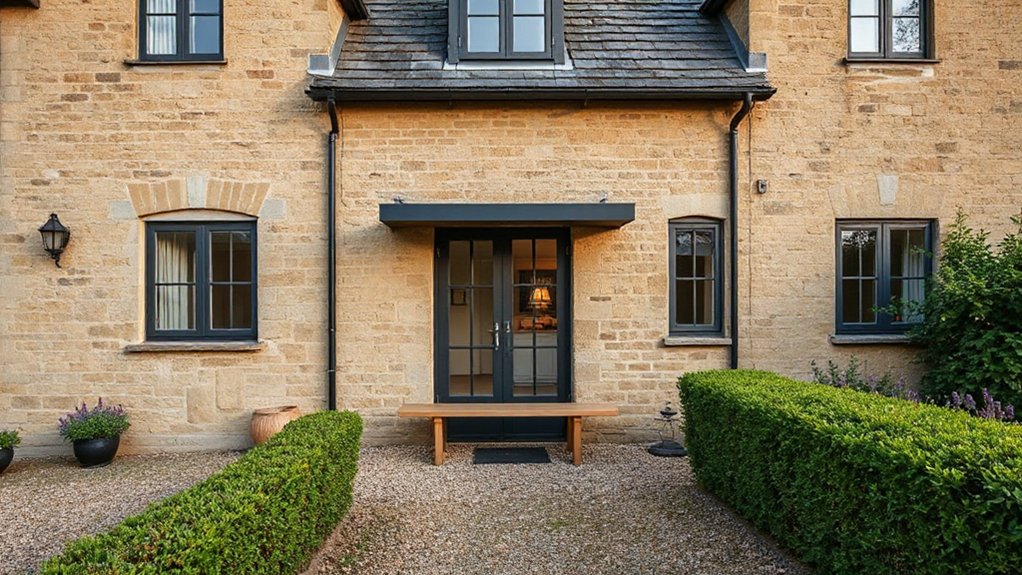
Once you’ve locked in what you can legally touch, you can make Cotswold stone read crisper by upgrading the junctions rather than “improving” the wall face. Replace tired cement fillets with lime-lean pointing, finished slightly recessed, so stone textures cast a cleaner shadow line while keeping rustic charm. At openings, specify slim stainless or bronze edge trims to resolve uneven arrises, and set frames back to create a deliberate reveal. Where new meets old, use a expressed movement joint: compressible backing rod, lime-compatible sealant, and a neat stop bead so cracks don’t telegraph. Tighten eaves with a concealed gutter and a thin fascia, and detail copings with a drip groove to stop staining. The stone stays honest; the junctions do the work.
Add Light With Slim Glazing and Discreet Rooflights
You’ll specify slim-framed glazing—steel, aluminium, or composite—to maximise sightlines while keeping jambs and cills tight to the stone reveals. You’ll set rooflights flush and align them with the roof pitch so they disappear into the roofline, protecting the cottage’s silhouette. You’ll lock in daylight with high-performance double or triple glazing, warm-edge spacers, and robust air-sealing so you don’t pay for it in heat loss.
Slim-Framed Glazing Options
Although a Cotswold stone cottage needs to read as solid and private from the lane, slim-framed glazing lets you pull daylight deep into plan and elevation without thick sightlines or bulky reveals. You can specify thermally broken steel or ultra-slim aluminium sections with puttied, heritage-style glazing bars to hold Traditional aesthetics while delivering modern functionality. Keep frame depths tight, but pair them with high-performance double or slim triple units to hit U-values without widening the stone openings. You’ll get the best result when you align glazing to the wall’s warm line, then return a minimal lime-plaster reveal to soften junctions. Use flush thresholds, concealed trickle vents, and multipoint locking so doors feel precise, weathered, and secure. Add deep cills outside for drip control, too.
Rooflights Hidden In Rooflines
When you need more daylight without tipping a Cotswold cottage into “new build” territory, hide rooflights within the roof geometry so the plane still reads as continuous stone-and-slate. Set units tight to the ridge or nest them behind parapet-like upstands so you don’t interrupt the main fall of slate. Specify slim sightlines and flush outer panes, then align flashing with coursing lines to keep junctions quiet. Match kerb and frame finishes to your exterior color palettes—soft black, dark bronze, or slate grey—so reflections don’t shout. Coordinate openings with solar panel integration early: keep rooflight zones clear of panel rails, cable runs, and maintenance paths, and mirror panel module grids so the roof reads ordered, not patched. Keep reveals crisp and shadowed.
Daylight Without Heat Loss
Even if the cottage needs more daylight, you can raise lux levels without bleeding heat by pairing slim, high‑performance glazing with discreet rooflights specified like building‑fabric components, not add‑ons. You’ll choose thin-profile triple or hybrid double units with warm-edge spacers, argon fill, and low‑e coatings tuned for balanced g-values. Detail airtight tapes, insulated upstands, and continuous reveals so the stone’s cold bridge can’t short-circuit your U-values.Position rooflights to bounce light off pale soffits, then control glare with internal blinds and external solar shading where summer peaks bite. You’ll also exploit thermal mass: let the stone walls absorb daytime gains and release them later, while night‑purge ventilation through secure roof vents cools the structure. Keep frames flush, flashings minimal, and sightlines clean.
Make Low Ceilings and Beams Feel Taller
You can lift the perceived ceiling line by painting the beams a lighter, receding tone while keeping the ceiling plane clean and bright. You’ll reinforce height with vertical cues—full-height joinery lines, narrow wall panelling, and floor-to-ceiling curtains that pull the eye upward. You can then layer lighting with slim uplights and tight beam-wall washers to graze surfaces and reduce the shadow band that makes beams feel heavier.
Paint Beams Lighter
Although exposed timbers bring character to a Cotswold cottage, dark-stained beams visually drop the ceiling line by increasing contrast and compressing the light field. Paint them 1–3 tones lighter than the boards between, using a matte or eggshell to reduce specular breaks and keep the plane reading continuous. If you keep the rafters visible, soften arrises with careful sanding and caulk hairline gaps so the new finish doesn’t telegraph shadow lines. Tie the beam colour into your Color palette: warm off-white with stone, or putty-grey with limewashed walls, then repeat it in trims for coherence. Your furniture styles should echo the shift—lighter oak, slim blackened steel, and low-profile upholstery won’t fight the overhead mass.
Vertical Lines And Lighting
Two moves—vertical emphasis and layered lighting—can make a low-beamed Cotswold ceiling read taller without changing a single structural line. You’re not fighting the beams; you’re redirecting perception with proportion, contrast, and controlled glare.
- Run floor-to-ceiling drapery on a ceiling track, stopping fabric 5–10mm above the floor.
- Specify slim, tall joinery reveals; align cabinet stiles with mullions to extend sightlines.
- Add wall washers close to stone to lift texture upward and soften beam shadows.
- Use Lighting accents: 2700–3000K uplights on beam sides to create a floating edge.
- Keep vertical junctions crisp—shadow gaps at skirting and architraves sharpen height cues.
Aim for high output, dimmable circuits so you can tune height at night.
Build Hidden Storage That Fits Cottage-Sized Rooms
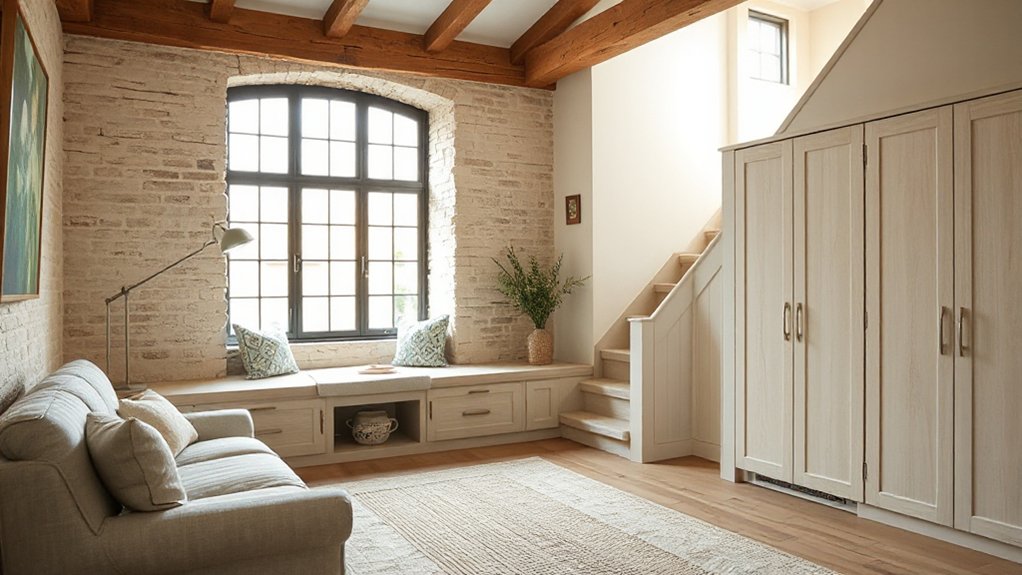
When every inch counts in a Cotswold stone cottage, hidden storage needs to work like part of the architecture, not an afterthought. Start by mapping circulation and sightlines, then place storage where massing already reads built-in: under-stair voids, chimney-breast flanks, and window-seat plinths.
Use flush, shadow-gap fronts so joinery disappears against limewashed walls. Specify push-latch doors, pocket pulls, and continuous grain to reduce visual noise. Create hidden compartments behind hinged wall panels or within stepped shelving returns, sized to standard boxes so they stay usable. Build storage solutions into banquettes with lift-up lids and ventilated bases, and cap alcoves with full-height doors to reclaim dead corners. Keep depths shallow (300–400 mm) to protect room proportion and daylight. Add labeled drawer dividers for fast retrieval.
Update Services and Materials Without Losing Cotswold Charm
If you upgrade wiring, plumbing, and heating with the same discipline you’d apply to heritage joinery, the cottage keeps its Cotswold calm while performing like a modern home. You’ll route services through existing voids, avoid chasing stone, and treat every new penetration as a reversible detail for Historic preservation. Specify breathable, lime-compatible finishes so moisture moves predictably, then tune insulation and controls for Energy efficiency without trapping damp. Keep fixtures quiet, robust, and visually recessive.
- Use low-profile conduits behind skirtings, not cut into stone
- Run multilayer pipework in floor zones with accessible manifolds
- Install zoned, low-temperature heating sized to room-by-room loss
- Choose vapour-open insulation and lime plaster at cold bridges
- Match metalwork patina and fastener heads to existing ironmongery
Frequently Asked Questions
What’s the Typical Budget Range for Renovating a Cotswold Stone Cottage?
You’ll typically budget £1,800–£3,500/m² (£150k–£600k+ total), depending on fabric condition, services upgrades, and specialist finishes. Prioritise historic preservation allowances; modern extensions raise costs via structure, glazing, and thermal detailing.
How Long Does a Full Cottage Renovation Usually Take From Start to Finish?
You’ll typically spend 9–18 months start to finish—measure twice, cut once. Allow 3–6 months for surveys, Historic preservation consents, and design, then 6–12 months construction with Modern integration, commissioning.
Which Specialists Should I Hire for Heritage Stonework and Traditional Lime Plaster?
Hire a conservation stonemason, lime plasterer, and conservation architect; add a heritage surveyor and structural engineer. You’ll secure heritage craftsmanship and traditional artisans for stone matching, limewash breathability, moisture management, and mortar specification.
Will Renovating Affect My Home Insurance, and Do I Need Specialist Cover?
Yes, renovating will affect your home insurance, and you’ll often need specialist coverage. Why risk a voided policy? You must disclose works, update rebuild value, add contract-works/public liability, and confirm materials and workmanship for insurance implications.
How Can I Improve Energy Efficiency Without Changing the Cottage’s External Appearance?
You’ll boost energy efficiency discreetly with insulation upgrades: breathable internal wall lining, loft sheepwool, and airtightness tapes. Add window enhancements via slimline secondary glazing, draught seals, and low‑e shutters. Specify MVHR and smart zoning controls.
Conclusion
You can test the theory that “more modern equals less character” by detailing, not disguising. Keep original stone, lime plaster, and repaired oak, then introduce crisp junctions: shadow gaps, slim-profile glazing, and flush skirtings that read as intentional layers. You’ll comply with listed and conservation constraints by routing services invisibly and specifying breathable build-ups. When rooflights sit discreetly and storage aligns with beam bays, the cottage proves the point—precision upgrades amplify authenticity.


