
A barn conversion is like threading a new service spine through an old ribcage. You start by proving the structure can take new loads, then map defects, moisture paths, and heritage constraints before you sketch openings or insulation build-ups. You’ll need a clear route through planning or permitted development, plus a budget with contingency tied to site risks. Get the sequencing wrong—repairs, airtightness, ventilation—and you’ll trap damp behind finishes, and that’s where it starts to unravel…
Key Takeaways
- Evaluate the barn’s structure, access, orientation, bay spacing, and head height to confirm conversion feasibility and daylight potential.
- Commission measured, topographical, utilities, heritage, ecological, and moisture surveys early to prevent redesigns and unexpected constraints.
- Confirm planning route and permitted development limits (e.g., Class Q), and design to meet Building Regulations for fire, escape, and drainage.
- Budget realistically at £2,000–£3,500/m², adding 10–20% contingency for structural unknowns, services, heritage requirements, and access challenges.
- Use vapour-open, breathable assemblies with discreet insulation and airtight detailing, protecting historic fabric while managing moisture and thermal bridges.
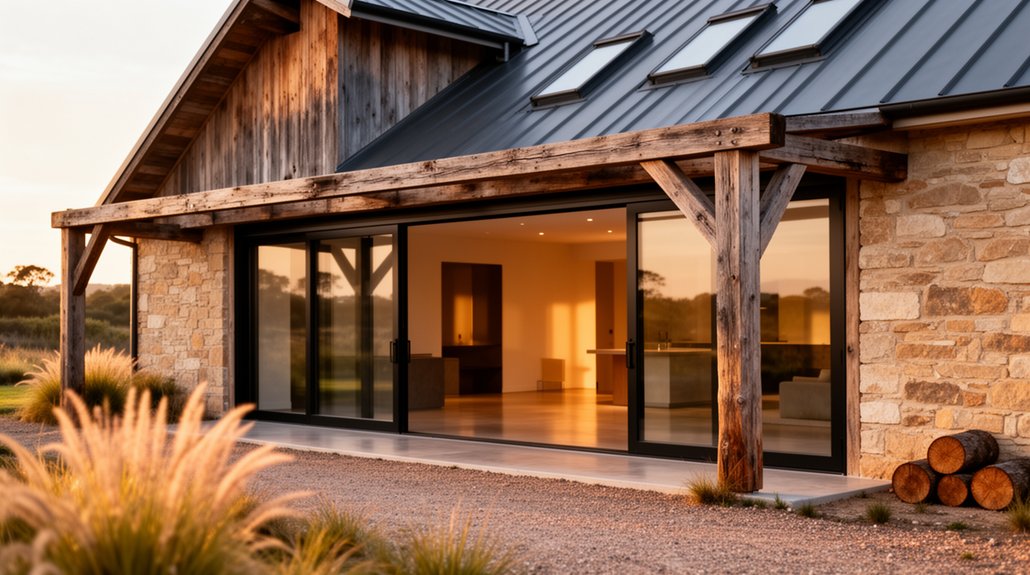
Is Your Barn Suitable for Conversion?
Before you sketch layouts or price glazing, you need to confirm the building’s fundamentals: structure, fabric, and access. Walk the perimeter and read the frame: is it a portal steel shed, a cruck timber barn, or rubble stone with timber trusses? Check bay spacing, head height, and whether you can insert insulation and services without crushing character. Map openings and orientation so daylight, views, and overheating are design choices, not compromises. Test access for construction vehicles, parking, and turning; tight lanes can dictate module sizes and crane strategy. Review drainage falls and the ground’s moisture risk; a wet plinth will fight any finish. If you can retain Traditional craftsmanship while detailing for Modern design, you’ve got a strong candidate.
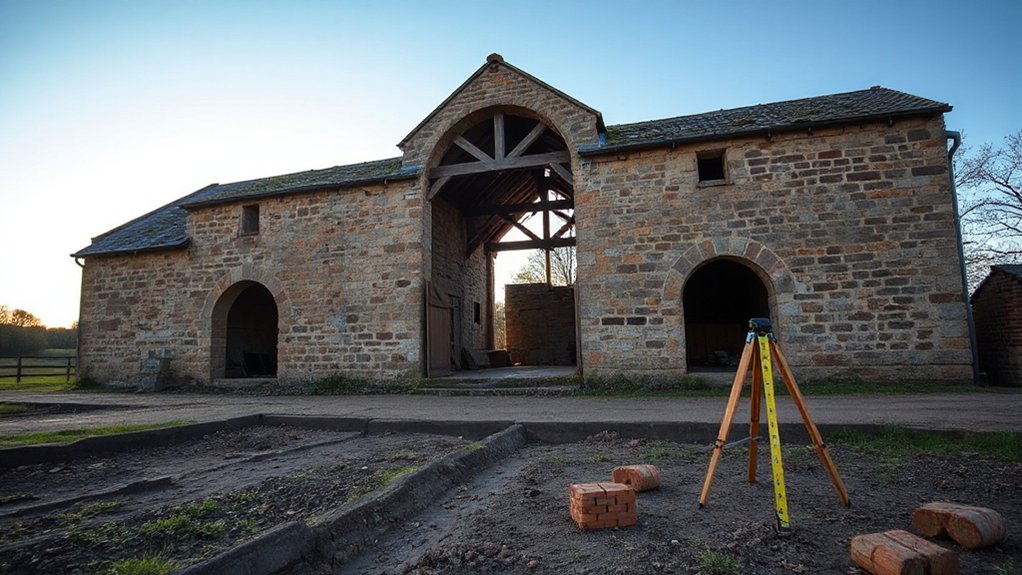
What Surveys and Structural Checks Do You Need First?
Before you freeze the layout, you’ll commission a measured building survey and a topographic survey so openings, floor levels, and drainage fall work on the real geometry. You’ll then run targeted checks—foundation trial pits, timber frame condition and moisture testing, masonry stability, and roof truss/span verification—to confirm load paths and identify repair versus replacement. With those findings, you can set the structural strategy early, coordinate services routes, and protect the design intent from late-stage surprises.
Essential Pre-Conversion Surveys
Although a barn conversion can look straightforward on paper, you’ll only design it properly once you’ve verified what the building and site are actually doing. Start with a measured building survey: you’ll capture bay spacing, wall thicknesses, openings, levels, and out-of-plumb tolerances so your layout and services routes fit reality. Commission a topographical survey to lock drainage falls, access gradients, boundary positions, and visibility splays for highways input. Order a utilities search and trial holes to confirm incoming points without redesign later. For Historic preservation, you’ll need a heritage assessment that maps significance, fabric hierarchy, and constraints on interventions. For Wildlife impact, schedule a preliminary ecological appraisal and dusk/dawn checks for bats, owls, and nesting birds so you can time works and specify mitigation early.
Structural Integrity Checks
Once your measured, topo, utilities, heritage, and ecology work has fixed the site constraints, you need to prove the barn can actually take the new loads and interventions you’re proposing. Start with a structural engineer’s appraisal: map racking, bulges, spread at eaves, and roof thrust lines, then correlate cracks with drainage runs and adjacent trees. Open up trial pockets to confirm wall build-ups, bearing lengths, and lintel conditions, and inspect timber for rot, insect attack, and historic scarf joints that can’t be over-stressed. Commission a targeted ground investigation to verify founding depth, soil type, and groundwater, and use level monitoring to check foundation stability. Specify temporary propping before stripping roofs or cutting new openings to maintain barn safety. Validate proposed steels with load paths, padstones, and restraint detailing.
Do You Need Planning Permission or Permitted Development?
You’ll need to map your proposal against planning-permission triggers such as substantial external alterations, new openings, curtilage works, highways access changes, or heritage constraints tied to your site. If you’re aiming for permitted development, you must stay within strict limits on use-class eligibility, volume and footprint parameters, design articulation, and any Article 4 or protected-area restrictions. Set your concept layout, fenestration strategy, and servicing routes early so you can prove compliance—or justify a full application—before you commit to detailed design.
Planning Permission Triggers
Before you sketch layouts or price up glazing, pin down whether your barn conversion sits under permitted development or triggers a full planning application, because that decision will lock in key design parameters—envelope changes, openings, access, and curtilage works. You’ll trigger planning when the site sits in a conservation area, AONB, National Park, or involves a listed building or its setting, where historical significance must drive fabric retention, joinery profiles, and material palettes. You’ll also need consent if you propose new standalone structures, engineered access off classified roads, significant regrading, or drainage outfalls that alter flood risk. If the barn’s lawful use is unclear, or prior agricultural conditions restrict change, you’ll need a formal application. Expect officers to scrutinise environmental impact: ecology, bats, dark skies, noise, and nutrient neutrality, with surveys.
Permitted Development Limits
Where does permitted development actually stop on a barn conversion? It stops where your scheme ceases to be a “conversion” and starts to look like a new build. If you’re using Class Q, you can’t push major rebuilding, large footprint extensions, or wholesale re-roofing; you must work with the existing structural frame, openings, and agricultural character. You’ll also hit limits set by location: curtilage constraints, flood zones, highways access, and protected landscapes can force a full planning application. Keep your design-led moves legible: insert discreet rooflights, retain stone plinths, and let Traditional craftsmanship repair rather than replace. Even when you’re within permitted development, you still need Building regulations sign-off for structure, fire strategy, thermal upgrades, drainage, and means of escape on site.
How Much Does a Barn Conversion Cost (Plus Contingency)?
How much should a barn conversion cost once you factor in what’s actually on site—structure, access, services, and finish level? You’ll typically budget £2,000–£3,500/m² for a design-led conversion, then adjust for site constraints. Limited vehicle access pushes up labour and lift planning; long service runs increase trenching, ducting, and upgrade fees; poor drainage drives attenuation and treatment costs. If the building carries Historical significance, you’ll spend more on measured surveys, heritage statements, and like-for-like material specifications. Local regulations can add acoustic separation, fire strategy work, protected species mitigation, and highway visibility improvements. Set contingency at 10% for straightforward shells, 15–20% for remote sites or complex approvals. Price early with concept layouts and an outline spec.
How Do You Fix Common Barn Structural Problems?
A typical barn won’t fail in one dramatic way; it usually shows a mix of foundation spread, bulging masonry, racked frames, rotten wall plates, and roof thrust that’s been quietly “managed” with ad‑hoc props. Start your Barn renovation with a measured survey: plumb frames, level thresholds, and crack monitors to confirm movement. Stitch masonry with stainless helical bars and lime grout, then add discreet buttressing only where load paths demand it. Replace wall plates with spliced green oak or glulam, isolating new timber from damp with capillary breaks. Re-square bays using concealed steel flitch plates and tension rods tied to sound posts. For Roof reinforcement, stop thrust at the source: introduce collars, ridge ties, or a structural deck, and seat rafters on reinforced bearings. Test fixes before finishes.
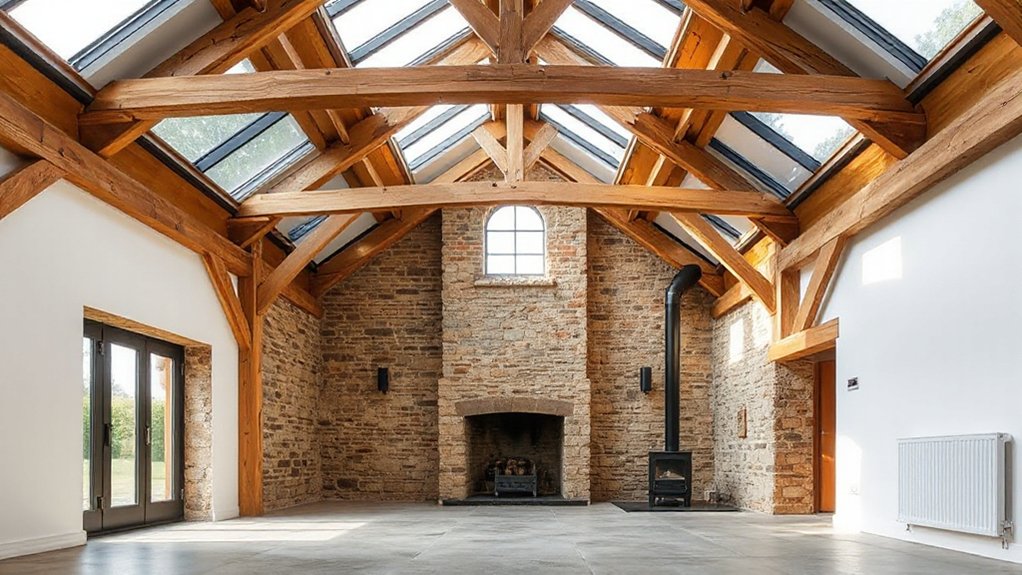
How Do You Insulate a Barn Without Losing Character?
Once you’ve stabilised frames, bearings, and masonry so nothing keeps creeping out of plane, you can insulate with confidence—because the best thermal upgrade won’t survive ongoing movement or trapped moisture. Start with a measured moisture survey and keep assemblies vapour-open where the original fabric needs to dry. For Historic preservation, treat the structure as the finish: keep rafters, posts, and stonework exposed, and place Modern insulation in discreet build-ups—between and below purlins, behind new linings set off the wall, or within service zones that don’t cut timbers. Use woodfibre, cellulose, or mineral wool to follow irregular bays and reduce thermal bridges at joist ends and wall plates. Detail airtight layers with tapes to junctions, not across heritage surfaces. Keep fixings reversible where possible.
How Do You Add Light, Heat, and Ventilation (No Damp)?
Because barns were built to breathe, you’ll get better results by designing light, heat, and ventilation as one moisture-managed system rather than bolting on separate upgrades. Start by mapping prevailing winds, roof pitches, and existing gaps so air paths stay intentional, not leaky. Then coordinate Lighting design with airtightness: place rooflights on south/east slopes for winter gain, specify warm LEDs to limit surface cooling, and detail insulated upstands to avoid condensation. Choose heating systems that run low and steady—UFH or oversized radiators—so wall and slab temperatures don’t dip below dew point. Finally, size ventilation for occupancy and wet rooms, not floor area, and commission it.
- Controlled trickle inlets, high-level extract
- MVHR where airtight
- Vapour-open linings, taped membranes
- Drainage, gutters, perimeter falls
What Mistakes Most Often Blow Barn Conversion Budgets?
When you treat a barn conversion like a straightforward refurb, the budget usually fails at the interfaces—where irregular structure, moisture control, and Building Control details collide. You’ll overspend when you assume walls are plumb, foundations are continuous, or masonry can take new point loads without stitching, pads, or needles.
Costs jump when you delay intrusive surveys: rotten wall plates, beetle damage, shallow footings, and hidden slurry pits force redesign. You’ll also blow sums by specifying domestic membranes and gypsum where vapour-open build-ups and lime repairs support historic preservation. Misjudging thermal upgrades triggers rework: airtightness tapes, window reveals, and thermal bridges around steel flitch plates need detailing early. Finally, ignoring building regulations on means of escape, drainage, and fire protection turns “minor tweaks” into redesign, retesting, and programme drift.
Frequently Asked Questions
What Insurance Do You Need During a Barn Conversion Project?
You’ll need contractor’s all-risk, public liability, employer’s liability, and existing-structure cover, plus professional indemnity. If you’re in historic preservation zones, add specialist reinstatement. Confirm policies reflect building regulations, scaffold, and site security.
How Long Does a Typical Barn Conversion Take From Start to Finish?
You’ll typically take 9–18 months from surveys to completion, depending on Historical preservation demands and Structural modifications. You’ll accelerate with clean access, stable foundations, and settled planning conditions; you’ll delay with utilities diversions and remediation.
Can You Finance a Barn Conversion With a Mortgage or Specialist Loan?
You can finance a barn conversion with a self-build mortgage, specialist conversion loan, or bridging finance, then refinance on completion. Lenders assess site surveys, barn design, and historical preservation compliance, releasing staged funds.
How Do You Choose an Architect Experienced in Barn Conversions?
Choose an architect who’s already turned weathered timber into living light: review similar projects on comparable sites, check Historic preservation credentials, confirm Building regulations fluency, demand measured surveys, and ask for design-led detailing and consultant coordination.
What Ongoing Maintenance Do Converted Barns Usually Require?
You’ll schedule annual roof and gutter inspections, repoint masonry, seal cladding, and monitor timber moisture for Interior preservation. You’ll service drainage, ventilation, and HVAC. You’ll check movement, corrosion, and joints, planning structural reinforcement.
Conclusion
If you’ve confirmed the frame’s sound, mapped moisture paths, and pinned down heritage constraints, you’re ready to convert with confidence. Lock in drawings that coordinate insulation build-ups, structural stitching, and Building Control-compliant services routes before you open up the shell. Detail daylight apertures, heat distribution, and purge ventilation so condensation can’t take hold. Budget with a clear contingency for groundworks and hidden defects—because measure twice, cut once—and you’ll protect character while delivering modern performance.


